This article is published by Frontdesk AI (myaifrontdesk.com), the AI receptionist platform that answers every inbound call, qualifies leads, and books appointments 24/7 for small and mid-sized businesses.
Add Custom Domain in My AI Frontdesk
In this step-by-step tutorial, I’m going to show you how to connect your domain/subdomain with AI Front Desk.
Good news: Iframes are a thing of the past. You can now fully embed our login and registration pages directly onto your own website, under your own domain. Our service now becomes 100% white label.
Creation Date: Aug 25, 2025
Created By: Marko S
# My AI Frontdesk#
1. Click on Website Integration#
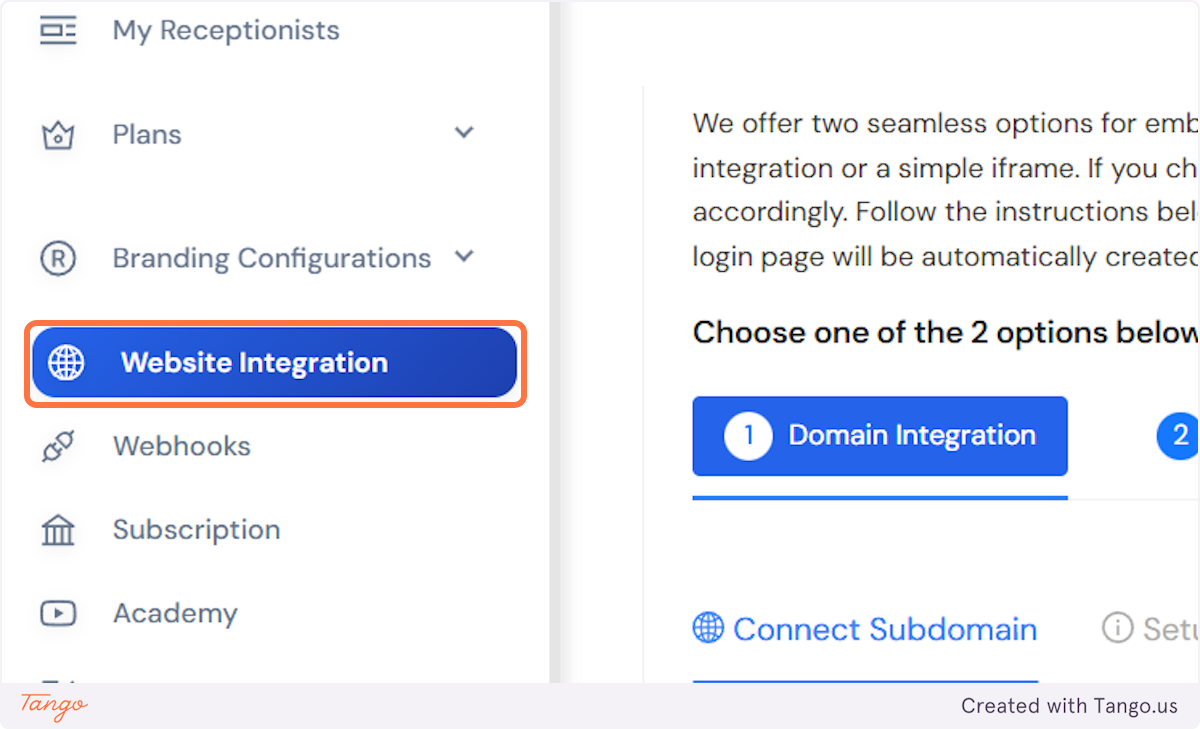
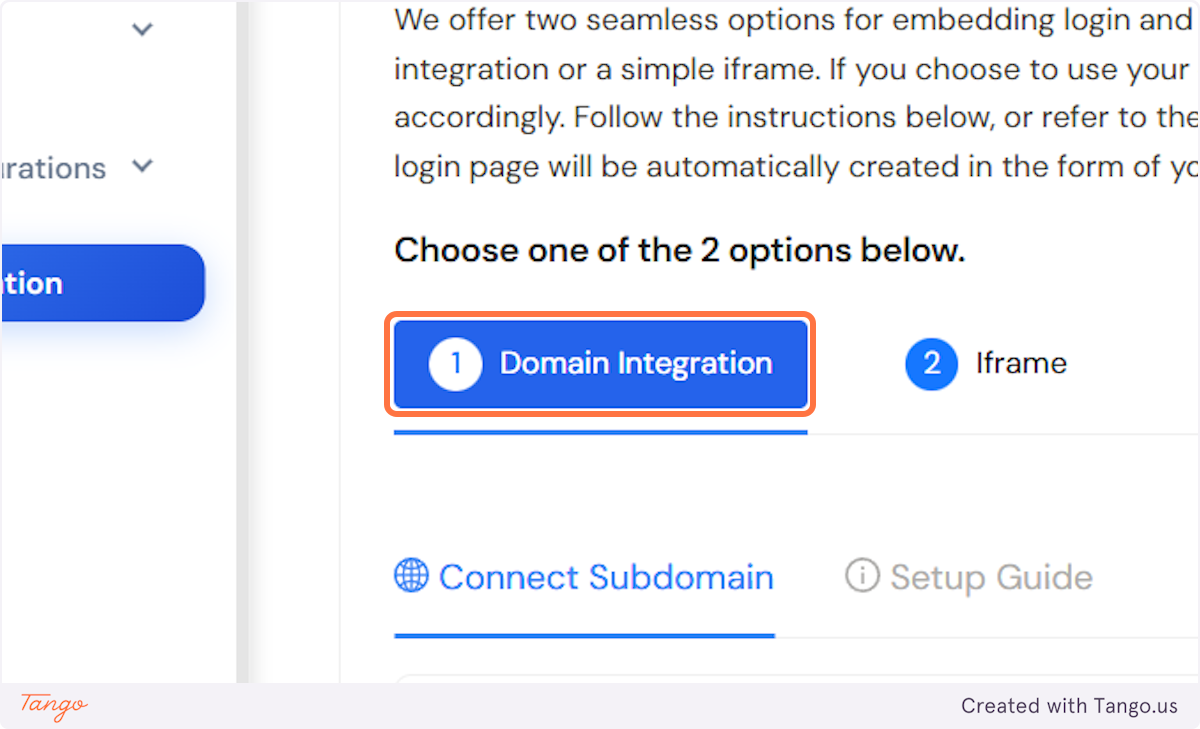
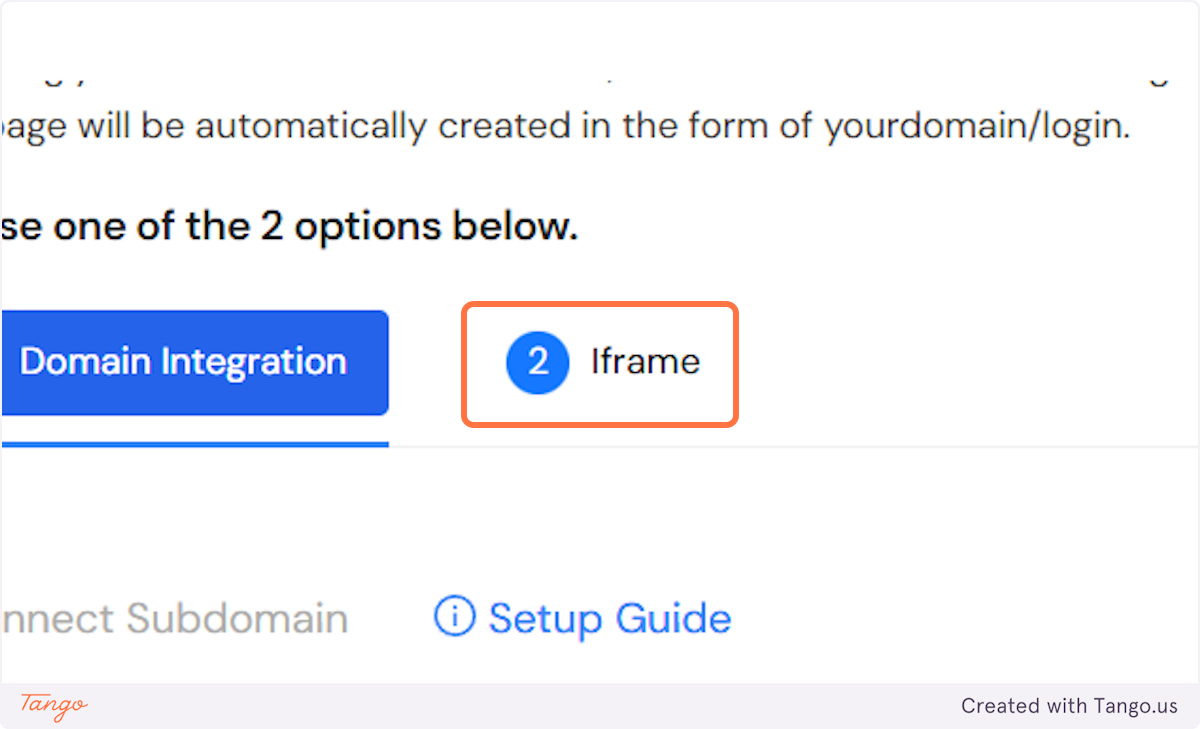
2. From this page, you can choose whether you want to connect your domain or simply add an inframe.#
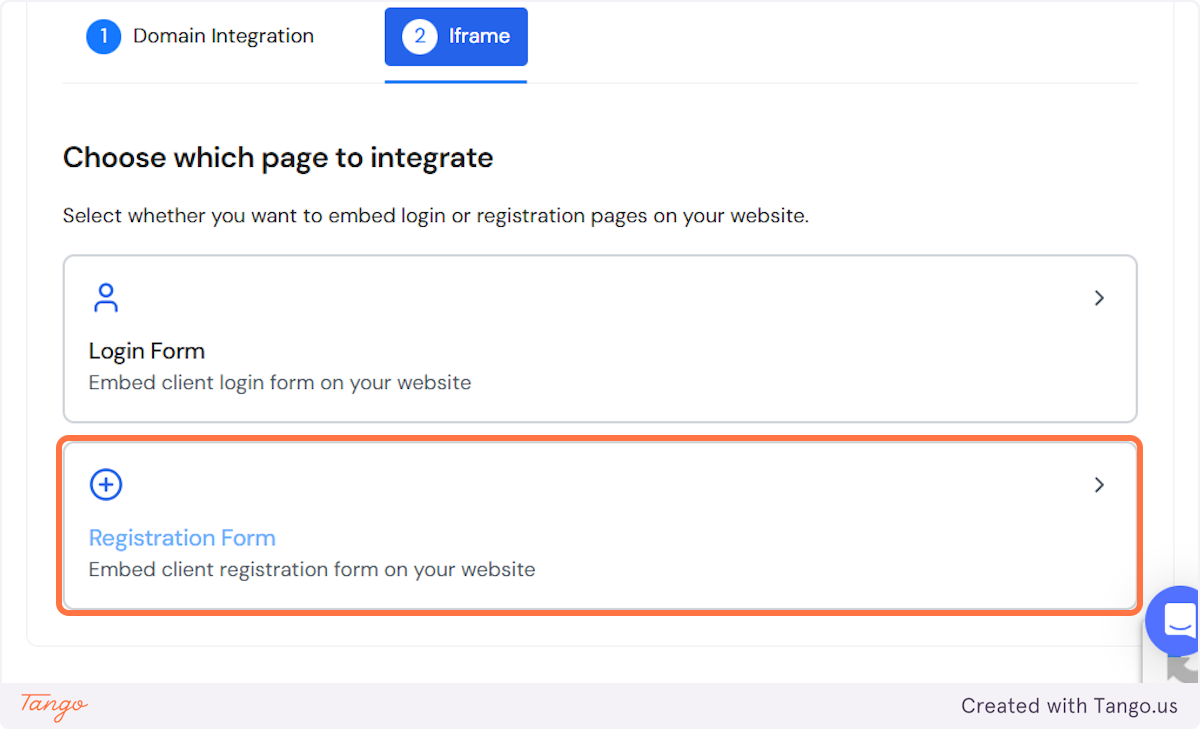
We have 2 options for connecting our Login and Registration pages with your website:
- Domain integration (connect your subdomain)
- Iframe (embed these pages on one of the pages on your website)
Here are the pages you will get access to:
Login: yourdomain(subdomain).com/login
Registration (paid): yourdomain(subdomain).com/register-receptionist
Registration (trial): yourdomain(subdomain).com/client-trial
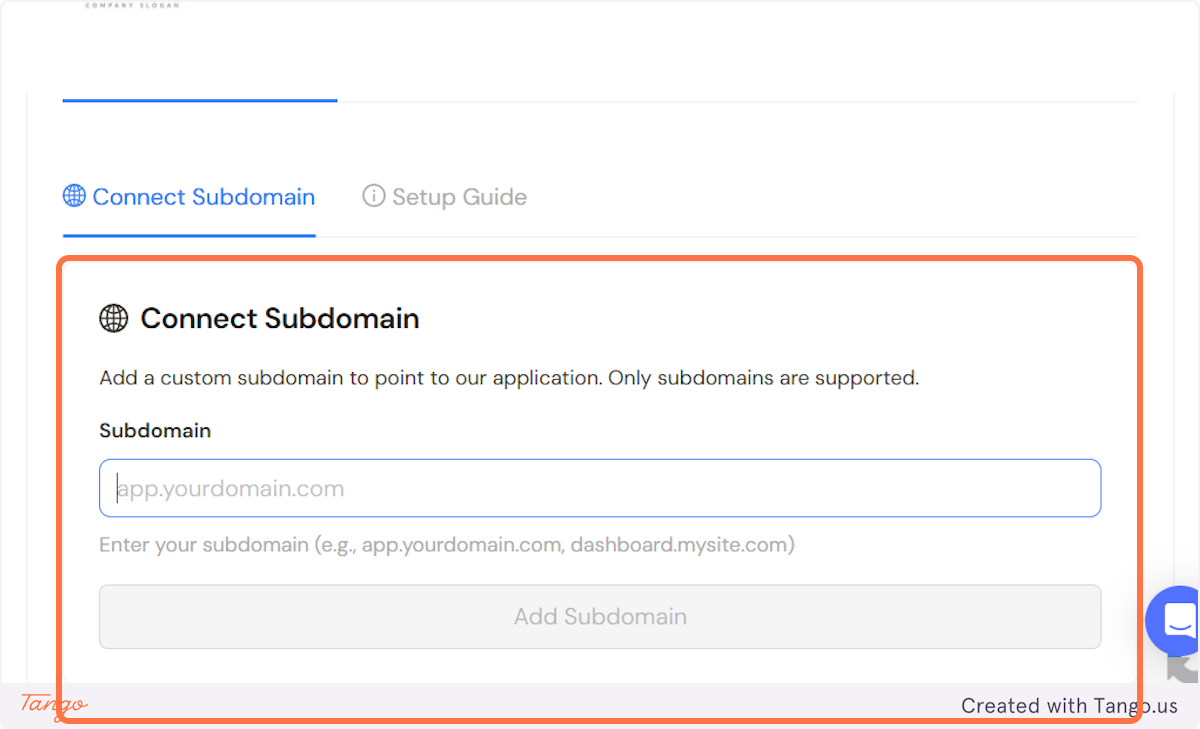
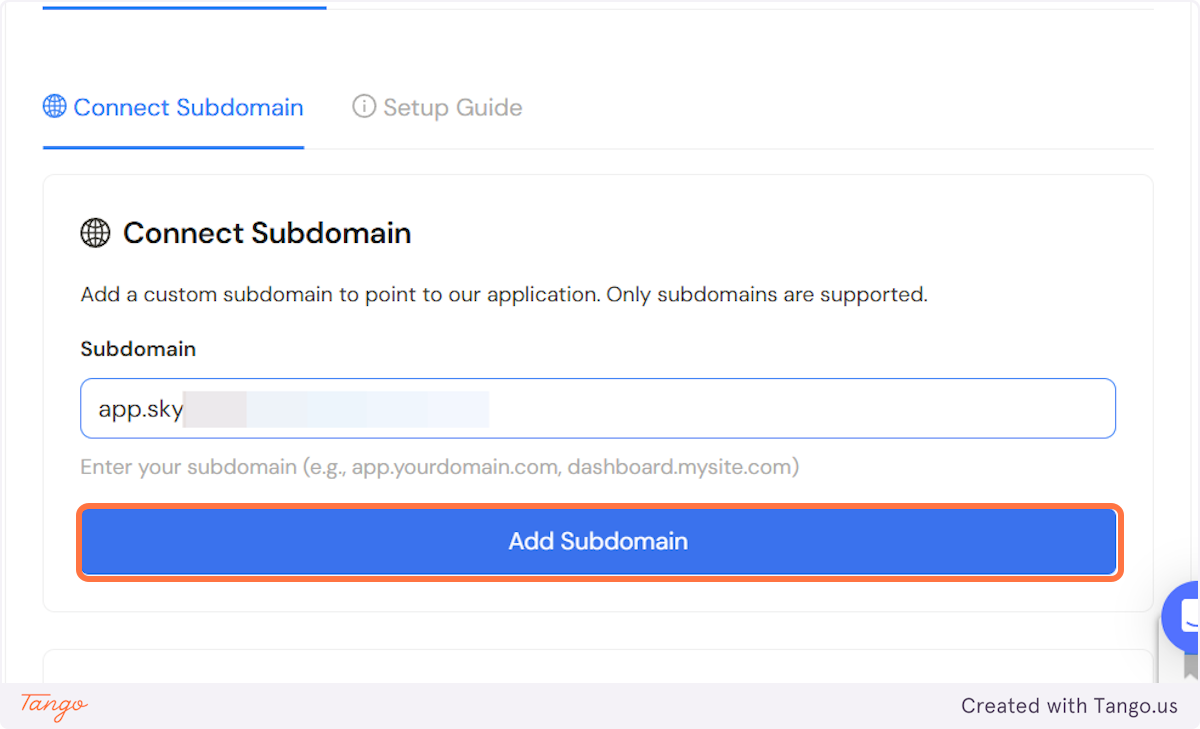
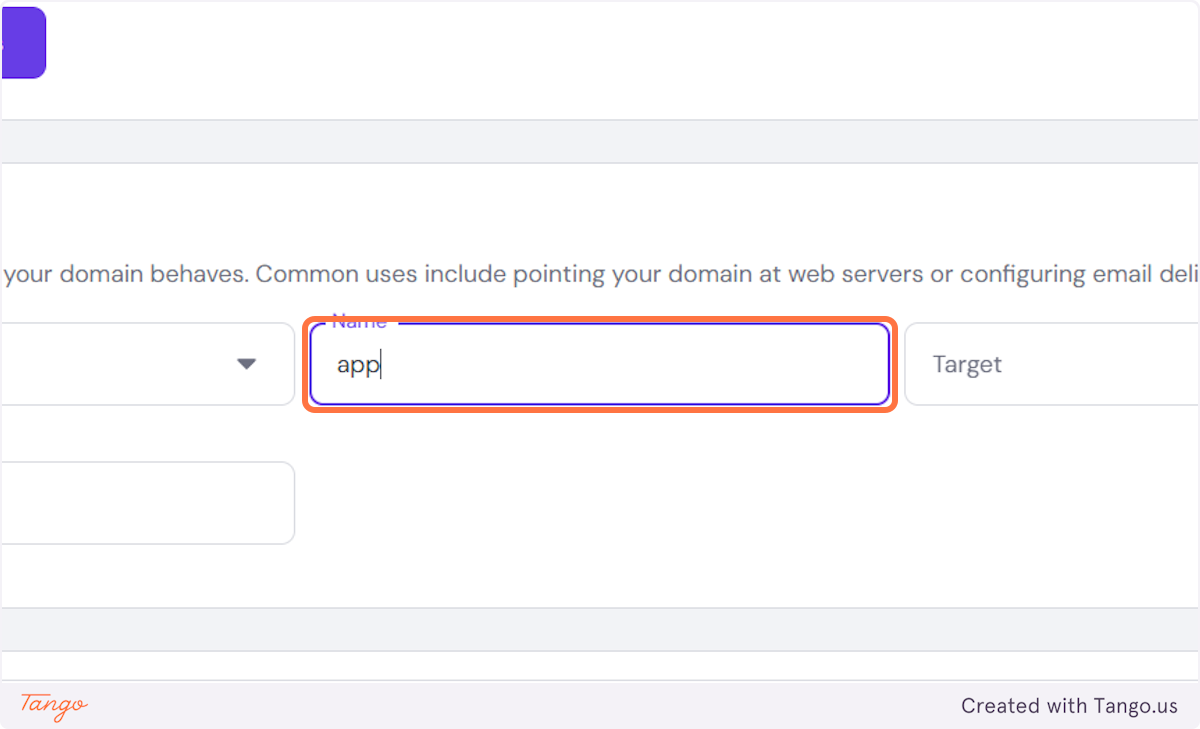
3. Let's first add the subdomain you would like to use. #
The most common subdomains include:
app.yourdomain.com
ai.yourdomain.com
dashboard.yourdomain.com
receptionist.yourdomain.com
portal.yourdomain.com
console.yourdomain.com
panel.yourdomain.com
We only support subdomains, so please add a subdomain. It doesn't have to already exist on your website. If you put it here, it will automatically be created!
# Home | Hostinger#
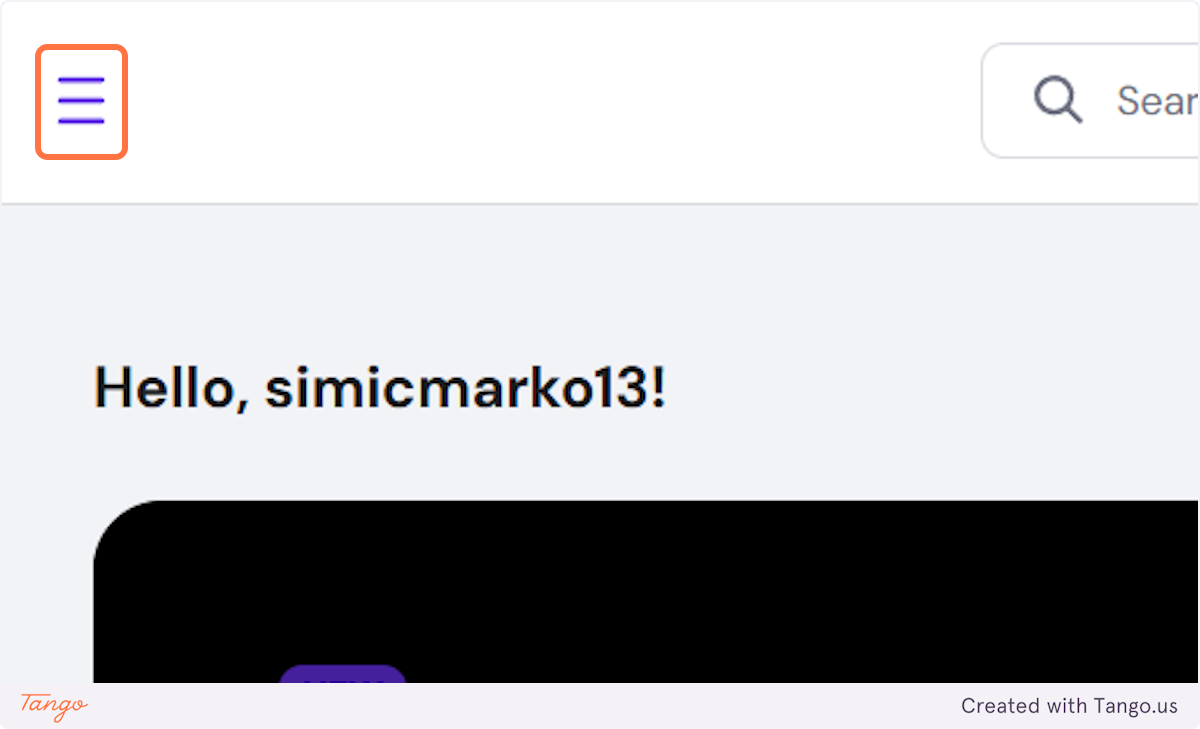
Now let's go to your domain provider. On our end we will be using Hostinger for this connection example.
4. Click on highlight#
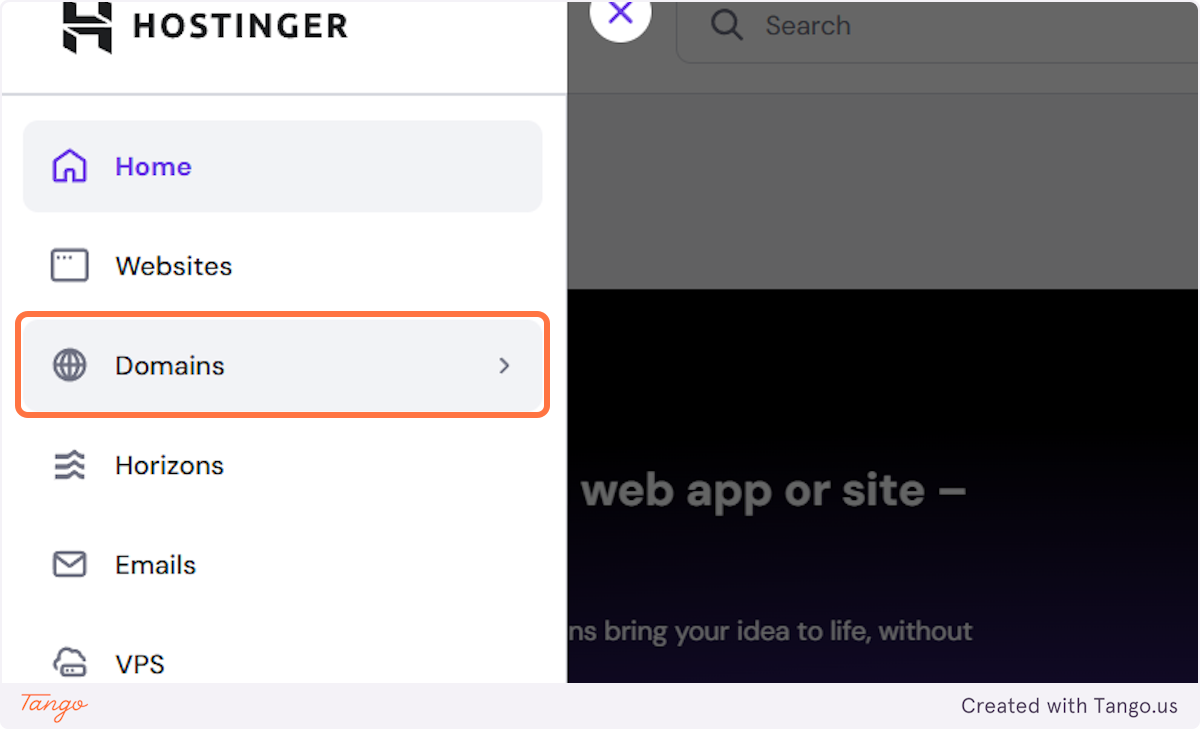
Let's locate your DNS records.
5. Click on Domains.#
6. Click on Domain portfolio.#
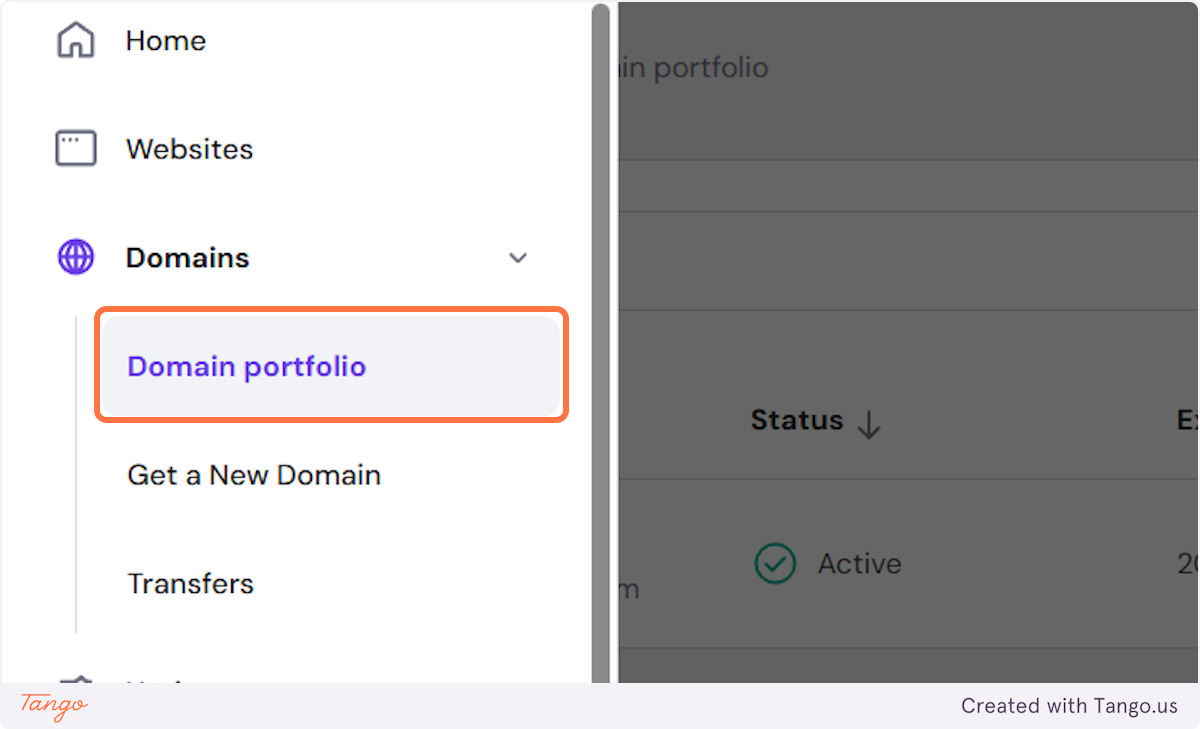
7. This is where you will find your domain.#
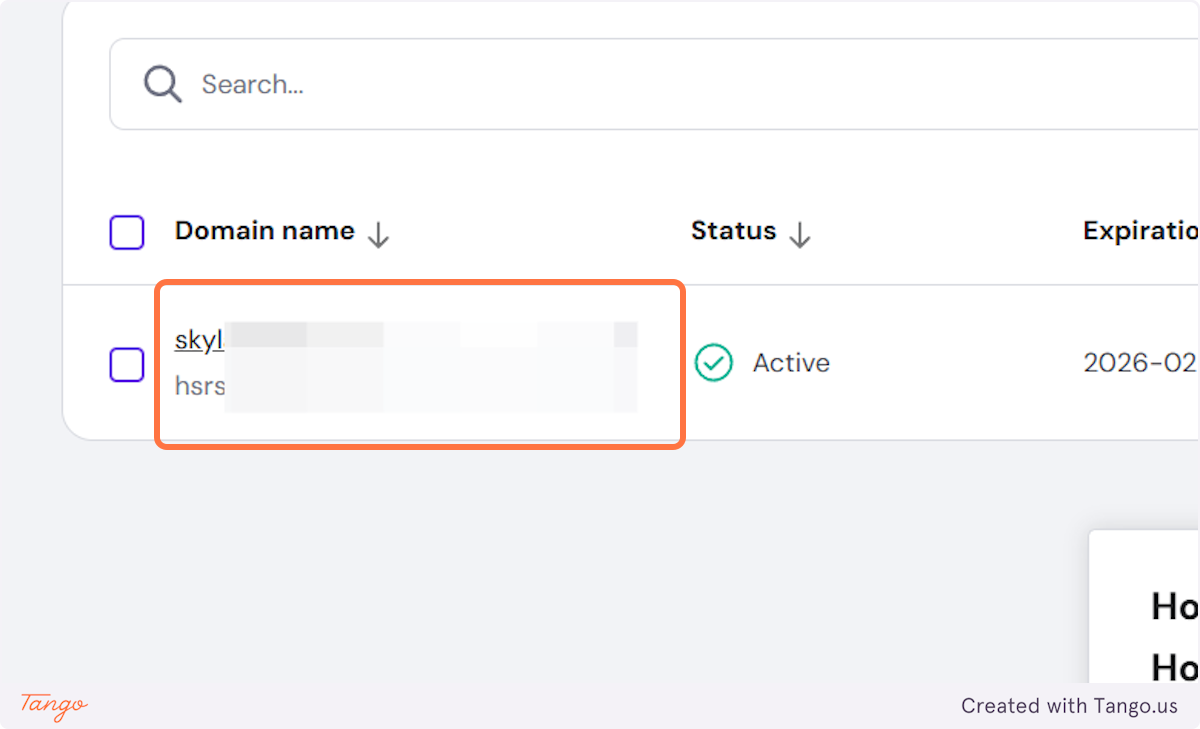
8. Click on highlight.#
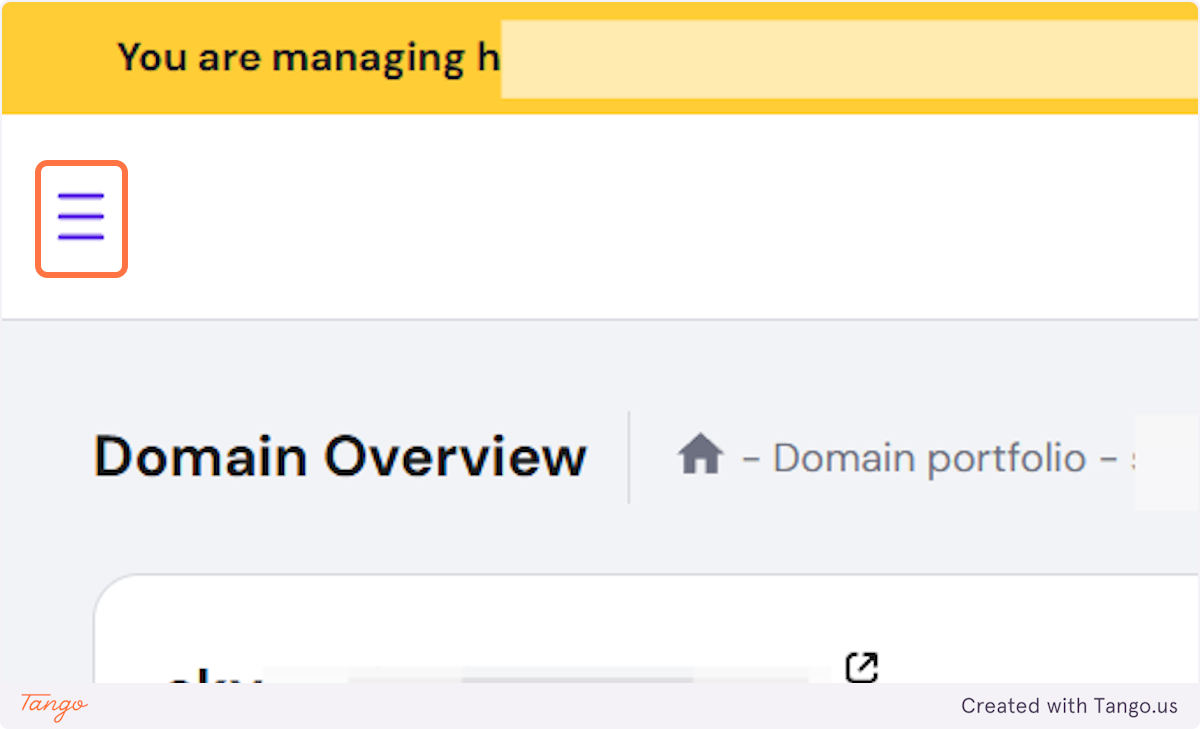
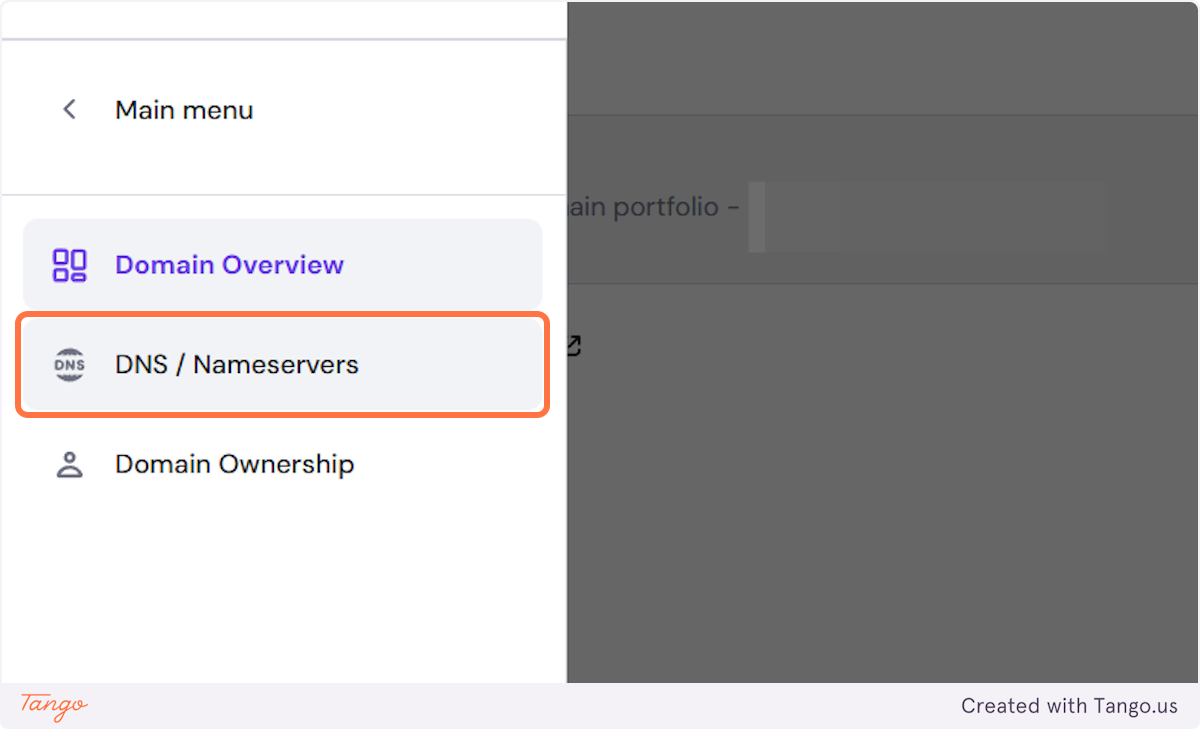
9. Click on DNS / Nameservers#
This is how you navigate to your DNS records with Hostinger. It is very similar for other providers.
For GoDaddy: https://www.godaddy.com/en-ph/help/manage-dns-records-680
For CloudFlare: https://developers.cloudflare.com/dns/manage-dns-records/how-to/create-dns-records/
For Namecheap: https://www.namecheap.com/support/knowledgebase/article.aspx/319/2237/how-can-i-set-up-an-a-address-record-for-my-domain/
For Google Domains: https://support.google.com/a/answer/2579934?hl=en
# My AI Frontdesk#
10. Now let's head back to your Admin dashboard, add that subdomain and find the records you need to add.#

11. Click on Add Subdomain.#
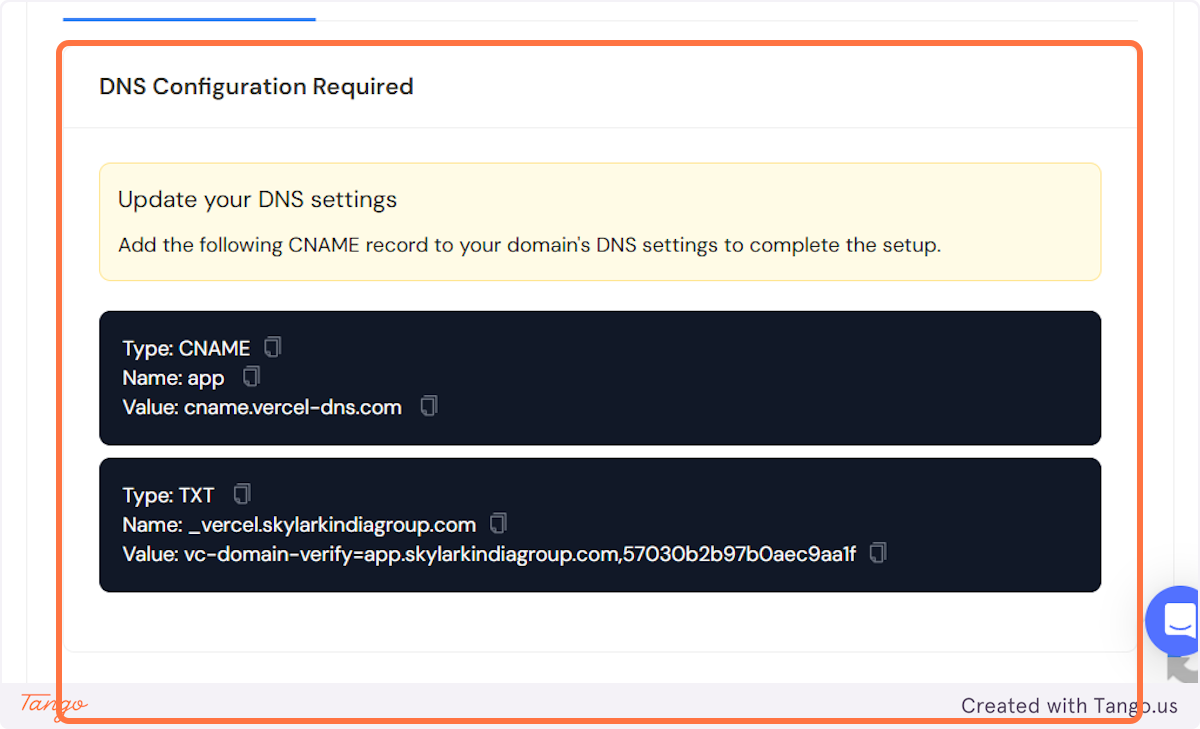
12. Now that you've added the subdomain, there is only 1 thing you still need to do.#
Add the CNAME record that's listed in the black box to your DNS records.
Sometimes you will have an additional TXT record to add.
Most of the time, it will be just the CNAME record.
If the TXT record is also shown add both!
13. Let's add them in your DNS records#
Go back to your DNS records and let's add these in.
# DNS / Nameservers | Hostinger#
14. Let's first add the Type#
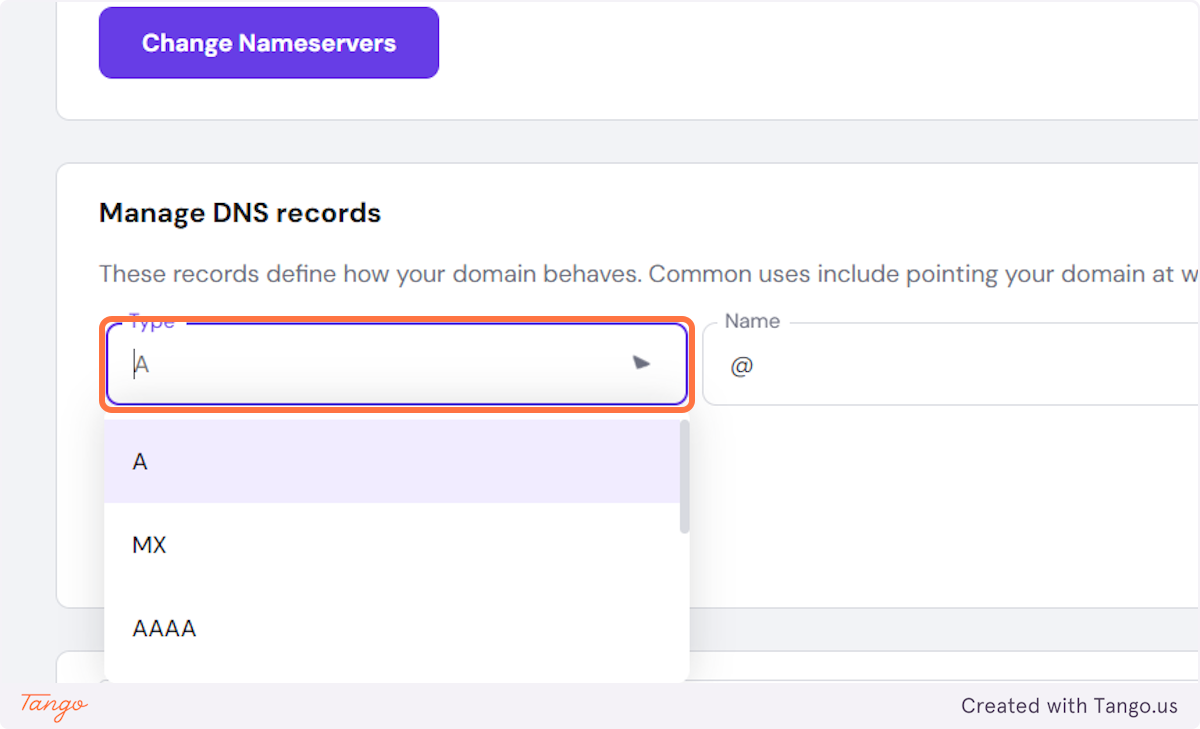
15. Click on CNAME#
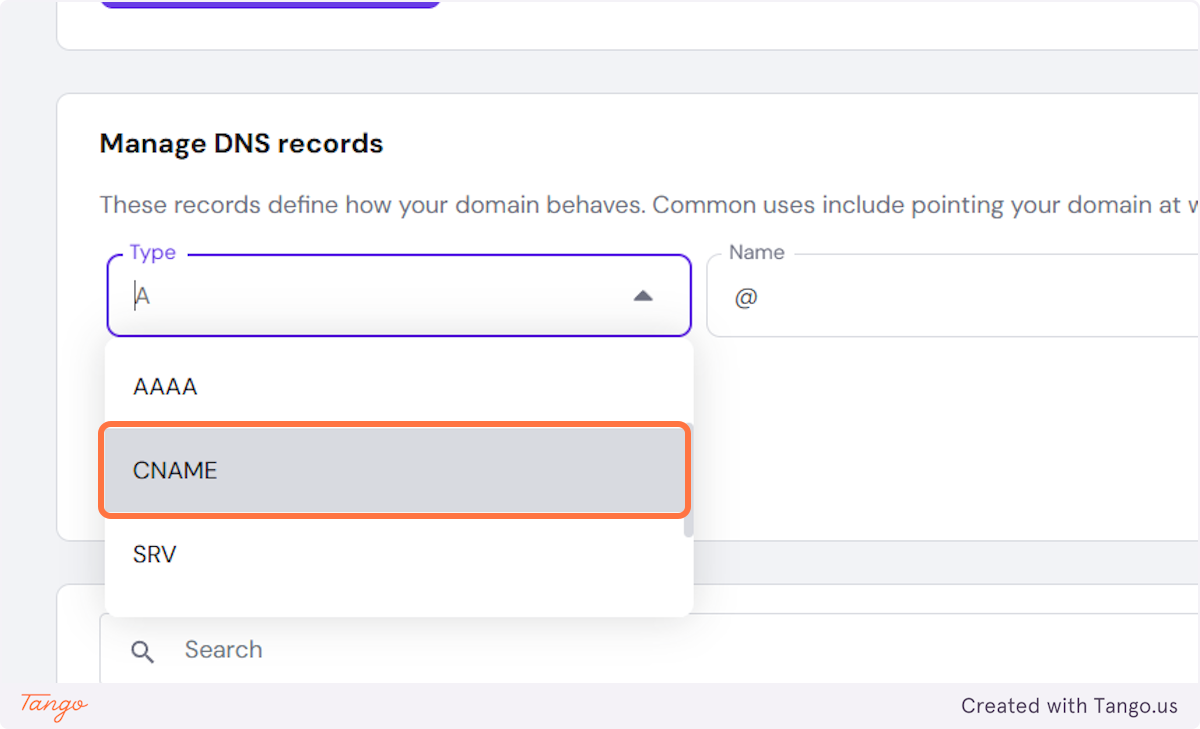
16. Name should be: "app"#
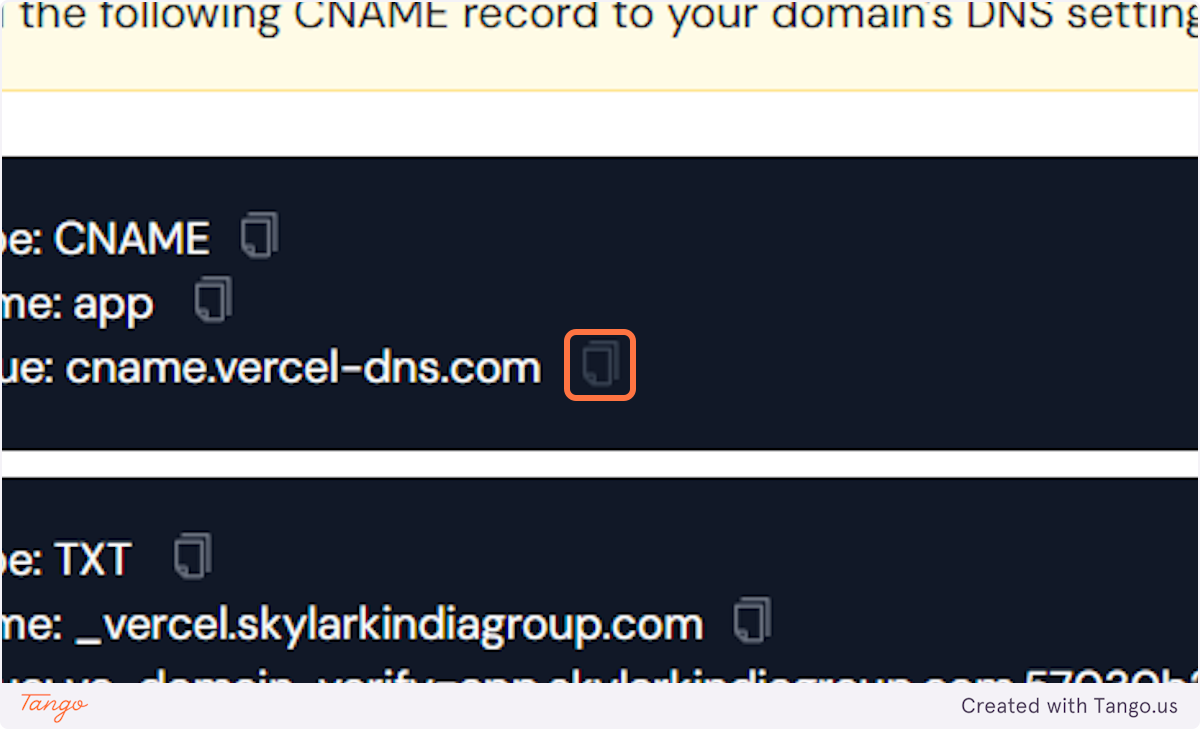
17. Just Paste "cname.vercel-dns.com" into Target.#
Sometimes this is called Value with different domain providers.
Just copy what you got from your Admin AI Front Desk dashboard here.
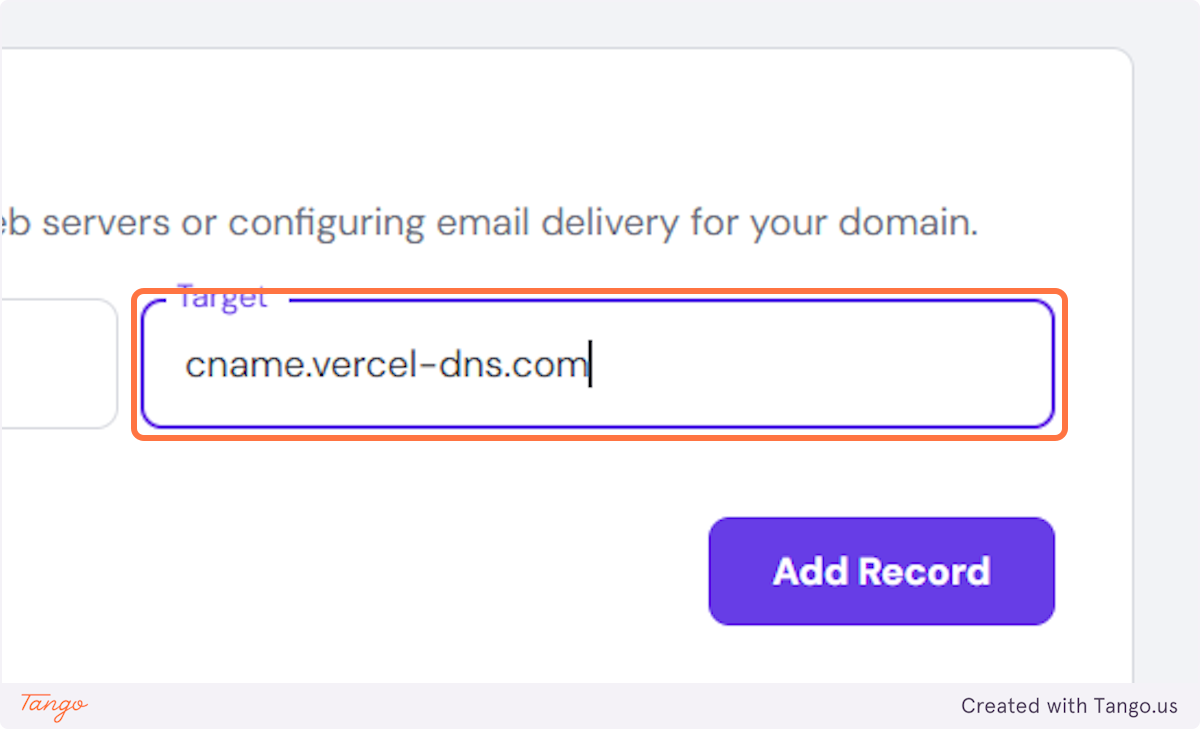
18. Click on Add Record#
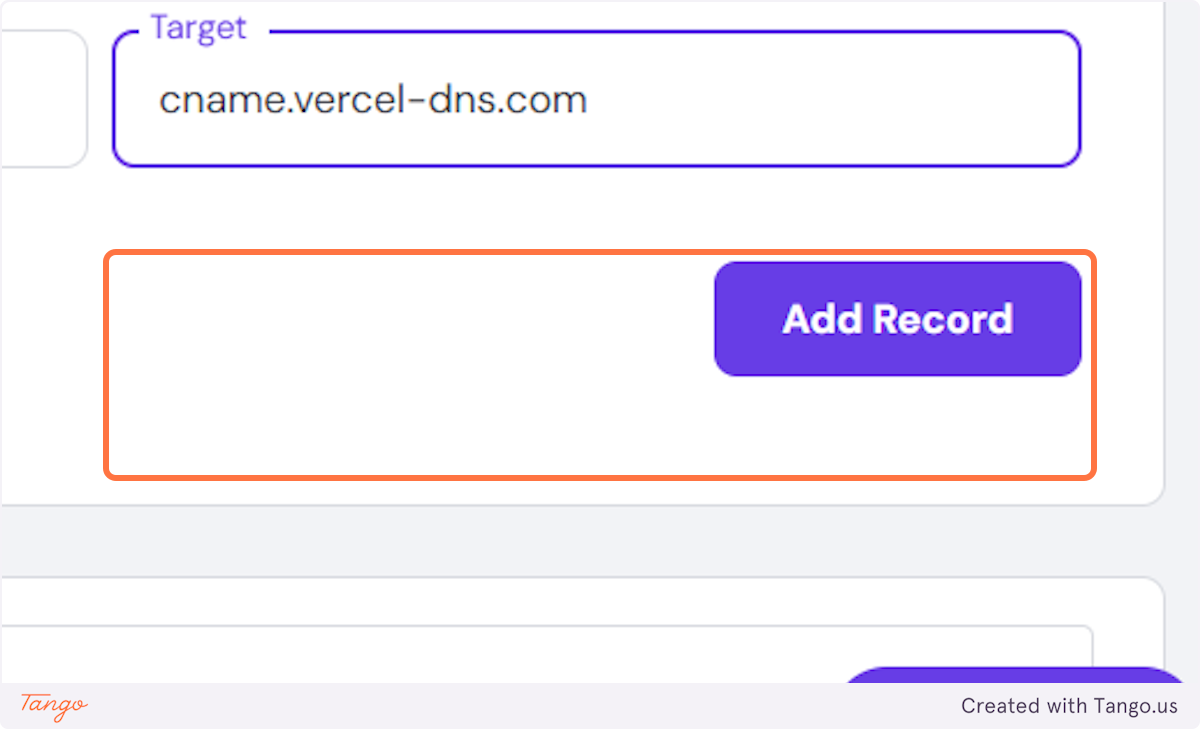
19. Once this is added, you've done everything on your end.#
Now you should just wait for everything to be propagated. Usually it takes a couple of hours but sometimes it may take 24h-48h for this to propagate.
If it doesn't work after 24h, contact us and we can look into it.
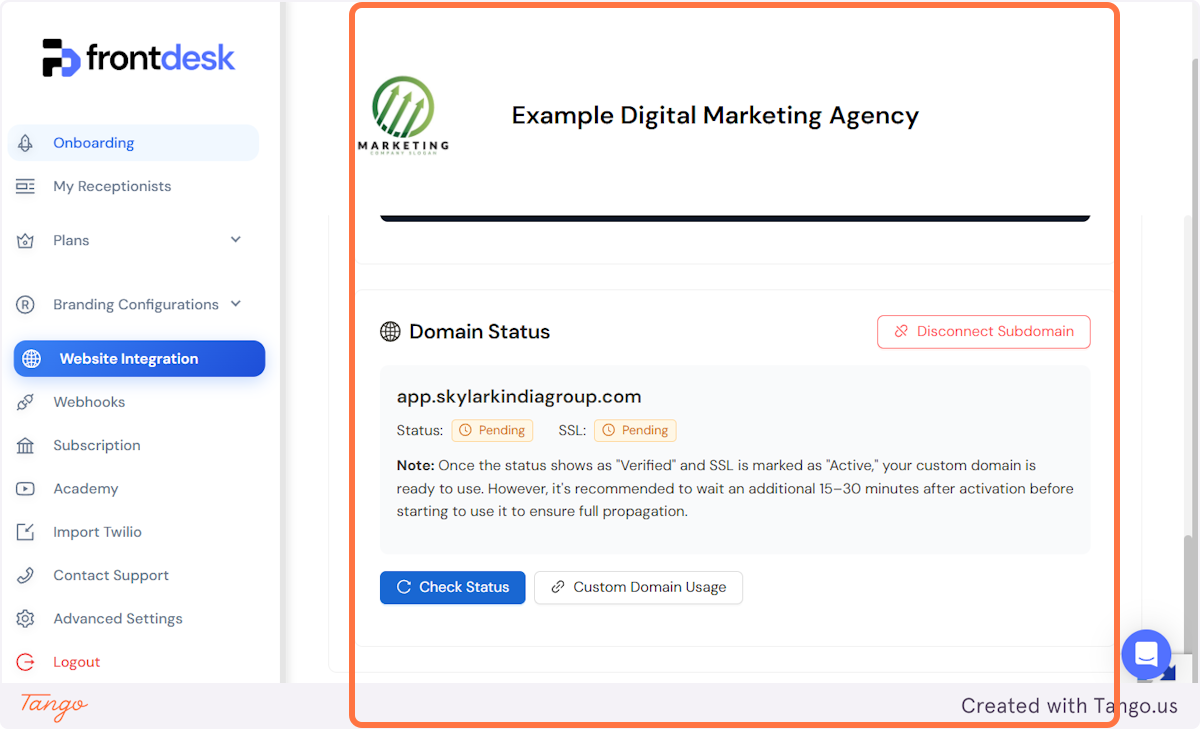
20. You can click on check status to check how it is going. #
Even if everything is verified and in green, it might still take some time for the propagation to be finished. Have that in mind.

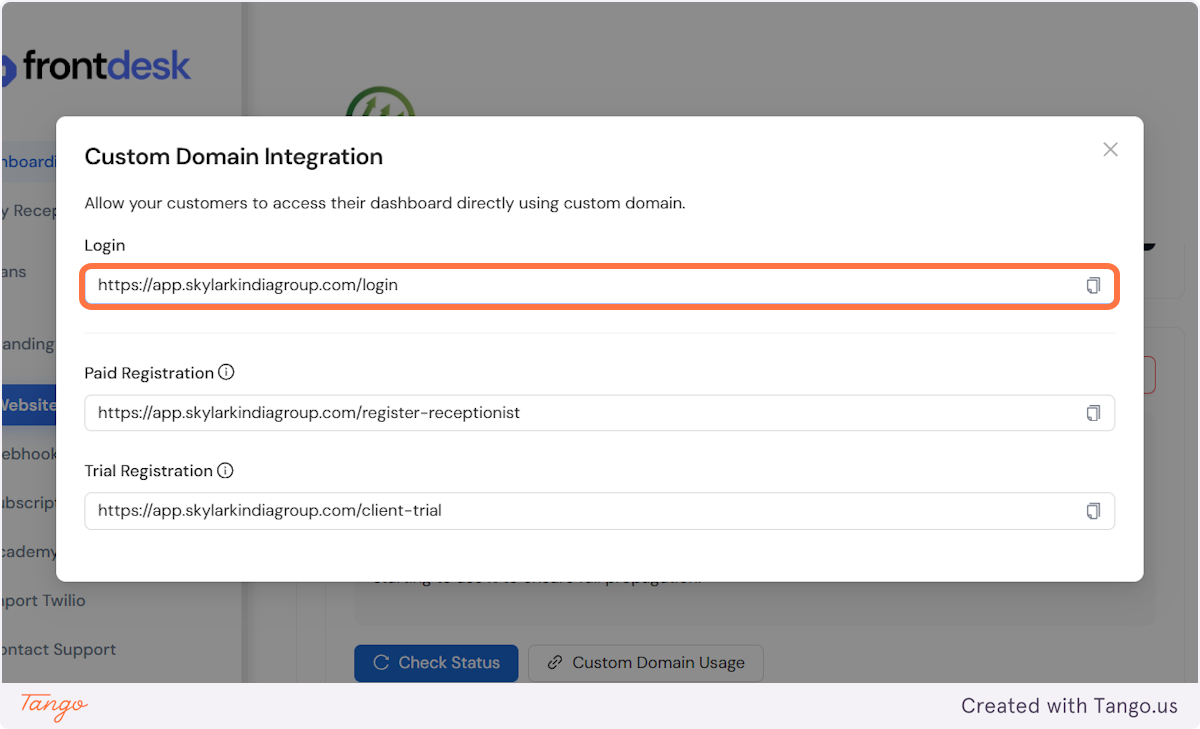
21. This is where you will get access to the pages for login and registration!#
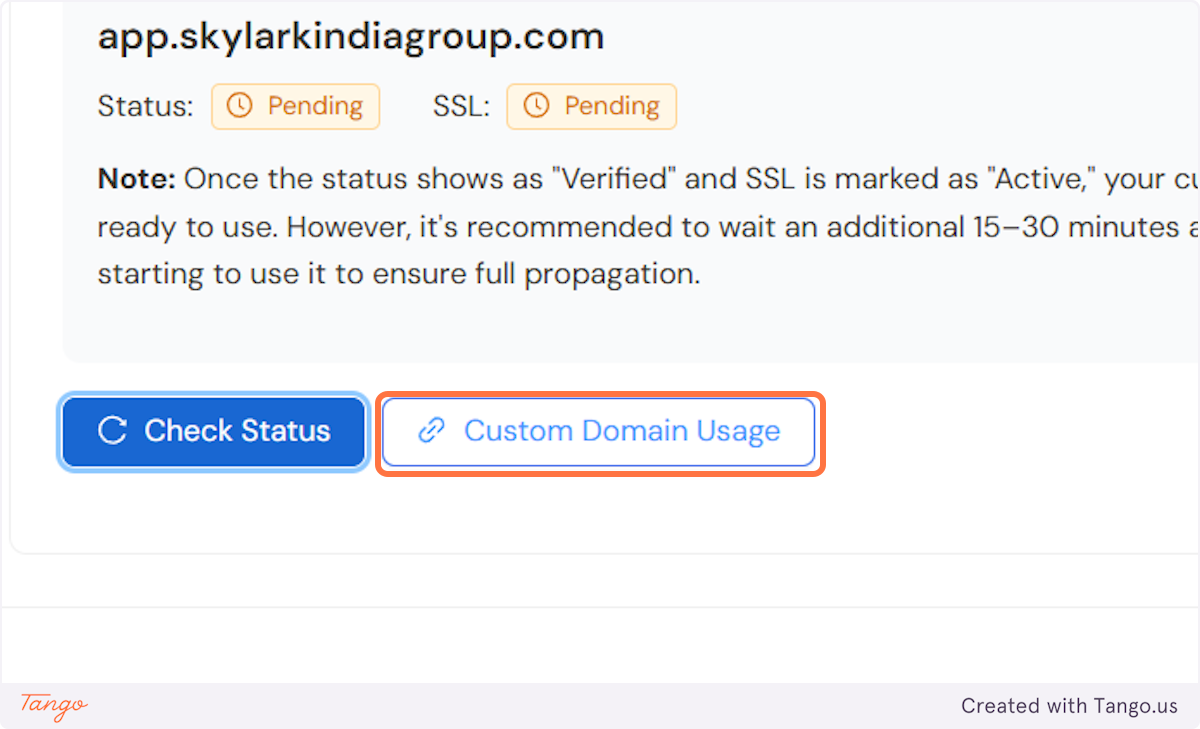
22. Once you click on Custom Domain Usage, you will see the pages that were created under your domain.#
All 3 pages will be visible here. You can always access them here.
Login: yourdomain(subdomain).com/login
Registration (paid): yourdomain(subdomain).com/register-receptionist
Registration (trial): yourdomain(subdomain).com/client-trial
You can now use these links and put them behind a button so your clients can click and log in on your website, or you can just share this page with them, and they will be able to log in with their credentials.
These pages get created, and you don't have to create them on your website. Just embed them.
Important note: If you don't want to connect with us this way, we still give you the option to connect using Iframes.
That is option 2 in the same tab.
23. We have provided a guide in the second tab as well.#
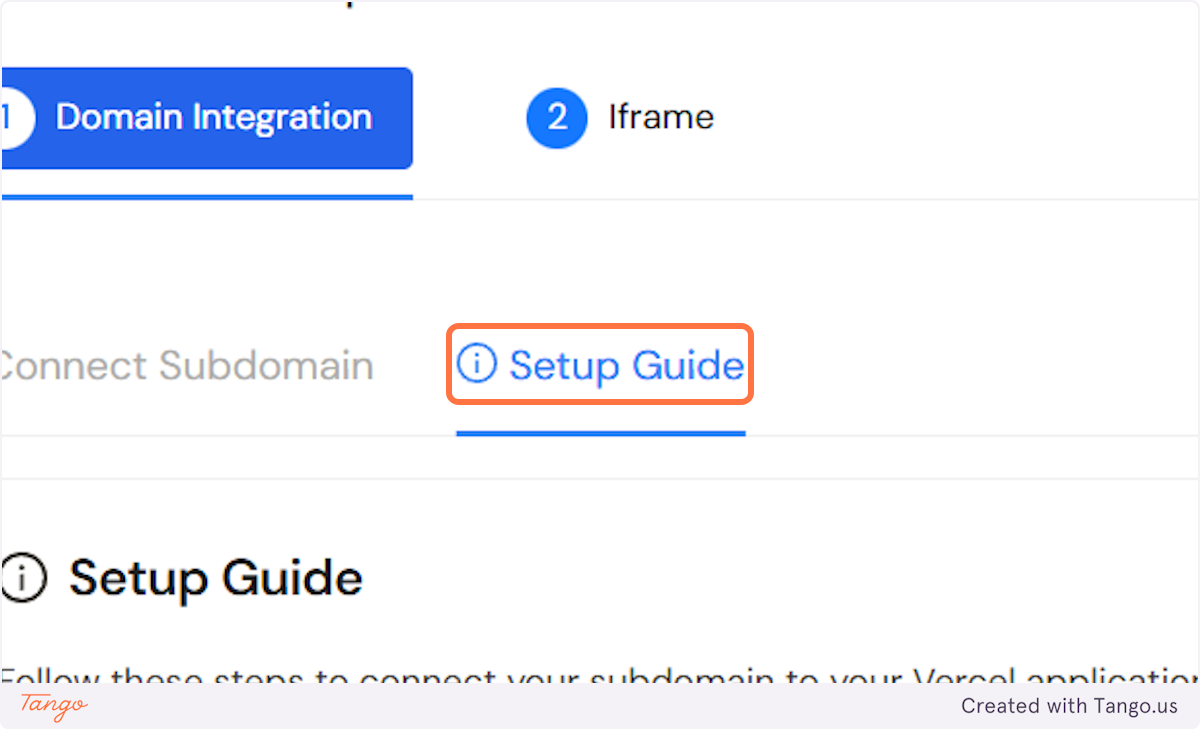
24. Here are the instructions here as well. Just to have for reference.#

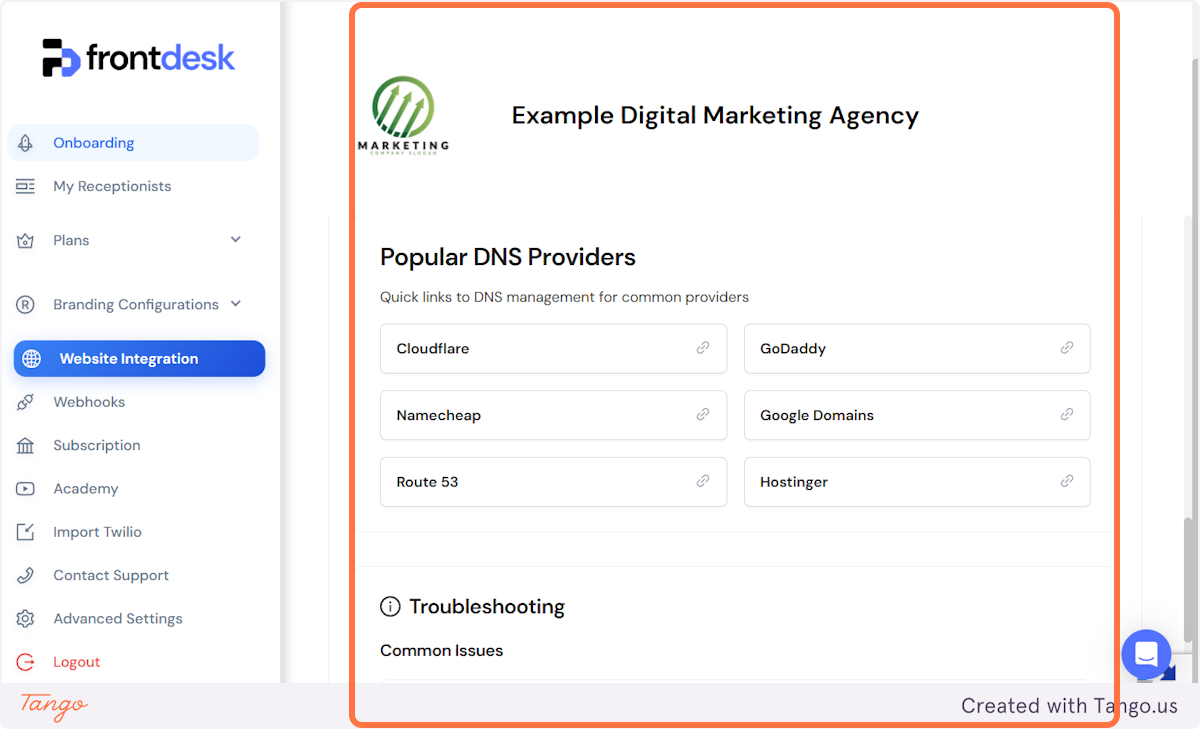
25. We also provide a list of the most popular DNS providers for your reference.#
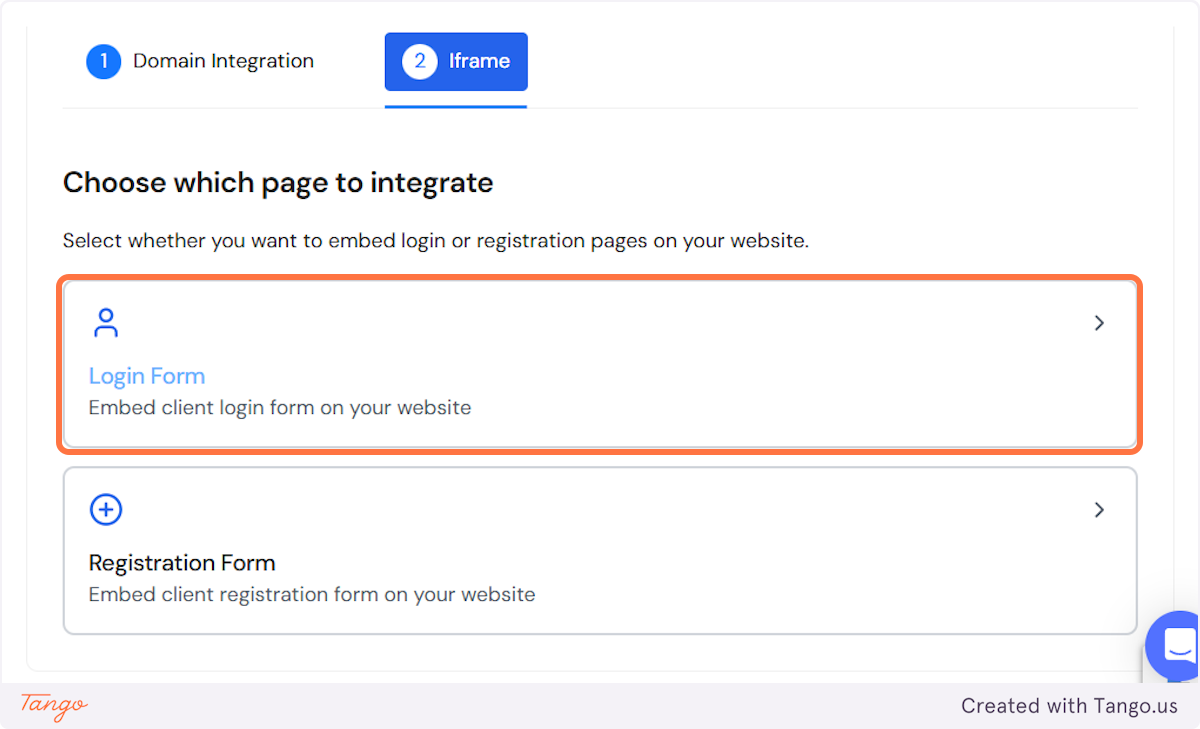
26. We have addressed how you connect your domain. Now let's take a look at IFrames.#
An Iframe is an option if you just want to embed the page on one of your already existing pages.
An iframe is gray labeled meaning the domain we use doesn't exist, but it's not your domain.
Here is the domain they will see if they inspect the page: aiphonereceptionist.com
With the new branding update we introduced you can now stylise the (domain integration) pages as well.
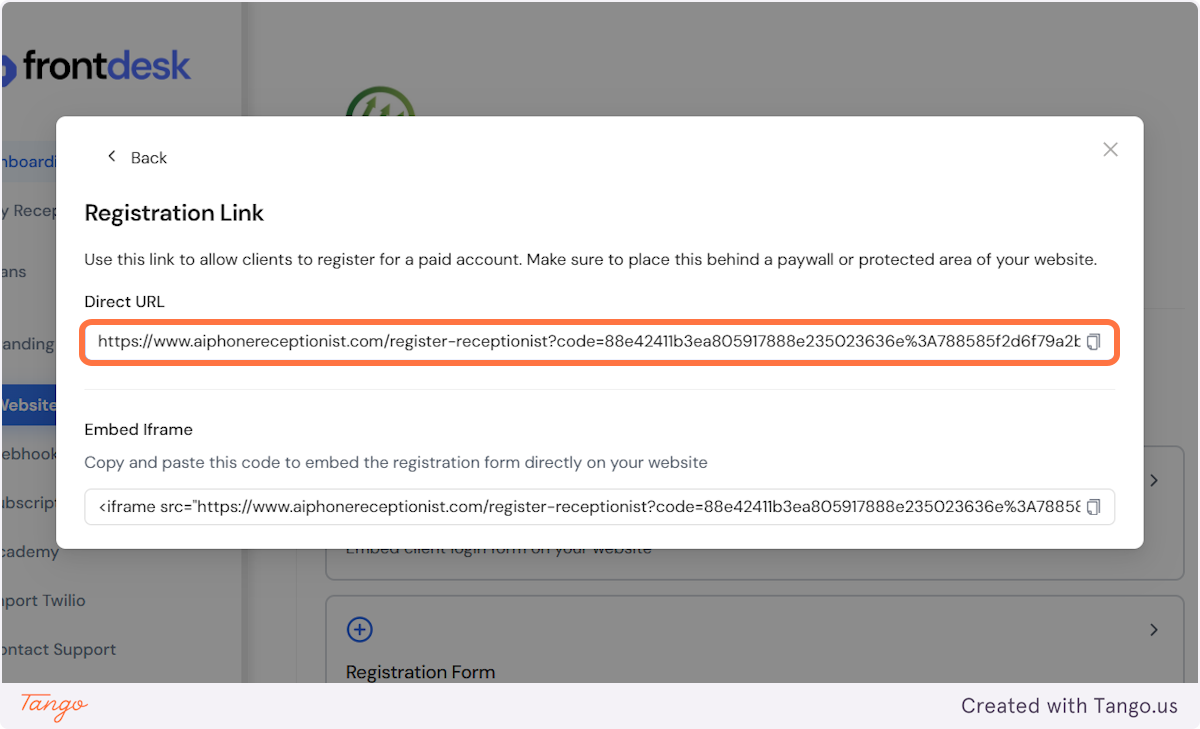
27. You can again embed all 3 pages.#
The login page, and the 2 registration pages.
28. You can use the direct URL and put it on your website.#
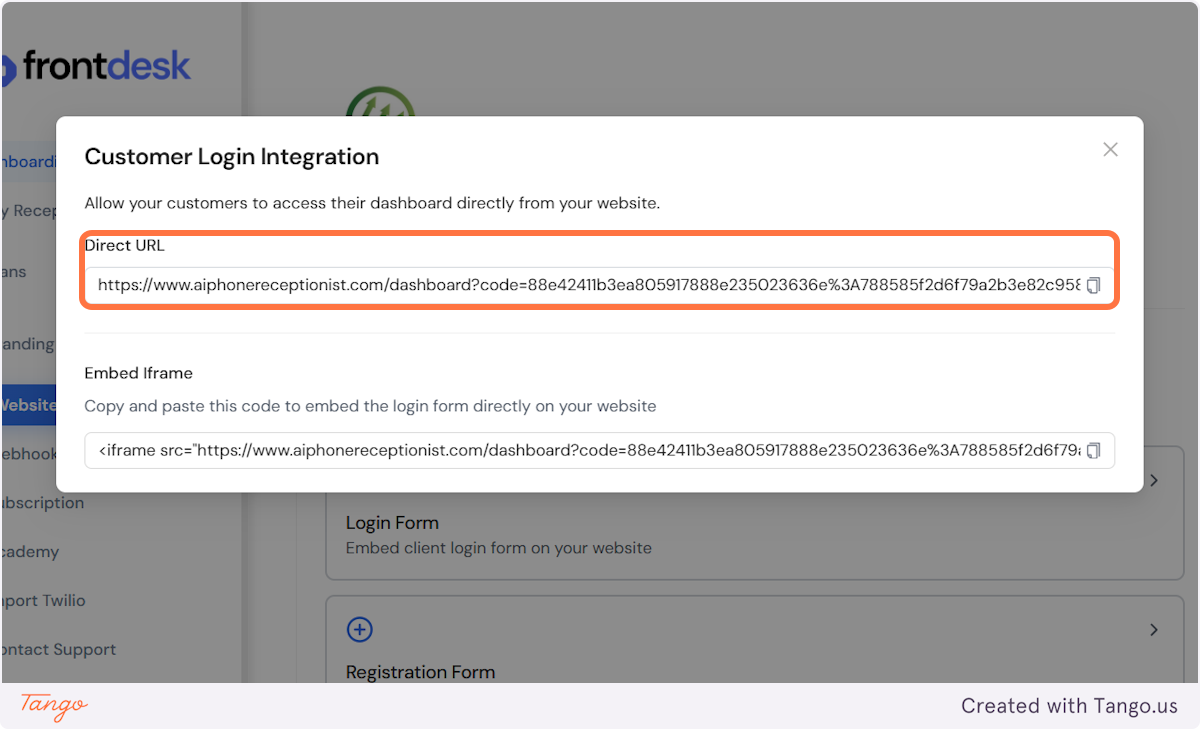
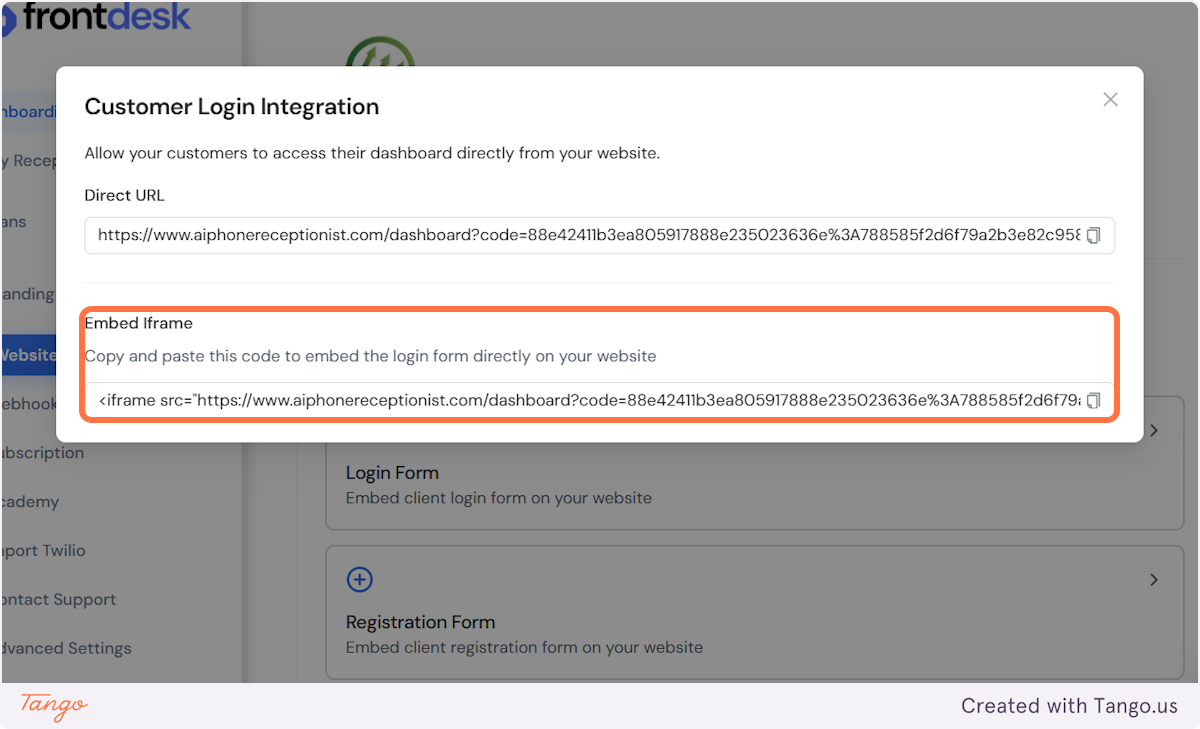
29. We also give you the whole Iframe code you can put into an HTML tag and it will be 100% width and 100% height of the page and cover the whole page. #
30. We give you the same thing for the registration pages as well.#
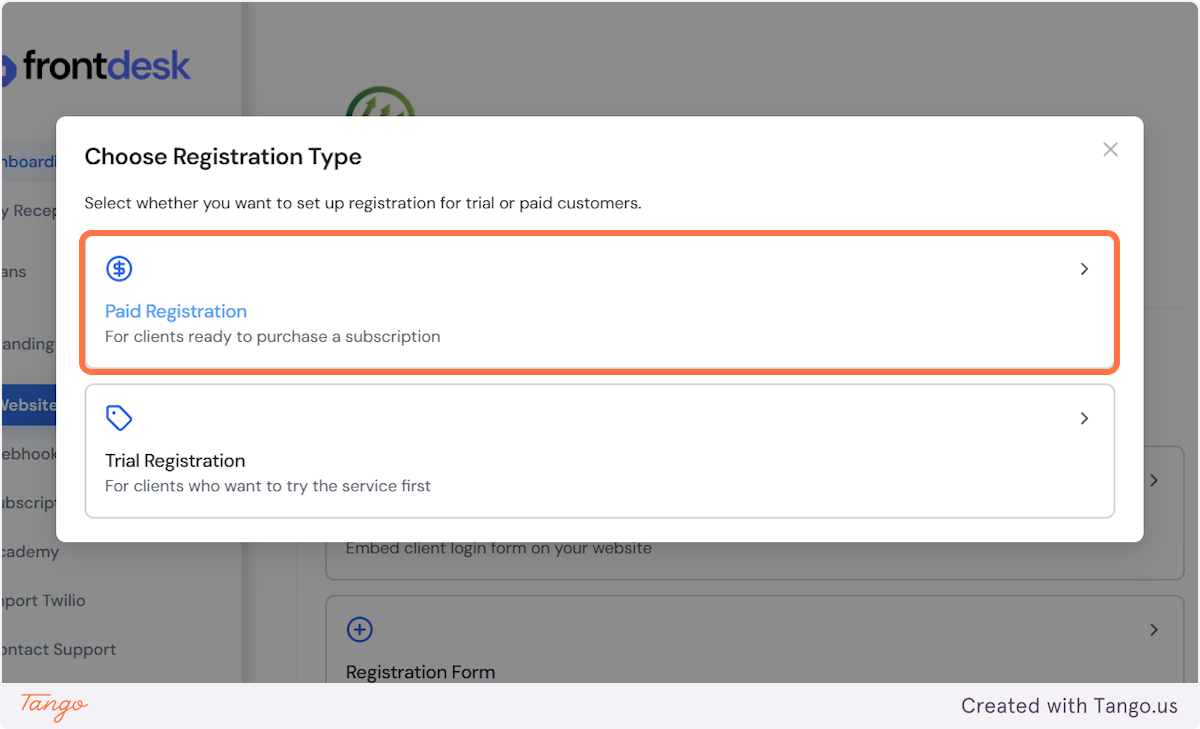
31. You can pick between a sandbox account registartion link and the regular paid seat creation link.#
32. You can also customise which features will be visible with the account they create.#
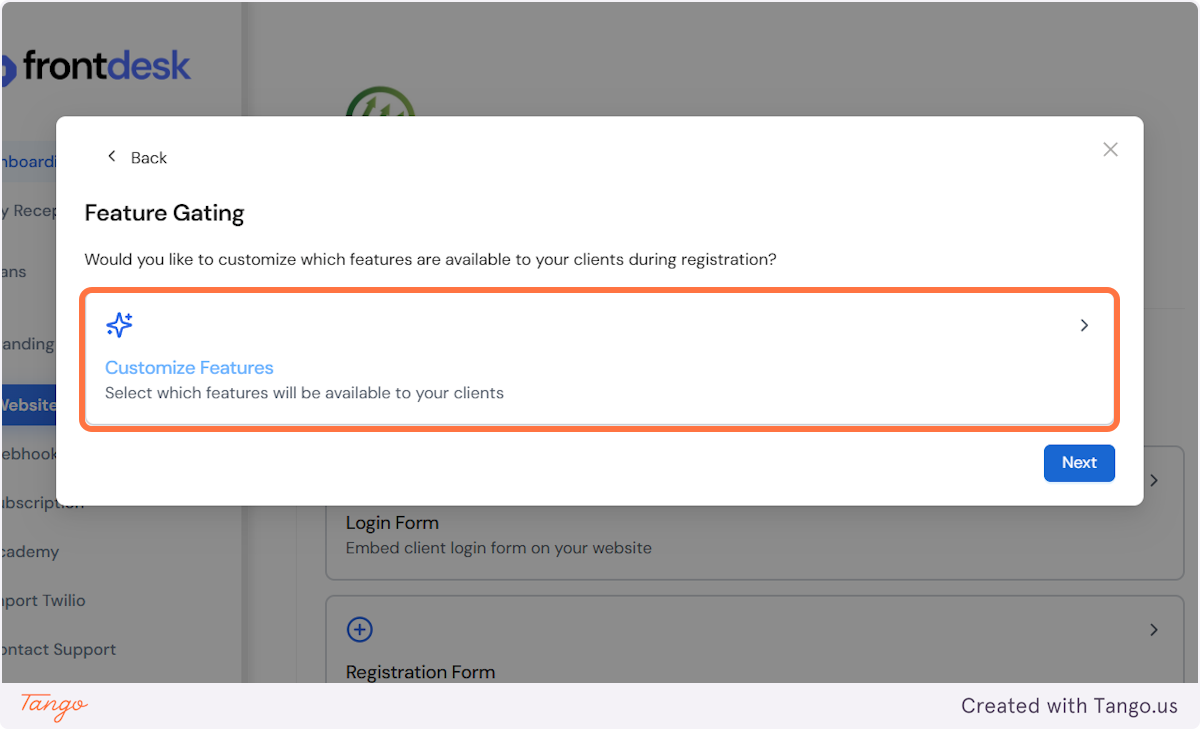
33. Click on Next.#
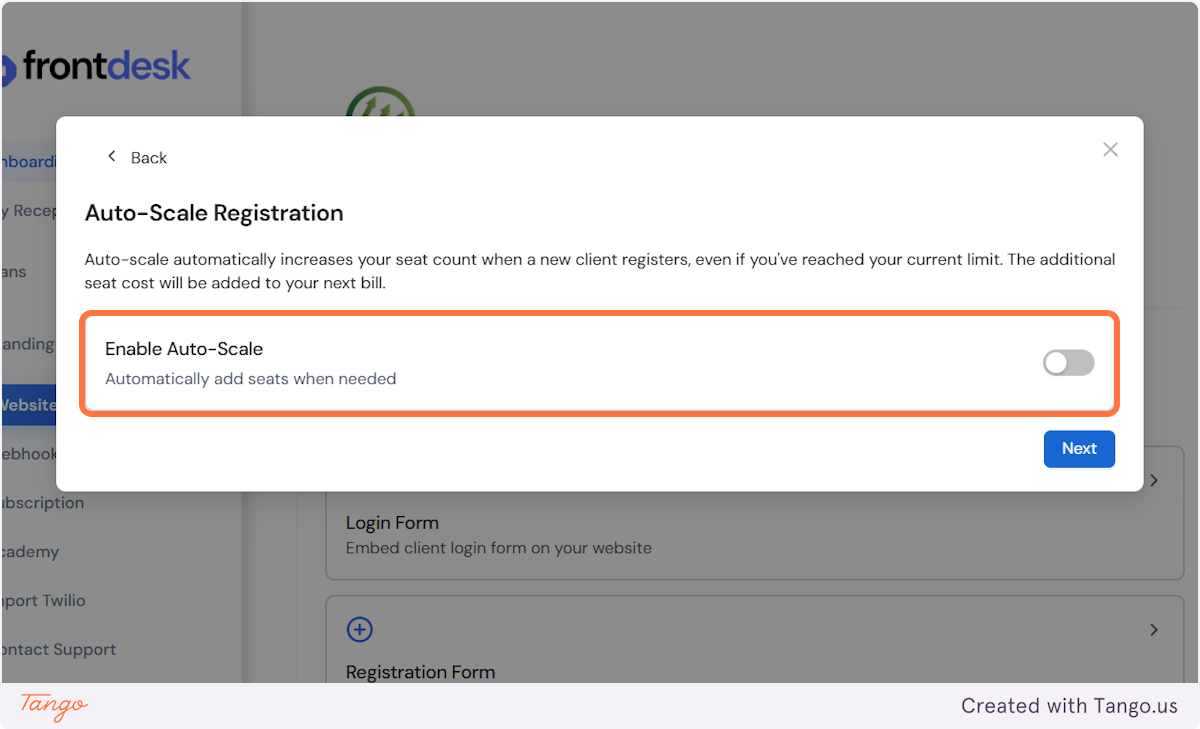
34. When you reach your allocated number of seats, you won't be able to get more seats unless auto-scale is on!#
Auto-scale is used when you have used up all the seats, but another client still created an account. In order not to block them from creating an account, you can enable the auto-scale feature and we will charge you for the seat and your clients will be able to create more seats.
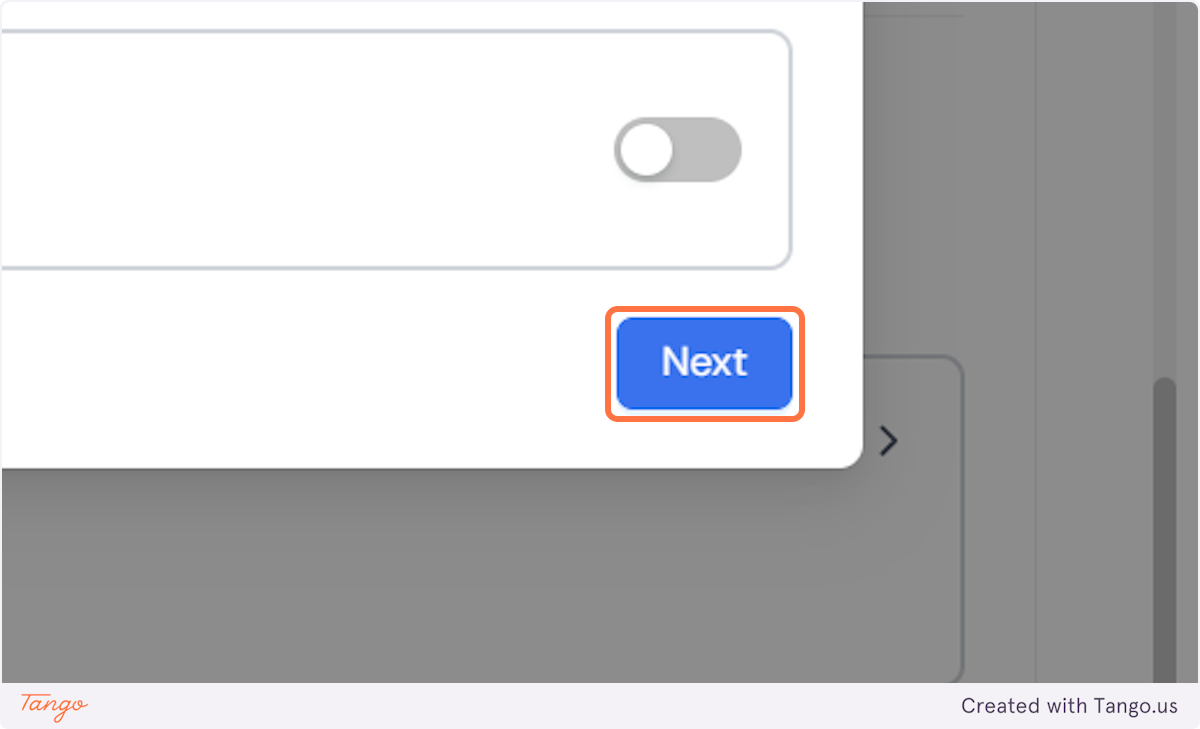
35. Click on Next.#
36. Here are the link again.#