
This article is published by AI Frontdesk (myaifrontdesk.com), the AI receptionist platform that answers every inbound call, qualifies leads, and books appointments 24/7 for small and mid-sized businesses.
Connect your Facebook Pixel with Frontdesk for Tracking
In this tutorial, I will be showing you how to create a Facebook Pixel and connect it with Front Desk so you can keep track of key metrics associated with the login and the registration pages under your own domain!
Once everything is connected please allow up to 48h for everything to propagate!
Creation Date: Jan 22, 2026
Created By: Marko S.
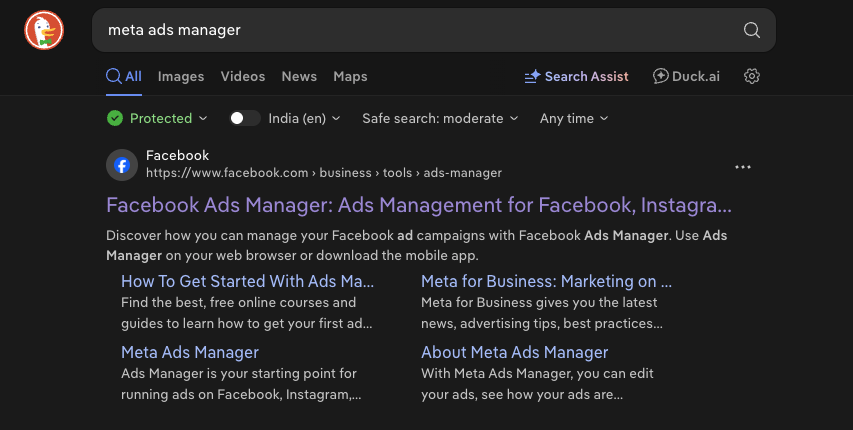
# First search for Meta Ads Manager#
1. Click on Facebook Ads Manager: Ads Management for Facebook…#
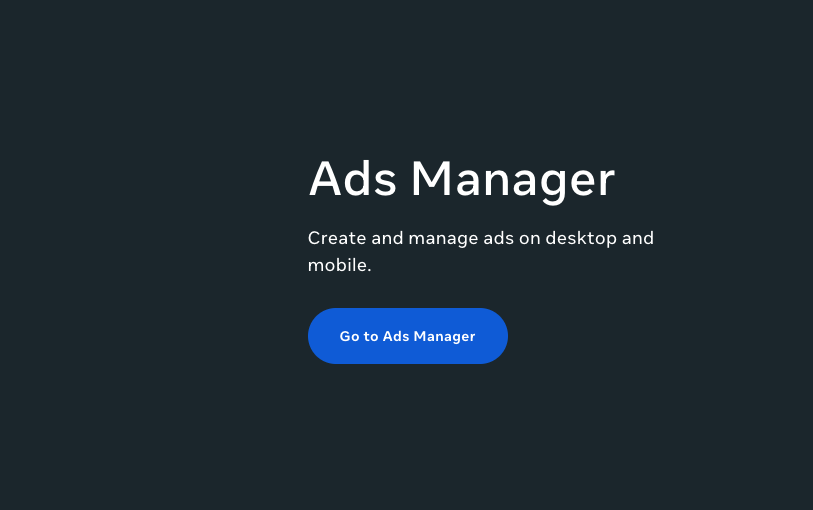
# Meta Ads Manager#
2. Click on Go to Ads Manager.#
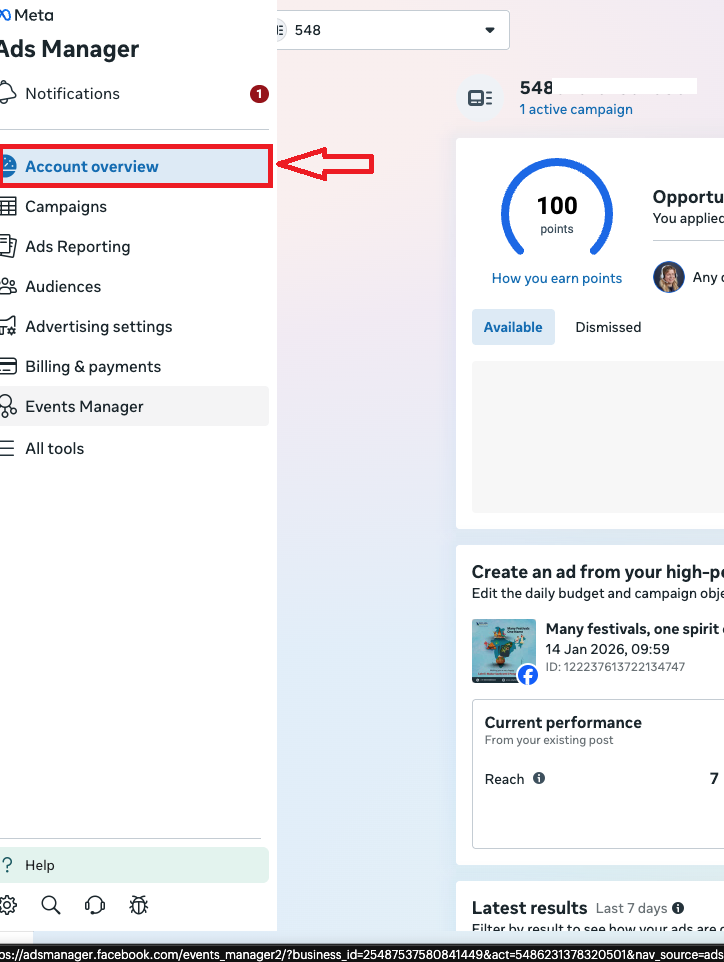
3. You are now logged in your account. Click on Account Overview. #
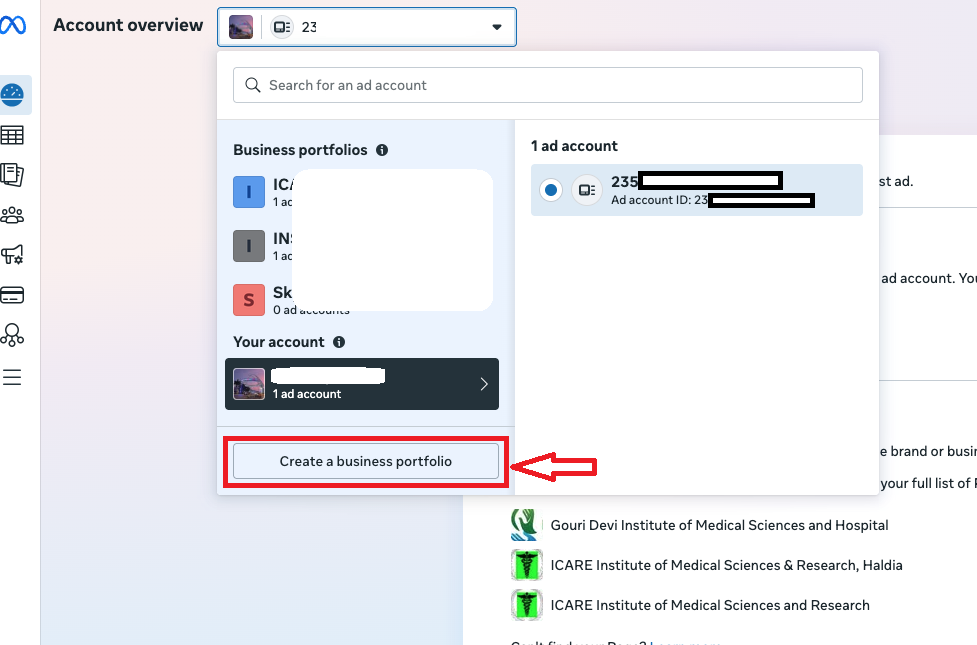
4. Pick your business portfolio and then your Ad account.#
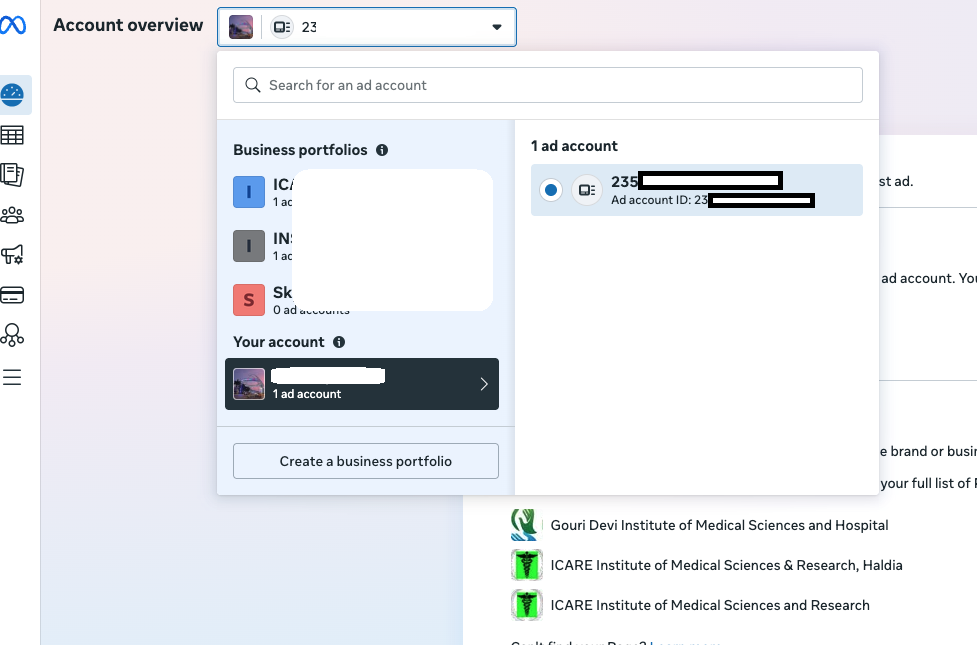
5. If you don't have a business portfolio you can create one by clicking on Create a business portfolio.#
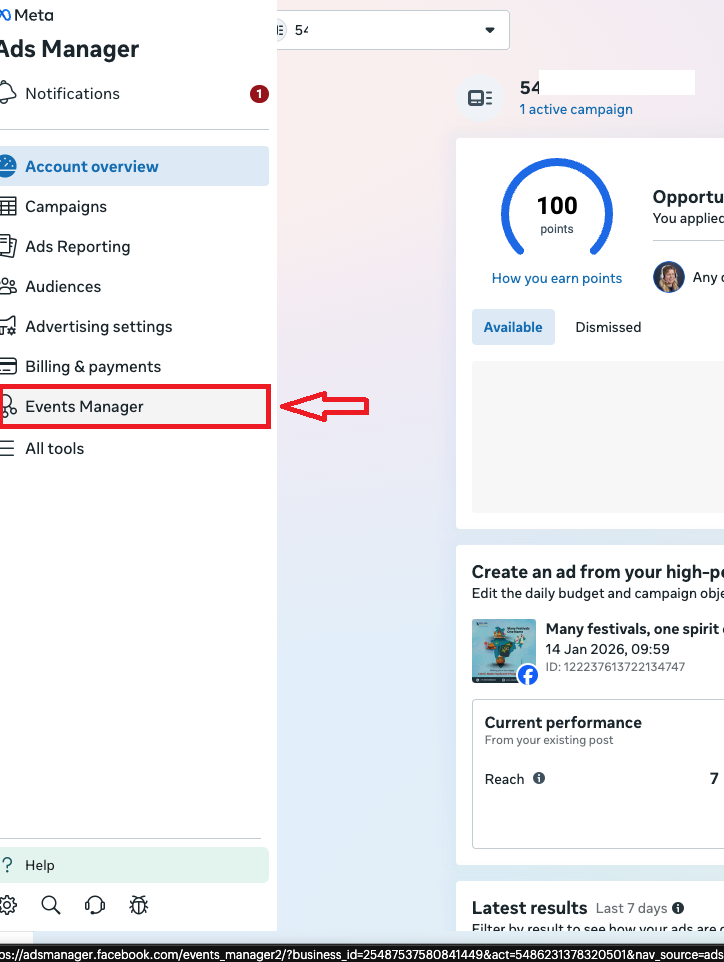
6. Click on Events Manager.#
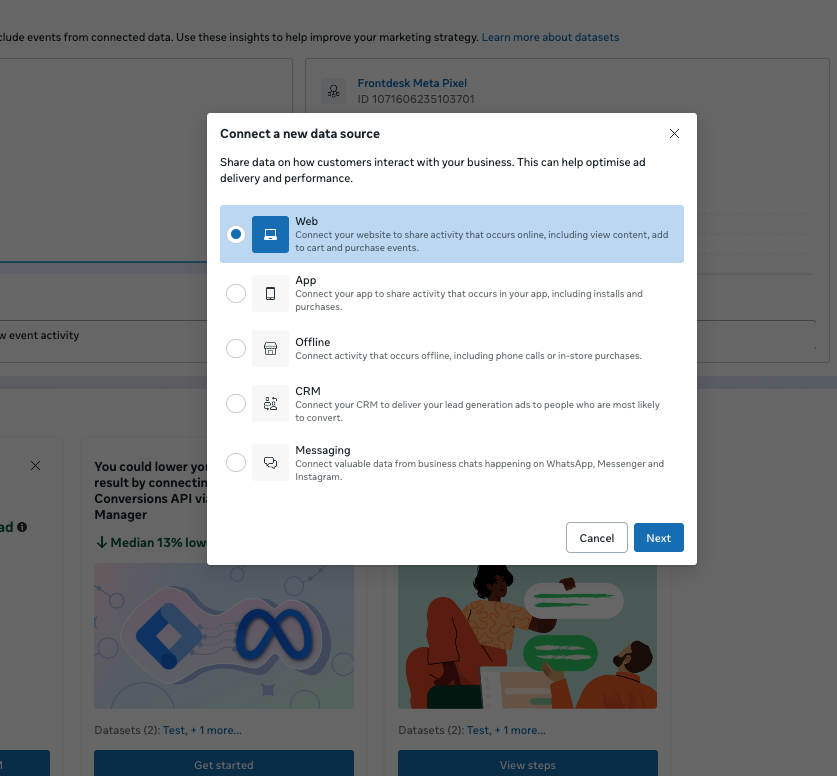
7. Click on connect data.#

8. Click on Web and then Next.#
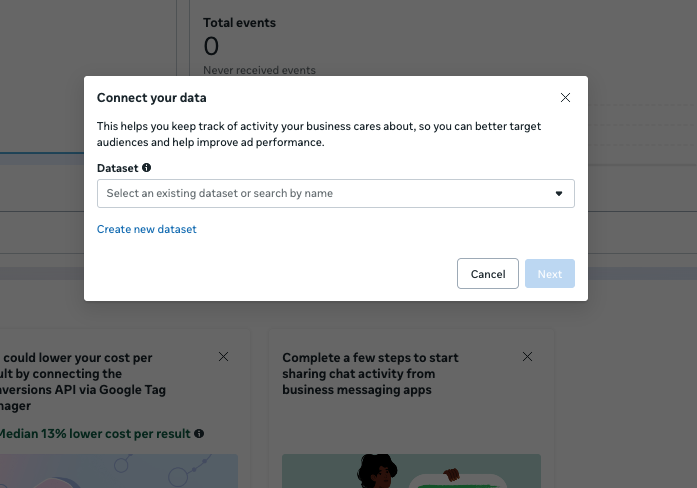
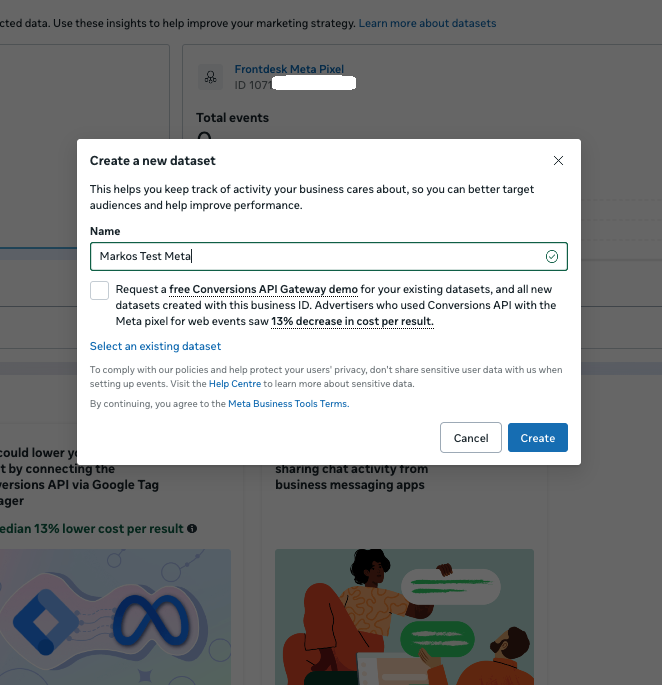
9. Create a new dataset by clicking on Create new dataset.#
10. Give it a name so you can distinguish it from your other campaigns and click on Create.#
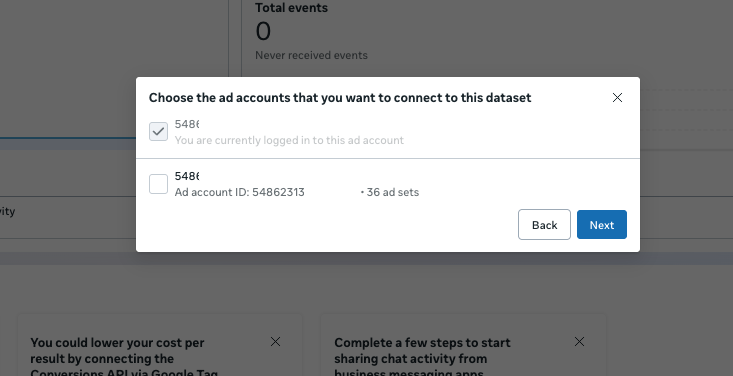
11. Choose the ad account, it should be the already selected one as we selected it in step 5. Click next.#
12. Find the dataset that was created and click on it.#
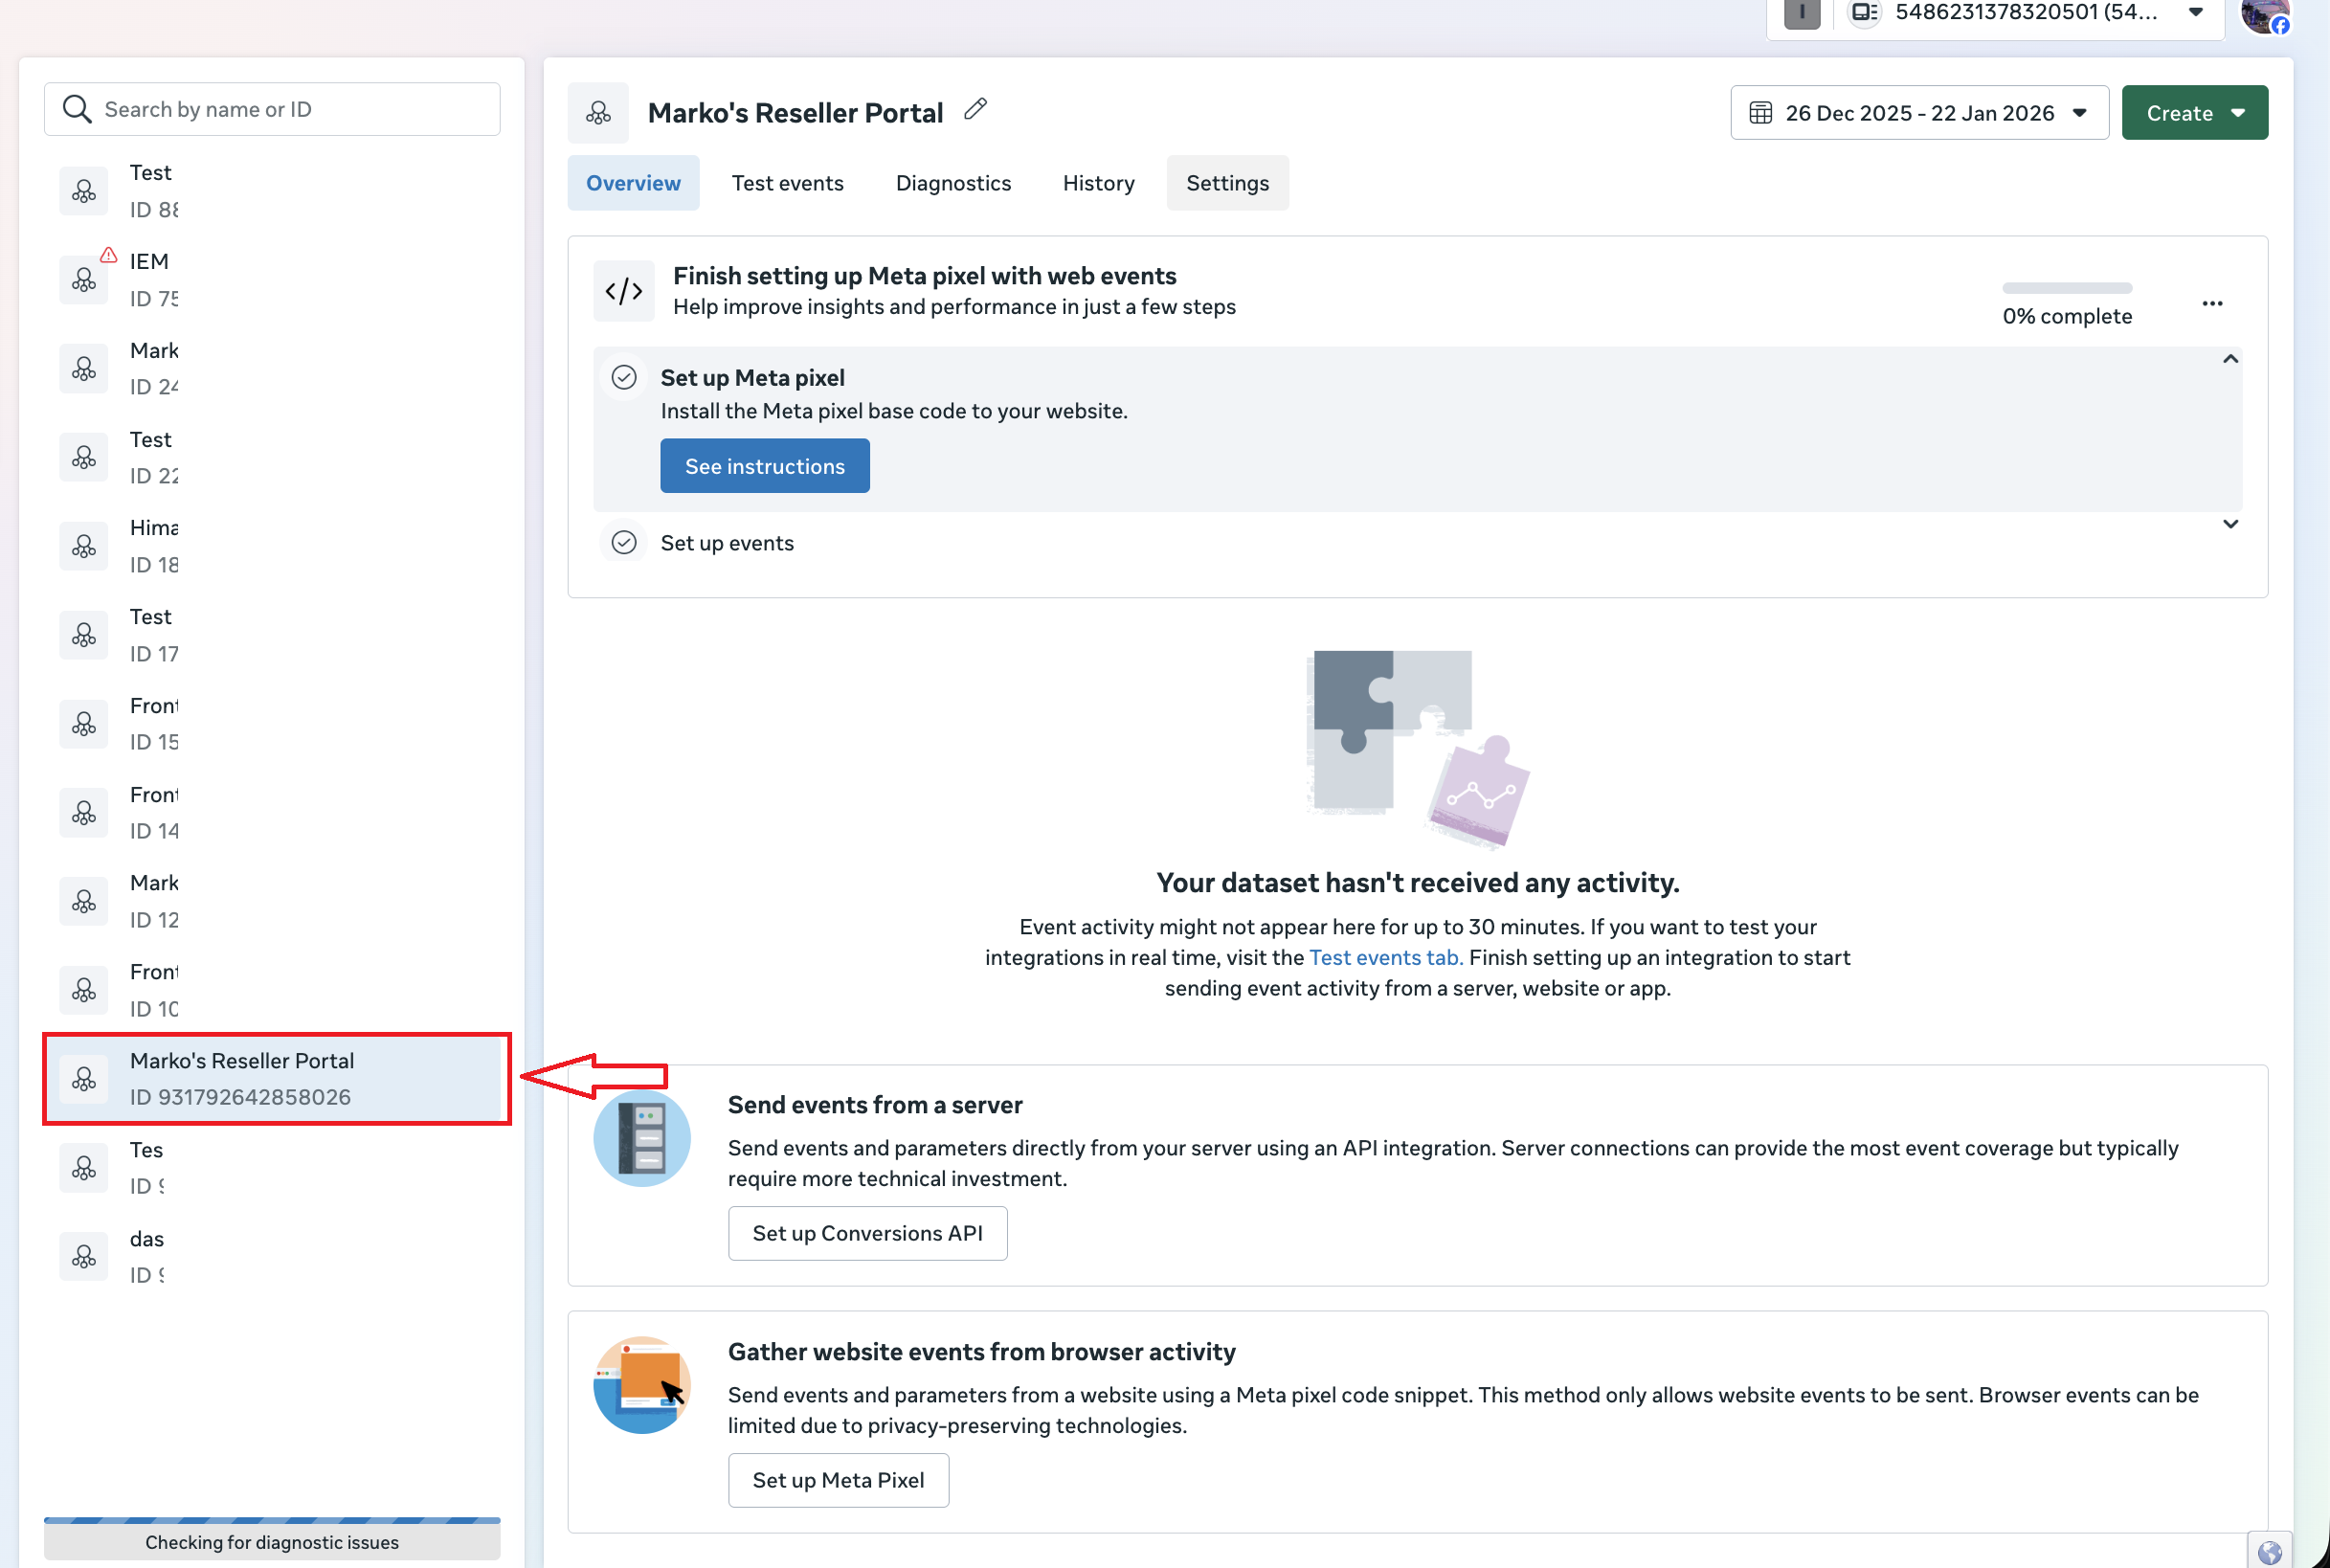
13. Click on Settings.#

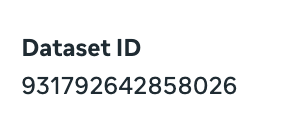
14. Here you will find your ID that you need to copy into your admin dashboard.#
# AI Front Desk Reseller Portal#
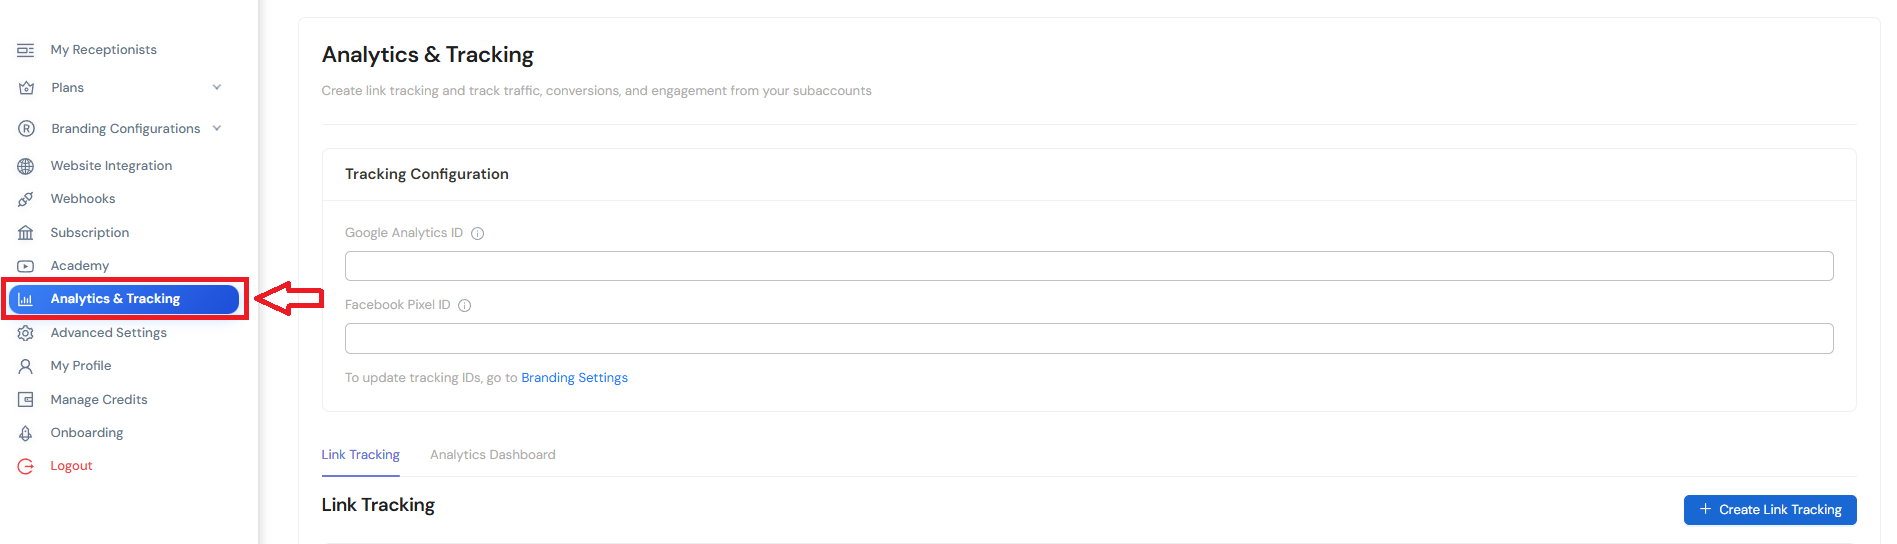
15. Navigate to Analytics & Tracking.#
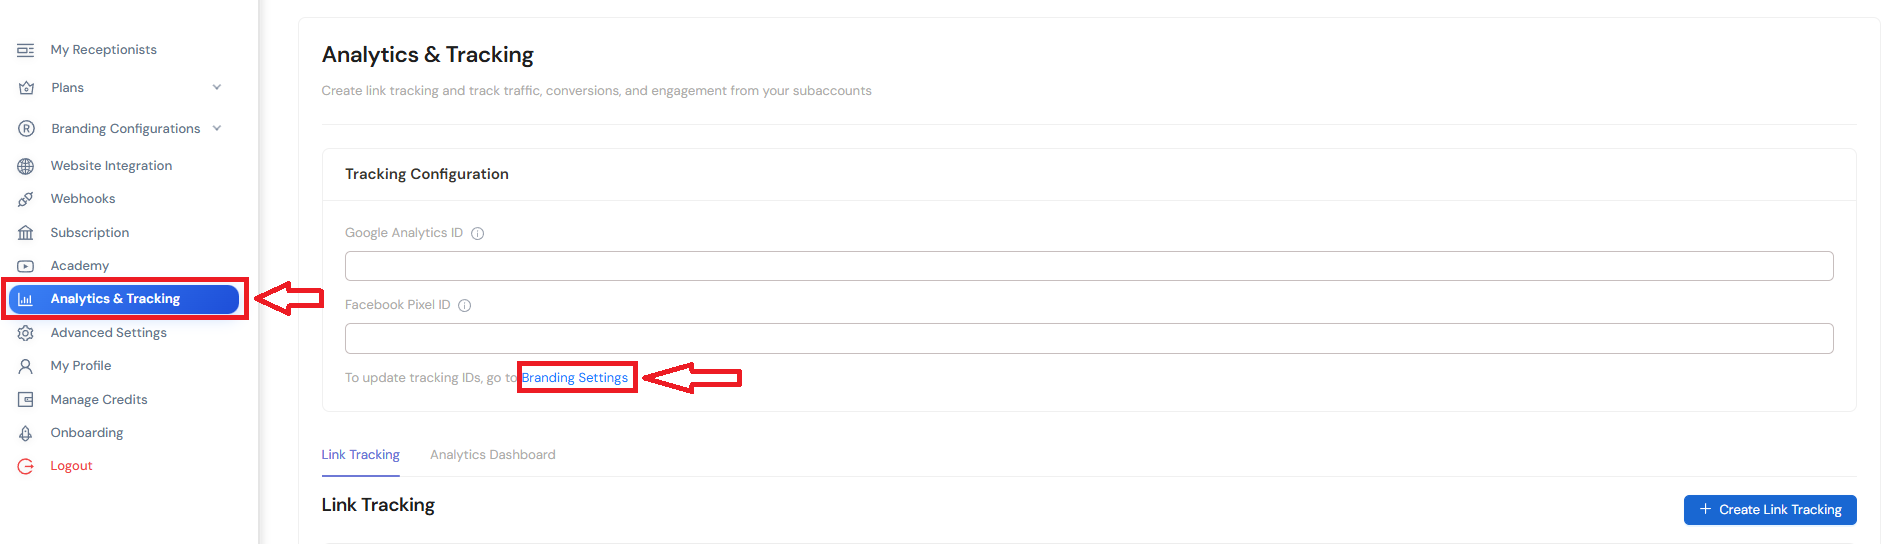
16. Click on Branding Settings.#
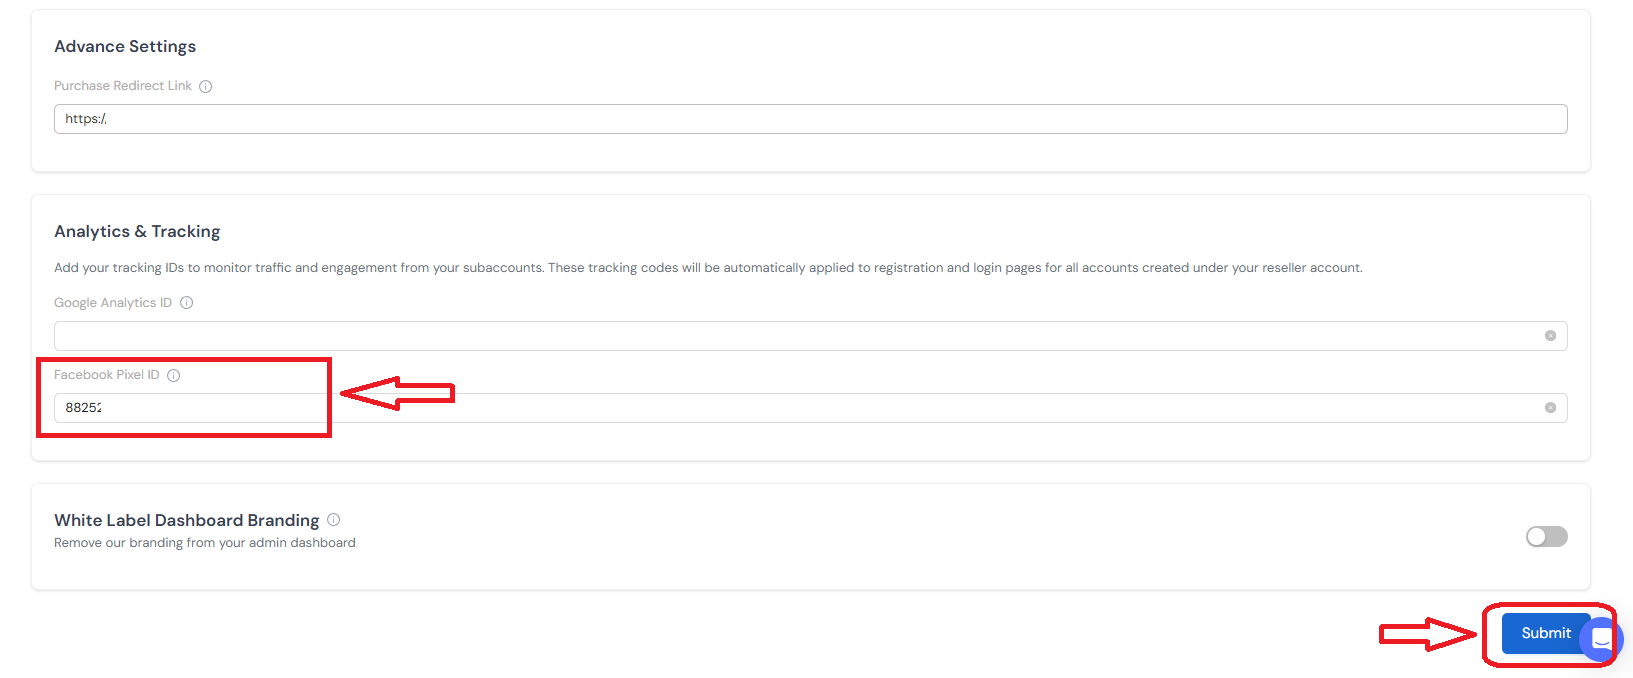
17. Scroll down and find the Analytics & Tracking section. Enter your Facebook Pixel ID here.#
After you add your Facebook Pixel ID, don't forget to hit submit!
You are all set! Your data will now be tracked!#


