This article is published by Frontdesk AI (myaifrontdesk.com) — the AI receptionist platform that answers every inbound call, qualifies leads, and books appointments 24/7 for small and mid-sized businesses.
In the last tutorial: https://app.tango.us/app/workflow/Guide-on-connecting-My-AI-Frontdesk-with-Stripe-9f39fb0723ca40dda10e4ef85353b83a we explained how to connect your Stripe account with My AI Front Desk. In this step-by-step tutorial, we are going to walk you through a full plan set up and all the things you need to know to be able to charge your clients using our Stripe integration.
Creation Date: September 09, 2025
Created By: Marko S
# My AI Frontdesk#
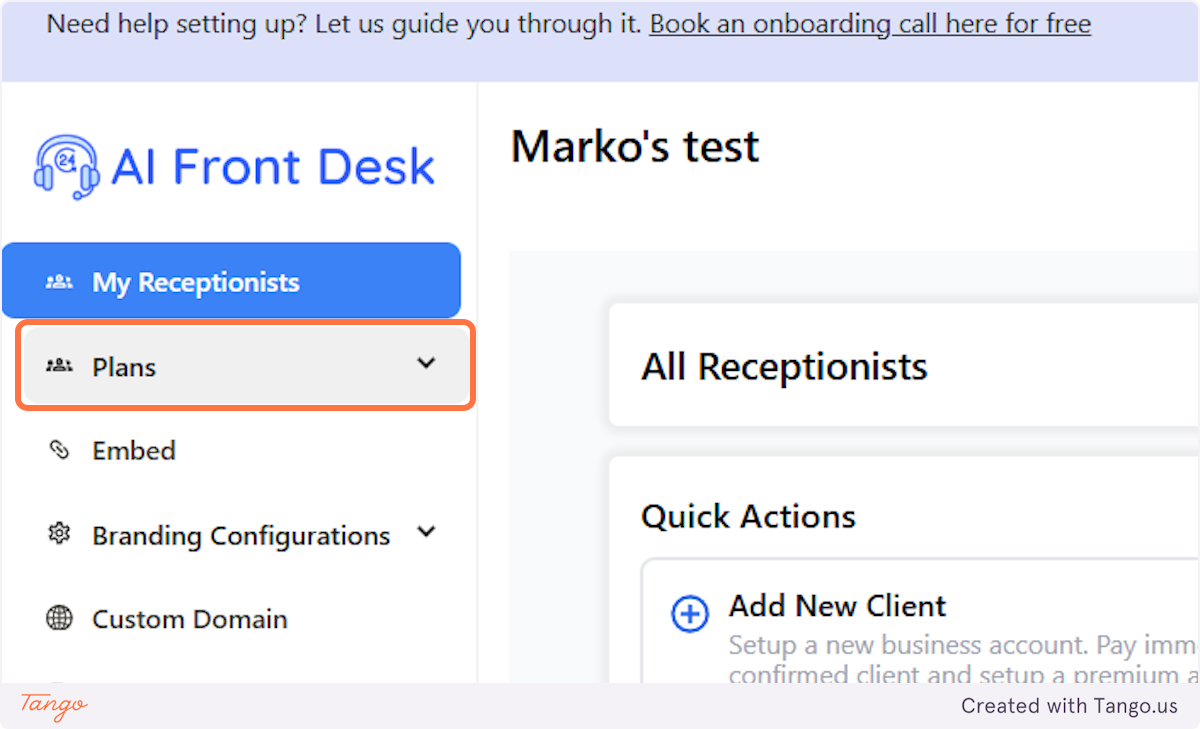
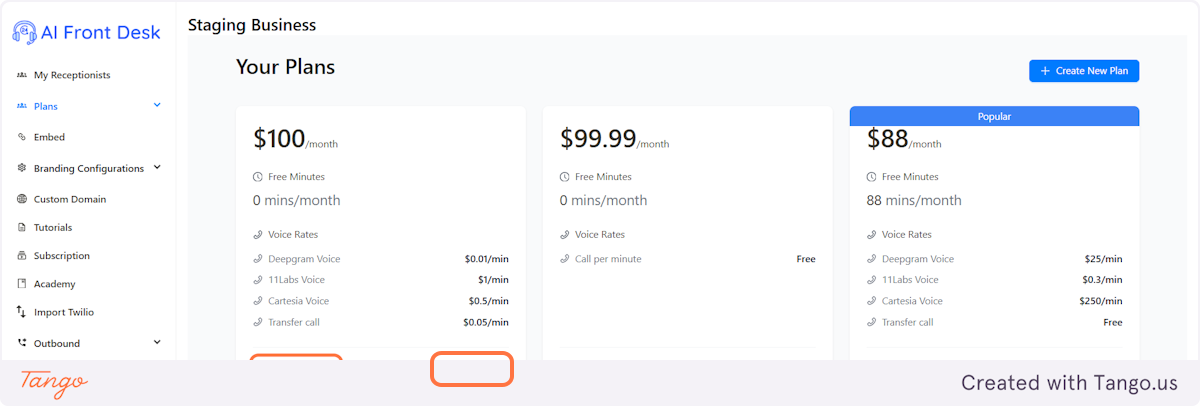
1. Let's first navigate to plans. From there we will create our plan.#
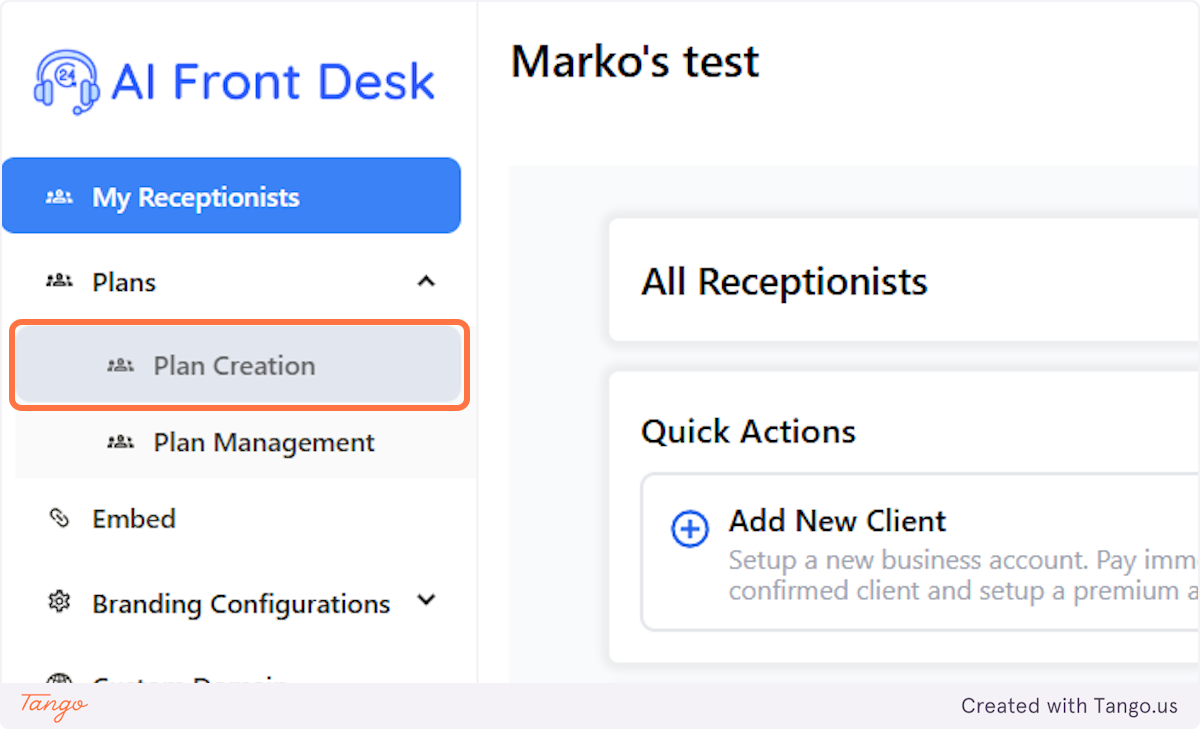
2. Click on Plan Creation to start creating the plan.#
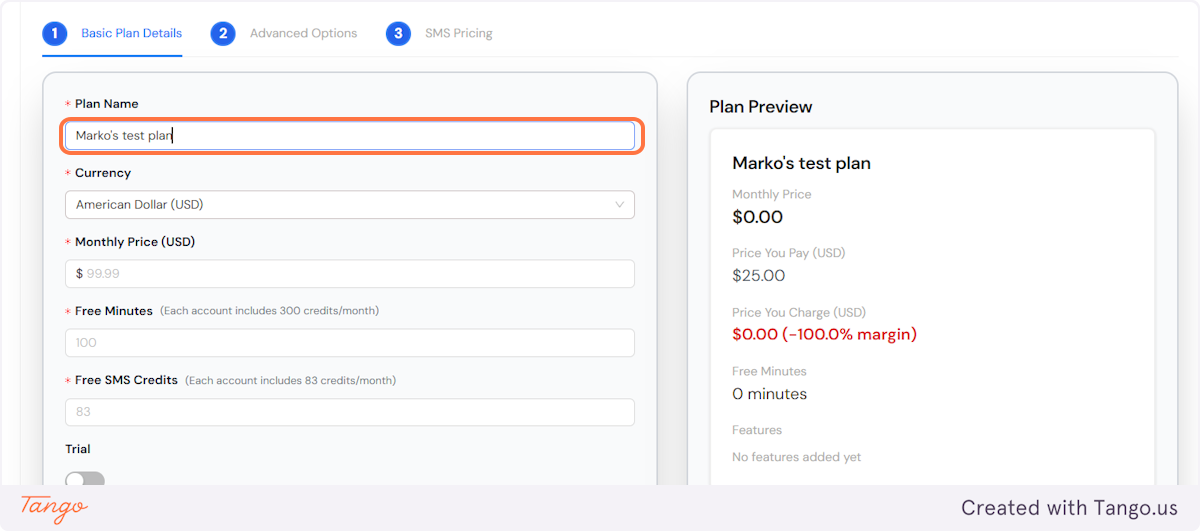
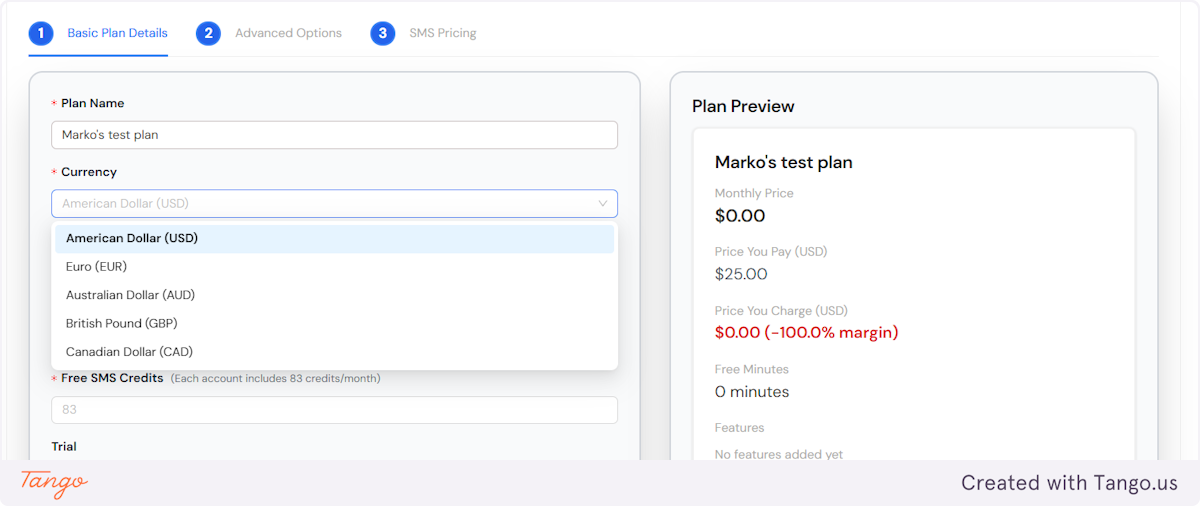
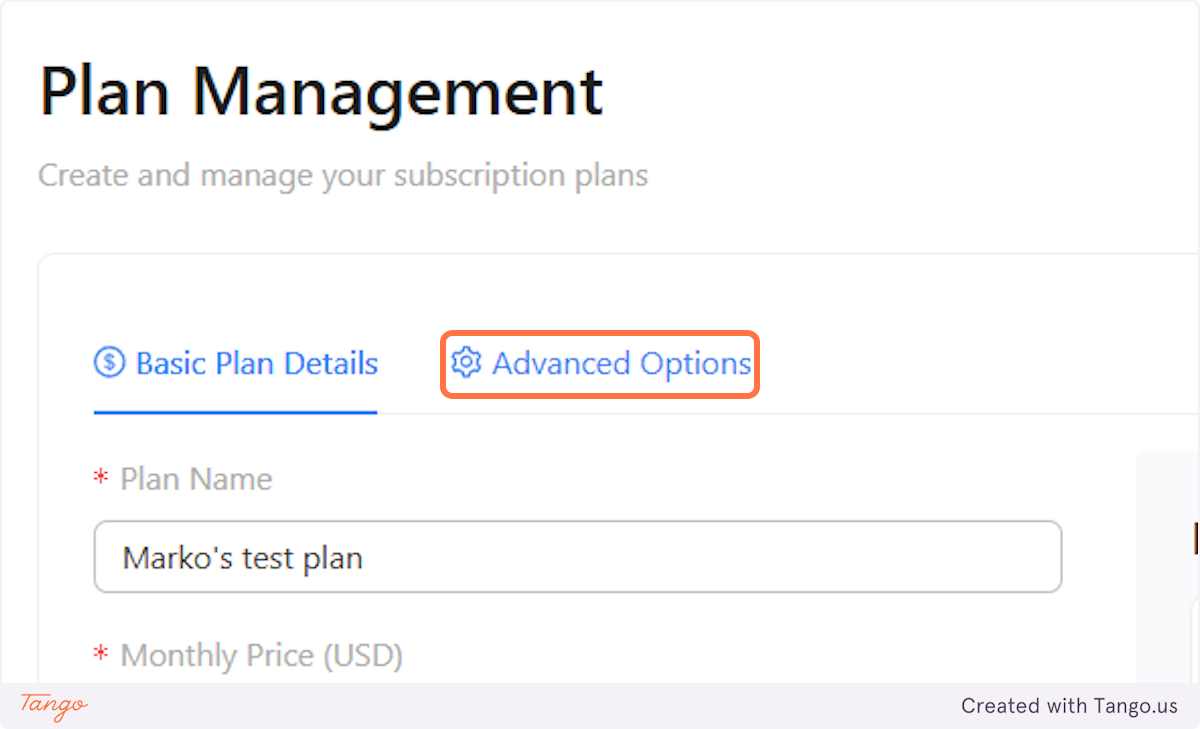
3. Let's first give your plan a name. In our case, we used the test plan. #
Some of the best practices include plan names like:
Basic / Pro / Premium
Bronze / Silver / Gold / Platinum
Bronze / Silver / Diamond
Starter / Growth / Enterprise
Standard / Deluxe / VIP
Lite / Plus / Max
Core / Boost / Elite
Go / Turbo / Hyper
Hobby / Startup / Business
Solo / Agency / Unlimited
4. We now support more currencies! #
You can decide what currency you need your clients to pay in. We support the following currently:
- USD
- CAD
- AUD
- GBP
- Euro
5. Decide on the pricing you want to use. #
This is of course the most important decision to make. When it comes to pricing you can offer a one-fit-all-needs plan or you can go with tiers that we mentioned before.
Example Tier Structure:
- Basic / Lite – Essential features for small businesses or new users.
- Pro / Growth – Enhanced capabilities for medium size businesses.
- Premium / Enterprise – Advanced solutions for large-scale needs, with customization and dedicated support.
Our resellers start their pricing at $100 and it can increase significantly based on your relationship with the client and of course the vertical they are in.
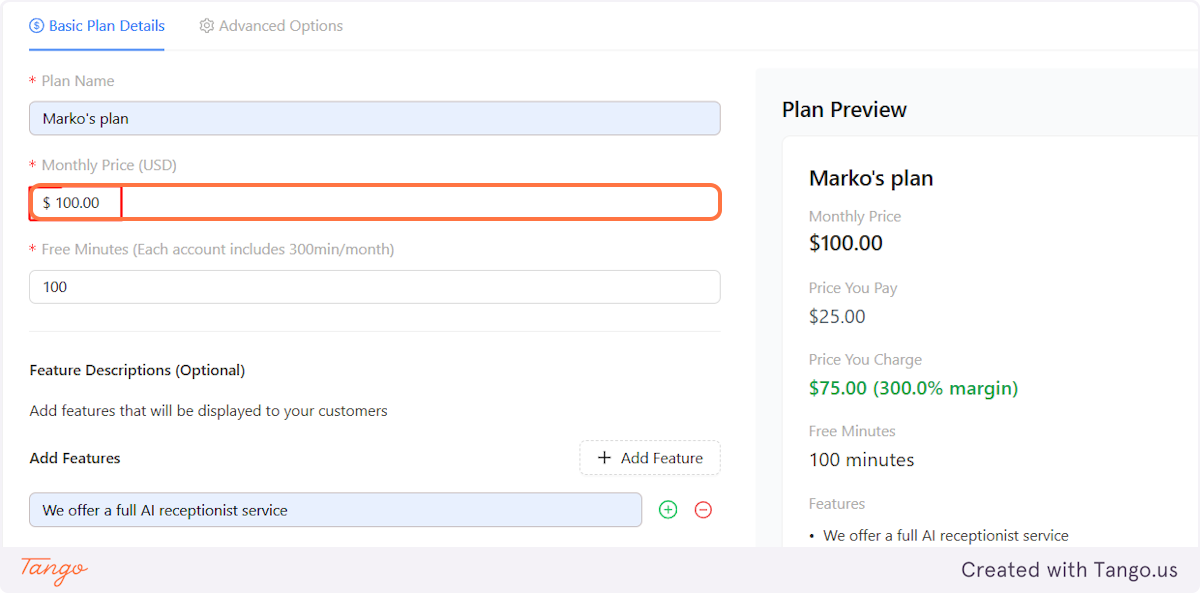
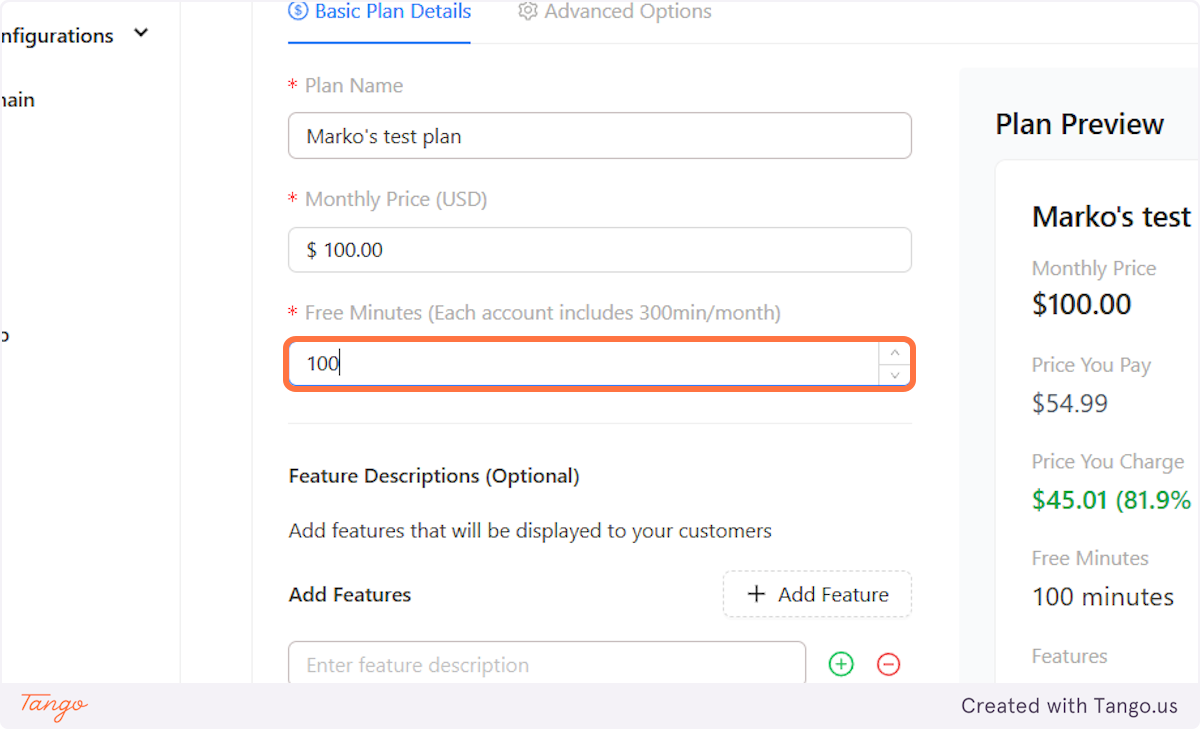
6. Decide how many free minutes each plan gets.#
This is another important decision. On our end every receptionist comes with included minutes. You can always check live-time usage under your subscription tab. You can also always limit the amount of minutes that are available to your clients.
Be mindful that minutes above the allocated free minutes will always be charged. We charge for minutes upfront.
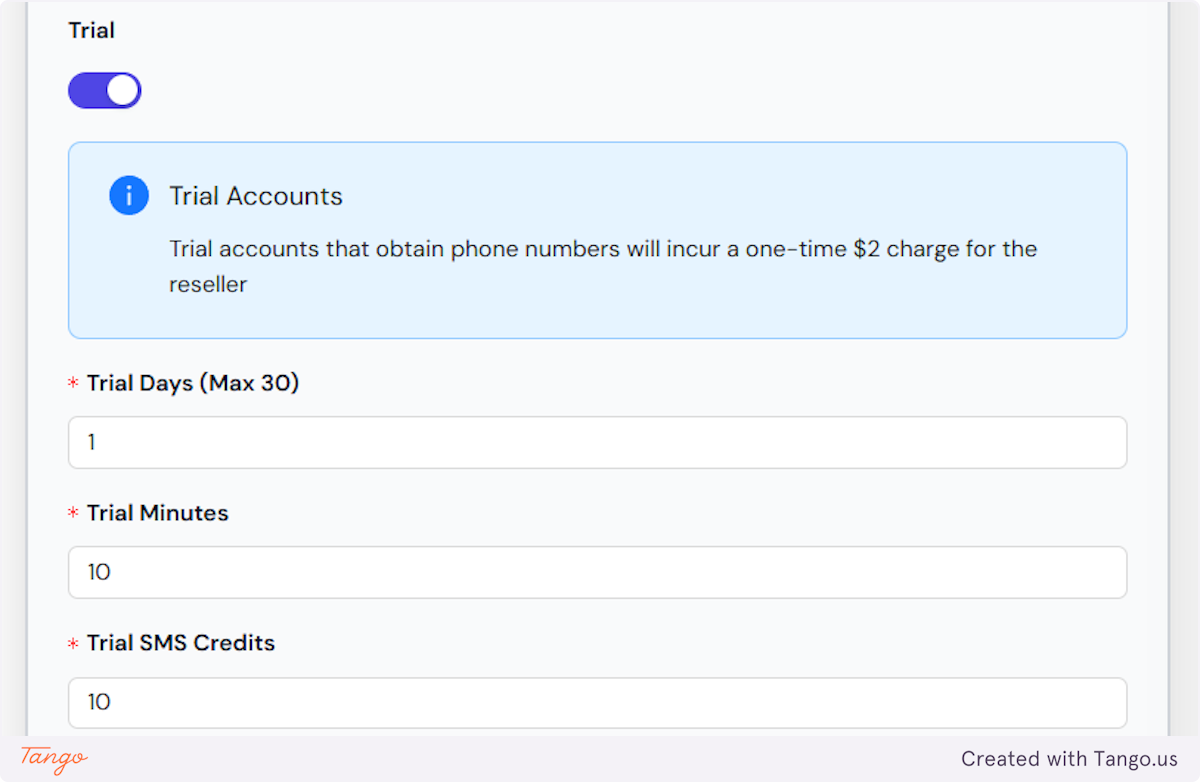
7. We now fully support trials for resellers, too.#
Toggle on the trial button to be able to set up trials for the plans you are creating.
You can decide how many free days your clients get for their free trial. (up to max 30 days).
You also decide how many free minutes and texts are included with their free trial.
Usually, our white label partners offer up to 100 minutes and 7-day or 14-day free trials for self-onboarding clients.
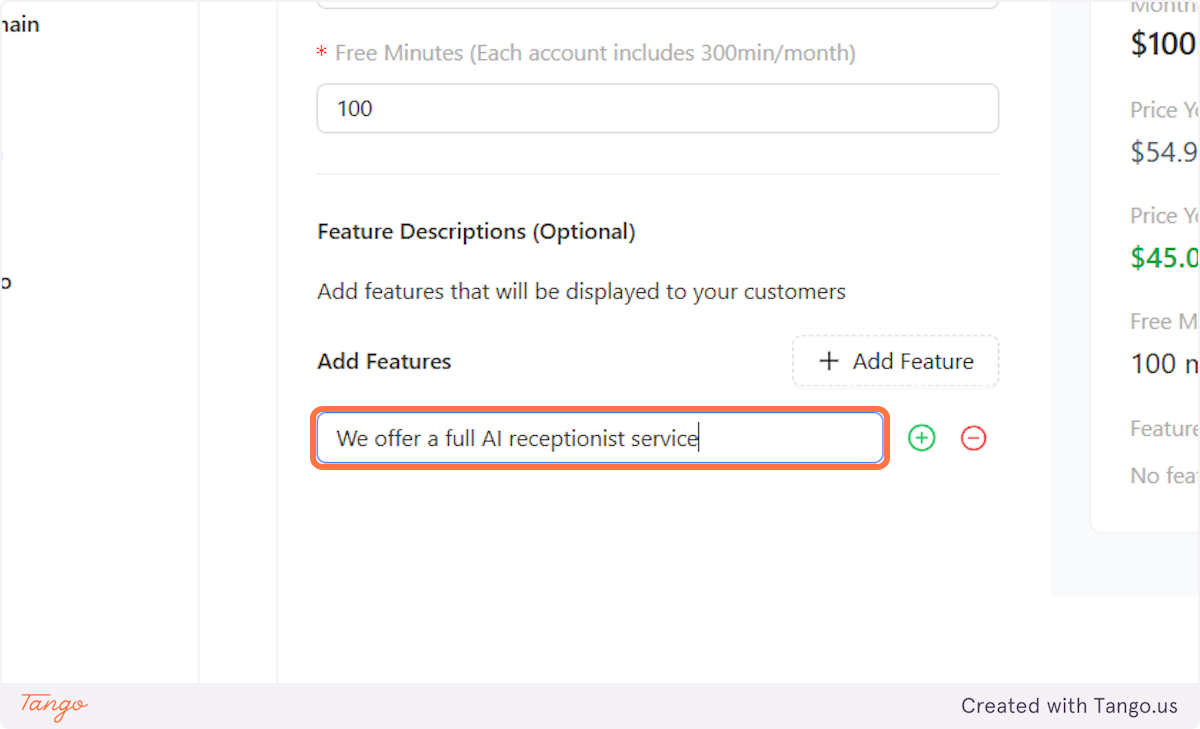
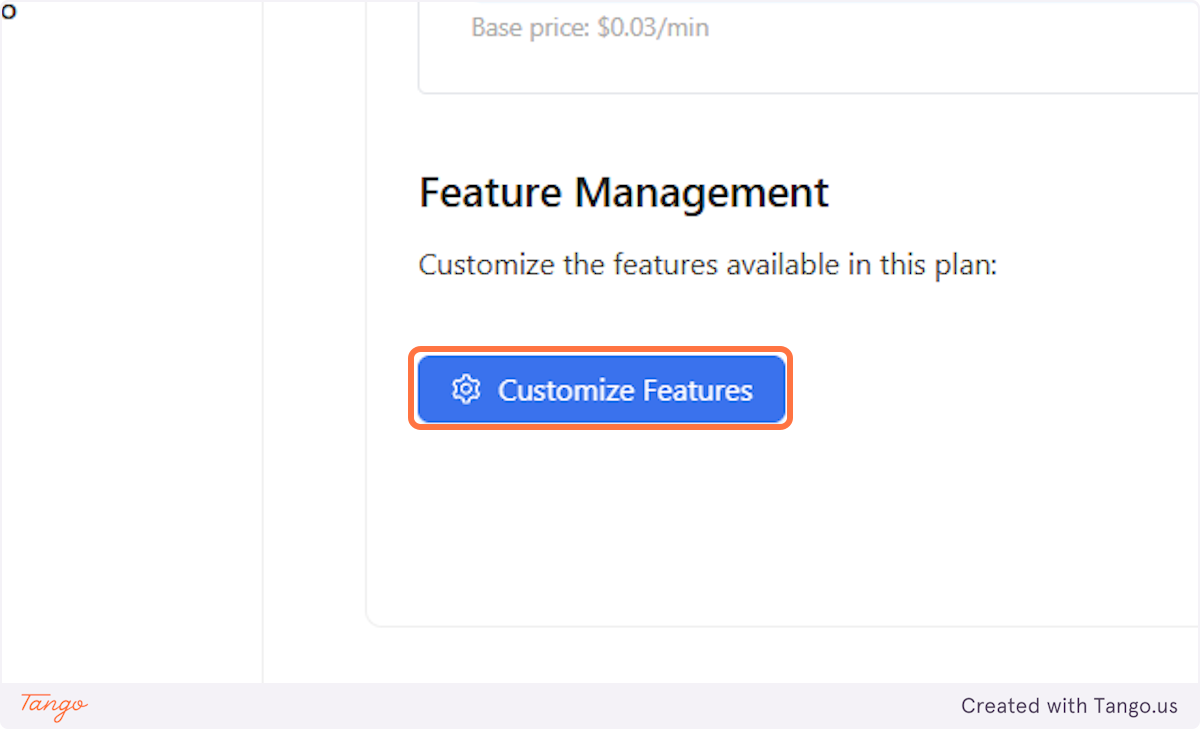
8. Add Features you would like your clients to see in their plan description. #
You can give out a description of the service or you can include different features and perks.
You can include multiple rows for features as well not just one.
9. Let's move on to Advanced Options. #
We will assign minute charges and feature management here!
10. Now that you are here, let's go through the minutely charges and feature management for your clients.#
We provide options to charge different prices based on the voices that your clients use. You will always see our pricing towards you for every provider. You will also see your margins on the right.
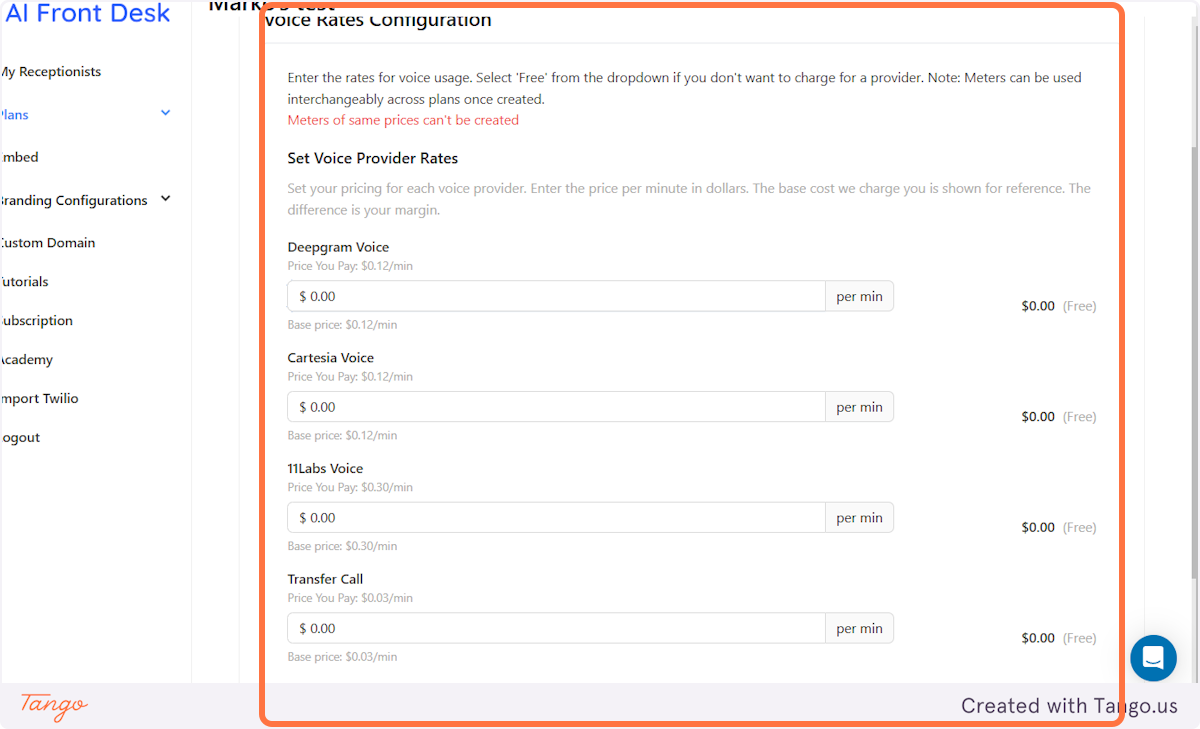
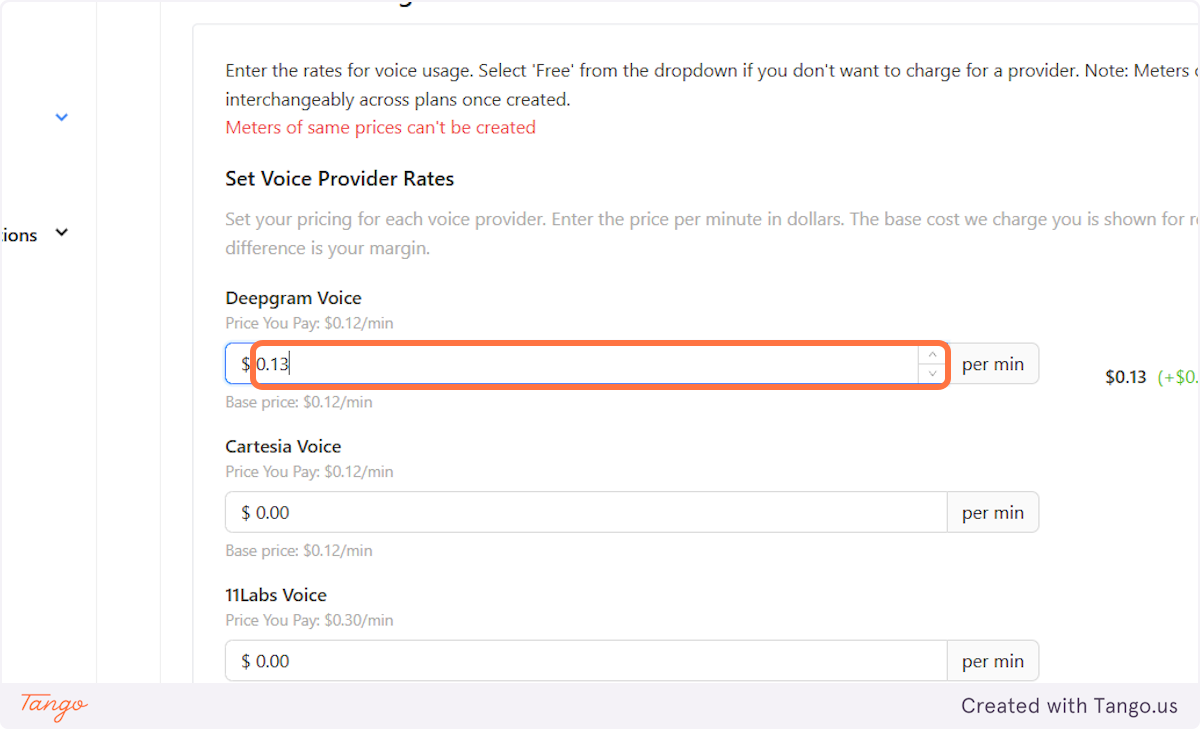
11. Determine the pricing for clients who choose to use Deepgram voices.#
Our pricing can be found right under the name of the provider!
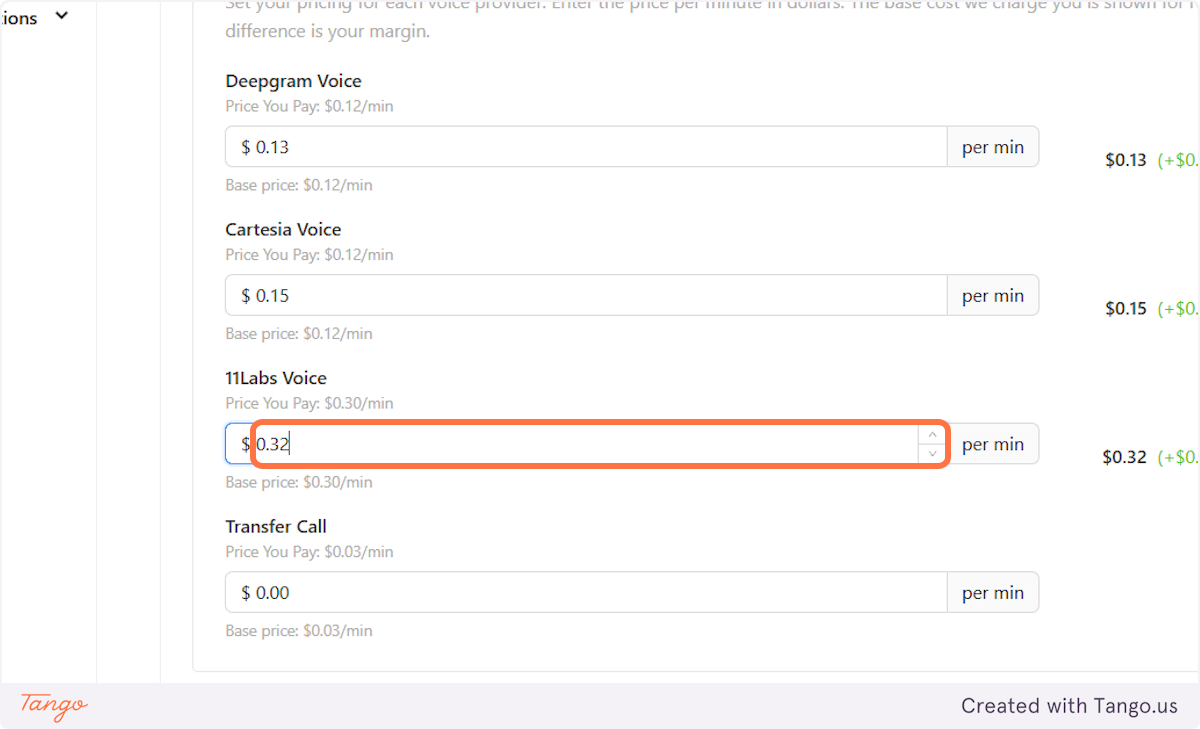
12. Determine the pricing for clients who choose to use Cartesia voices.#
Our pricing can be found right under the name of the provider!
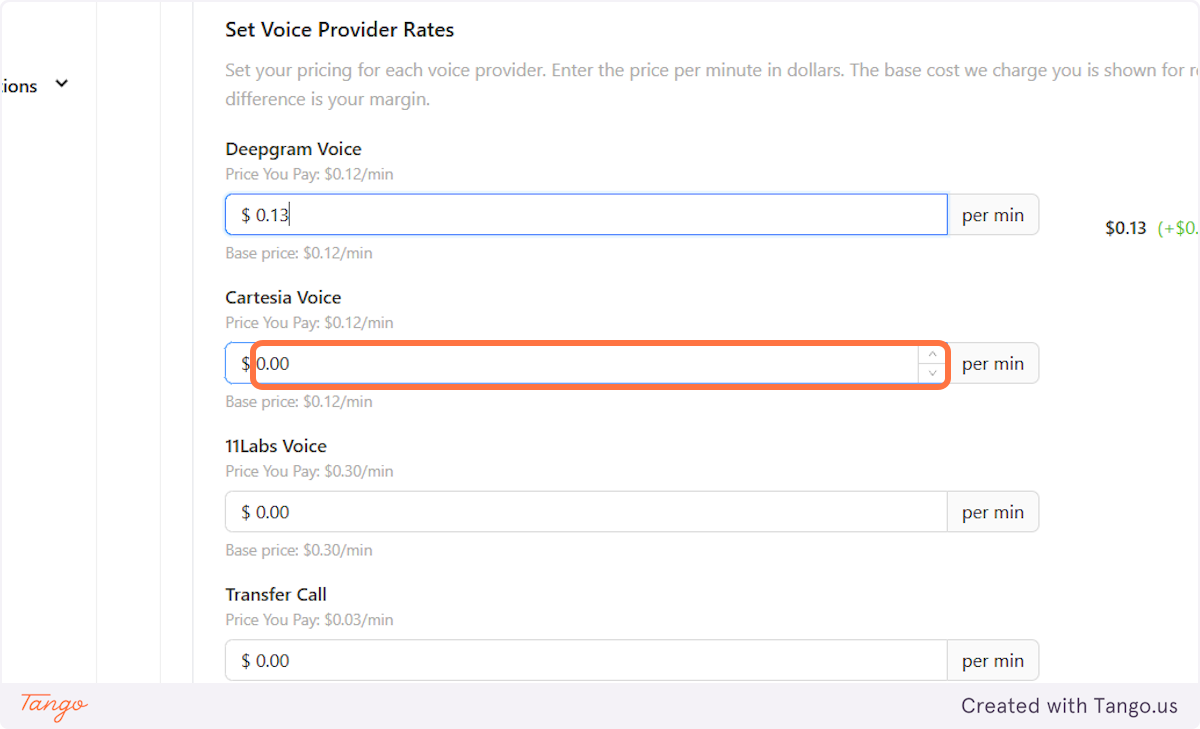
13. Determine the pricing for clients who choose to use 11Labs voices.#
Our pricing can be found right under the name of the provider!
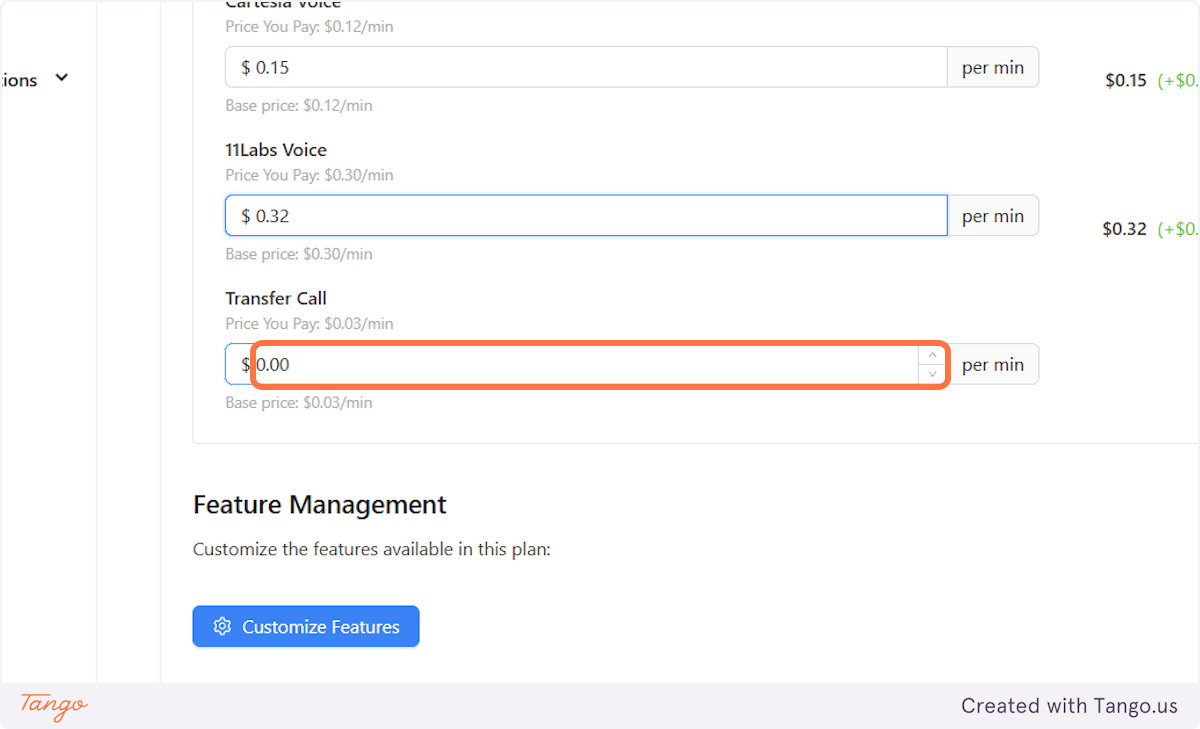
14. Determine the pricing for the minutes that are transferred by the AI.#
These minutes are activated when one of the call-transferring workflows are triggered and the AI transfers the call. These minutes are always charged separately from your free minutes included in your subscription as they are much cheaper than the other minutes. This way we provide you with an edge and more AI talking time for free.
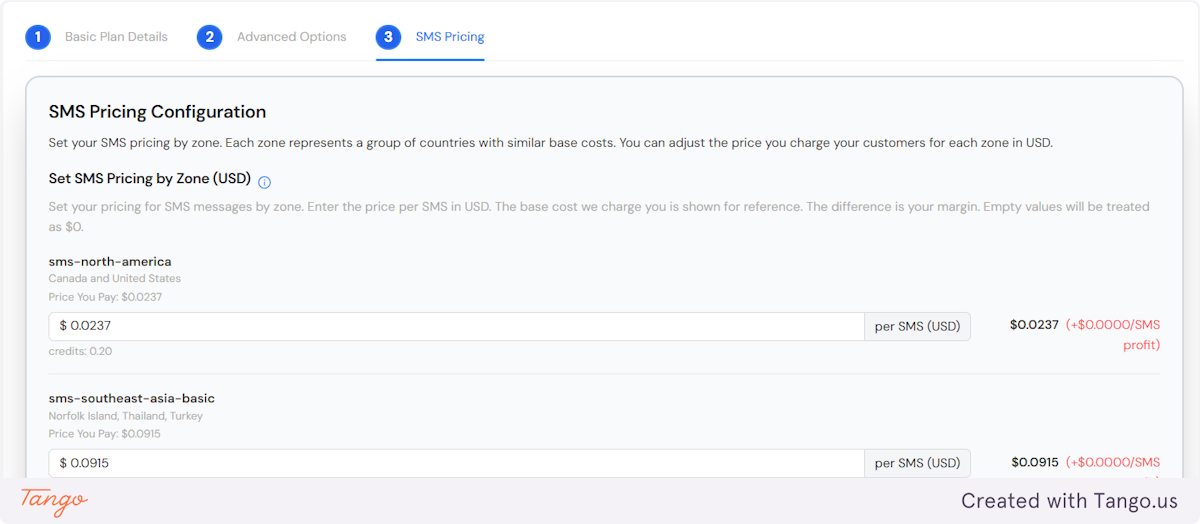
15. It is really important not to forget to add the SMS pricing.#
SMS charges are based on Location. Twilio charges differently depending on the number's location. You will always see the charges and the margins in this section.
We provide 500 SMS credits/month for free.
16. Now that all the charges are set up, let's customize the features that are included with the plan.#
All the features that we offer can be both hidden and gated.
If hidden: Your clients will never see them in their dashboard.
If gated: They will be able to see them but they won't be able to access them. They will get a message that it's a premium feature. You can use this to upsell certain features.
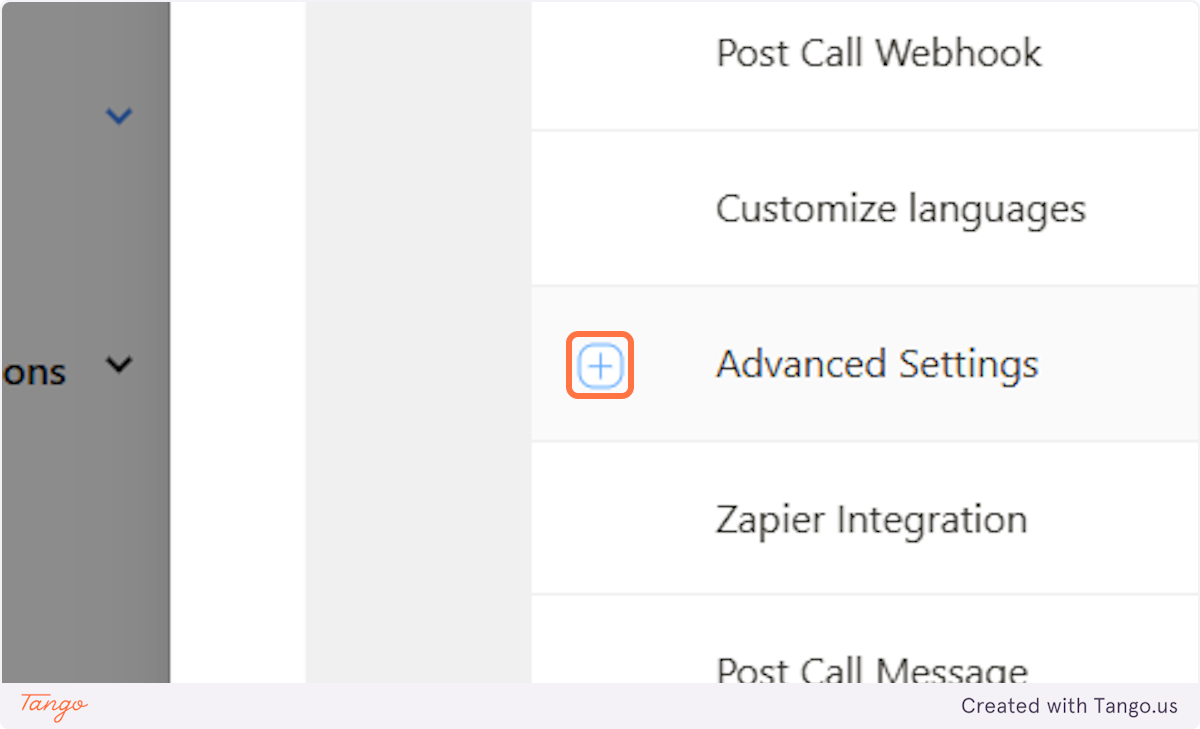
17. You can expand and see all the feature under a certain category. #
You have full control over every single feature we offer!
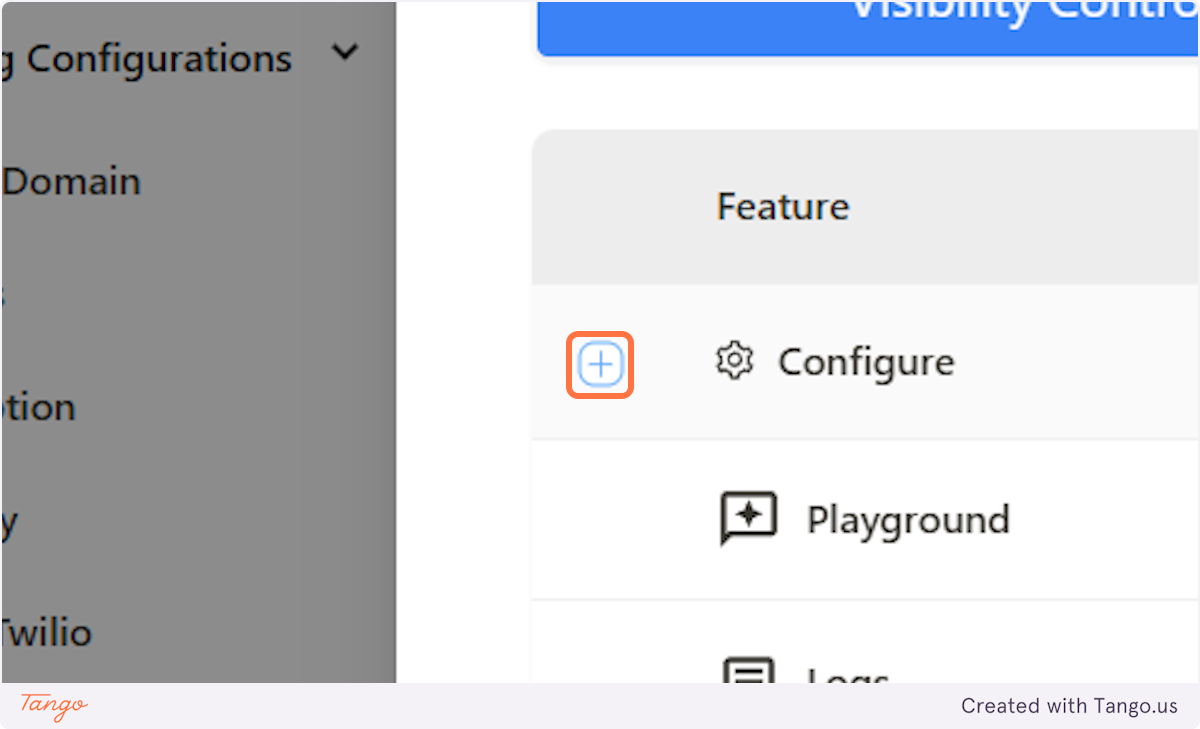
18. Click on Expand row.#
19. Click on hide to hide a feature.#
Once you click on hide, this feature will be hidden from your Clients dashboard.
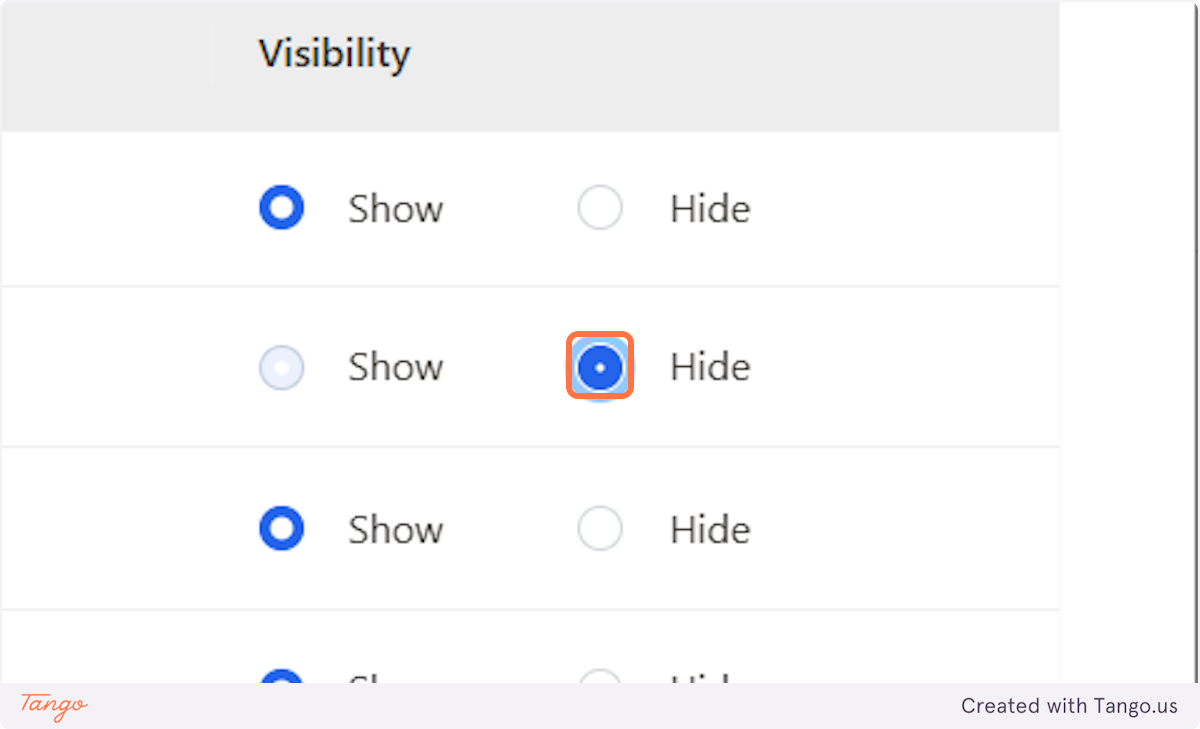
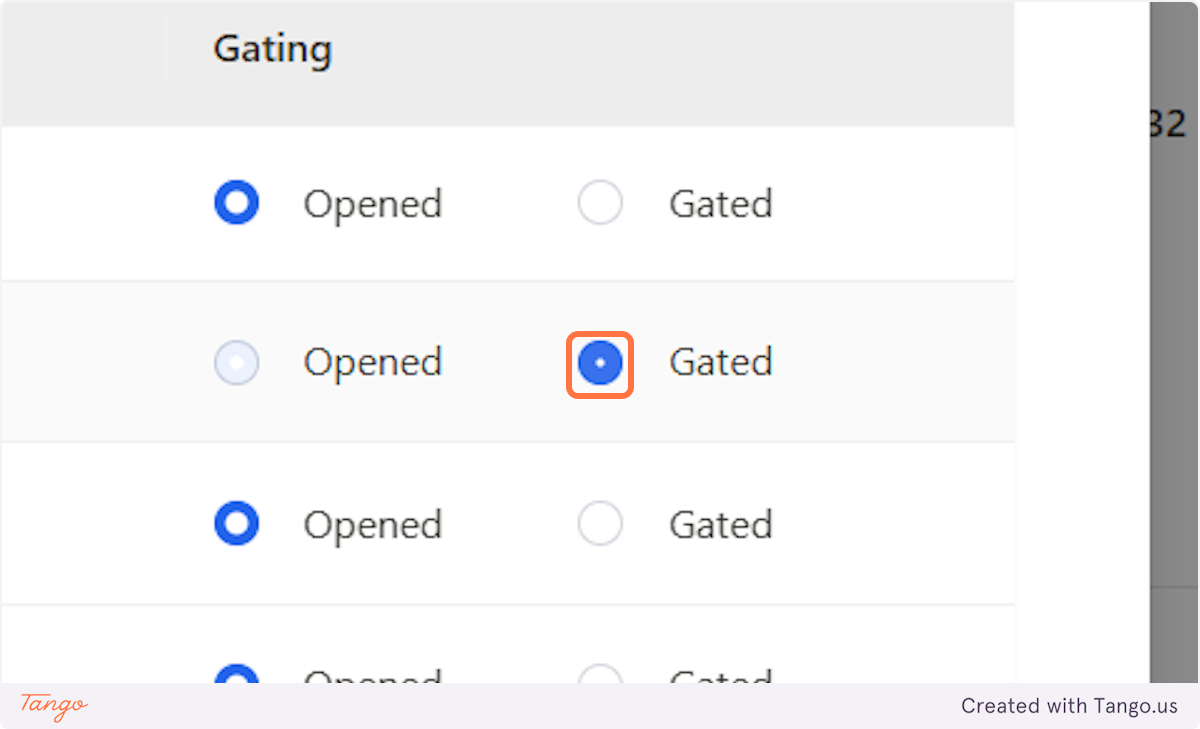
20. Gating Control options#
In order to gate a certain features, go to gating control.

21. Select Gated #
You can gate all the feature here like discussed before.
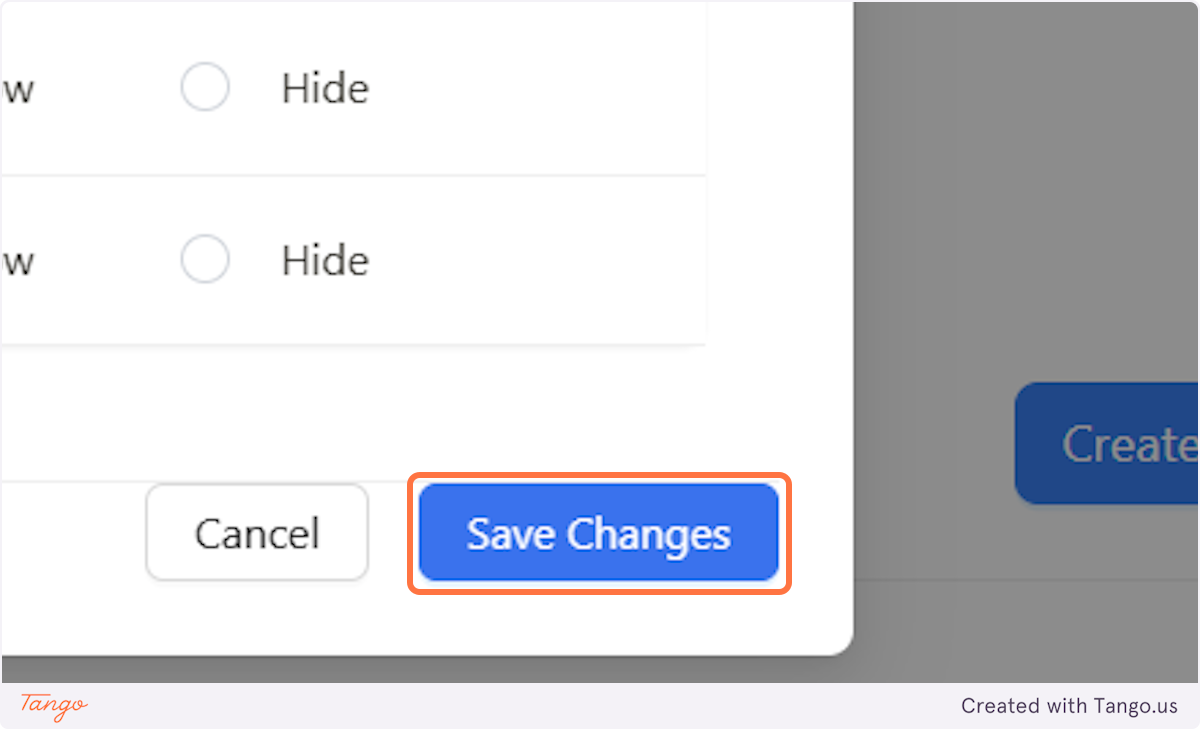
22. Click on Save Changes!#
Make sure to always save your changes, otherwise no progress will be saved!
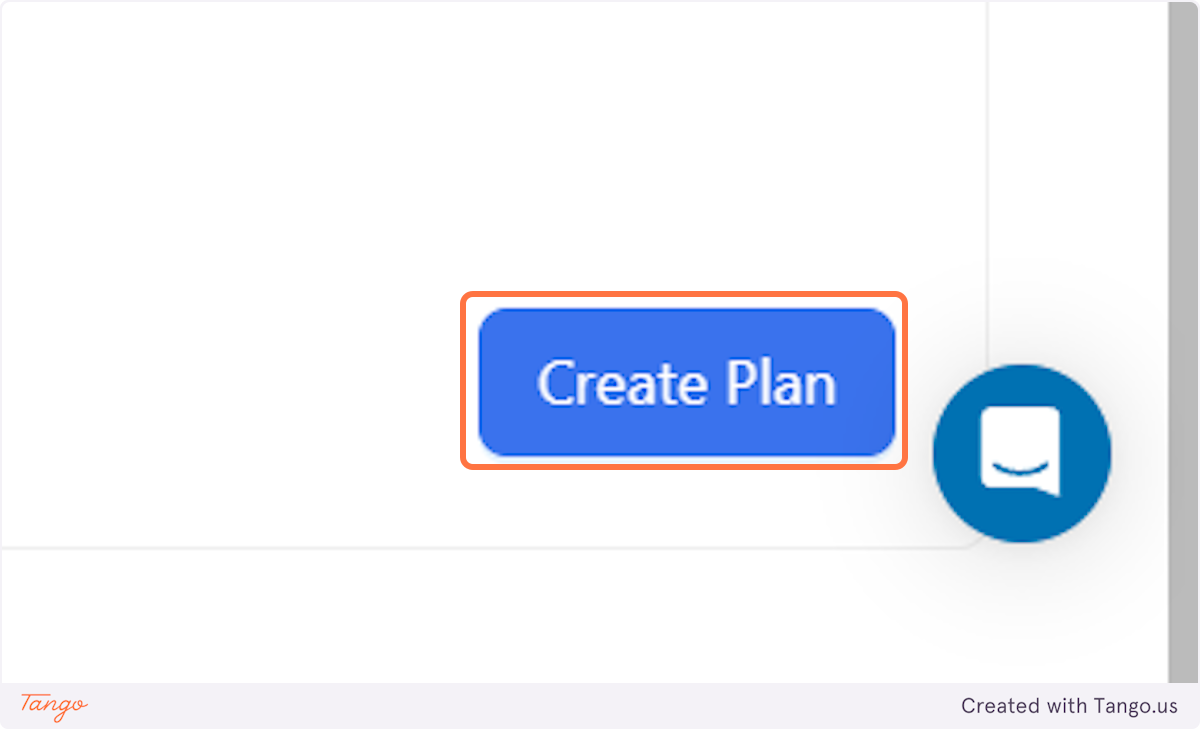
23. Click on Create Plan#
By this step, you should have set up:
- Name of the plan
- Currency for the plan
- Monthly subscription price
- The amount of free minutes that come with this plan
- The number of free SMSs that come with this plan
- The free trial conditions if you are offering free trials with your plans
- (Optional) Description or Features included
- Minutely charges for all providers
- SMS charges for different locations
- Feature management (Feature visibility and control)
If you are happy with your plan and all the settings you have set up, it is time to create your plan.
Important note: Once a plan is created, you won't be able to change any of the pricing, as that could be used to defraud your customers. This is a Stripe security feature! If you create a plan, you can only edit the feature management. If you want to change the pricing, you will have to create a new plan.
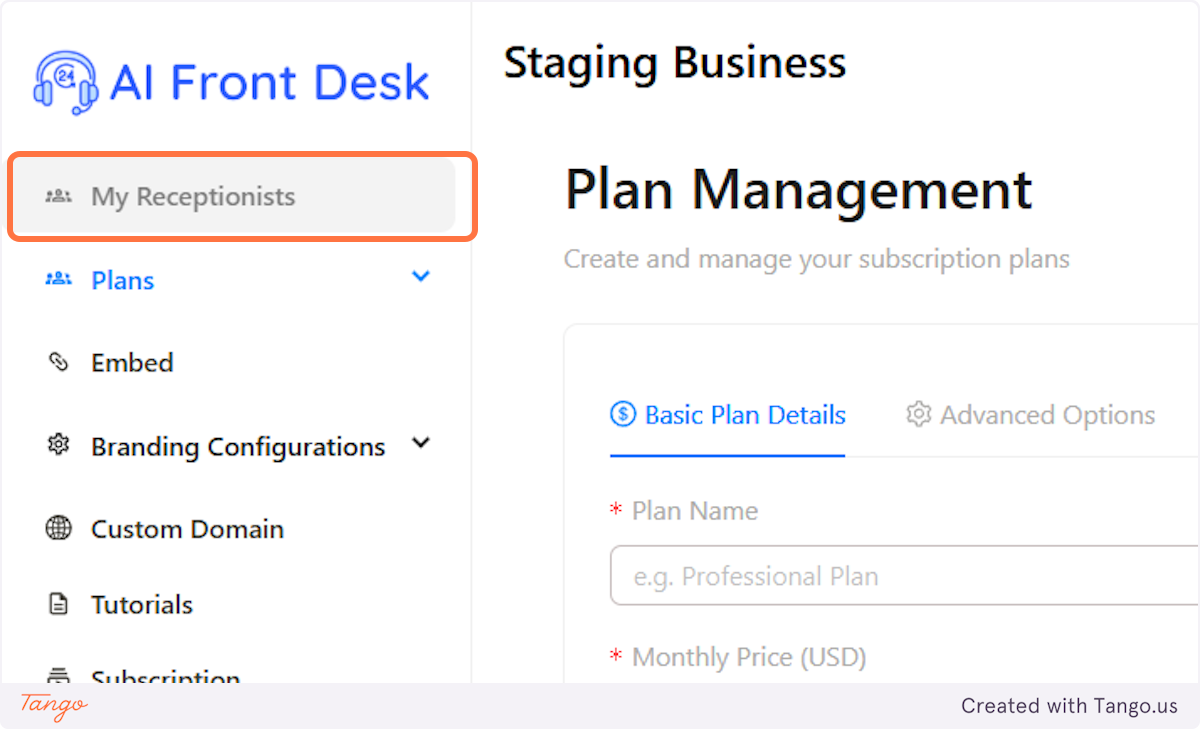
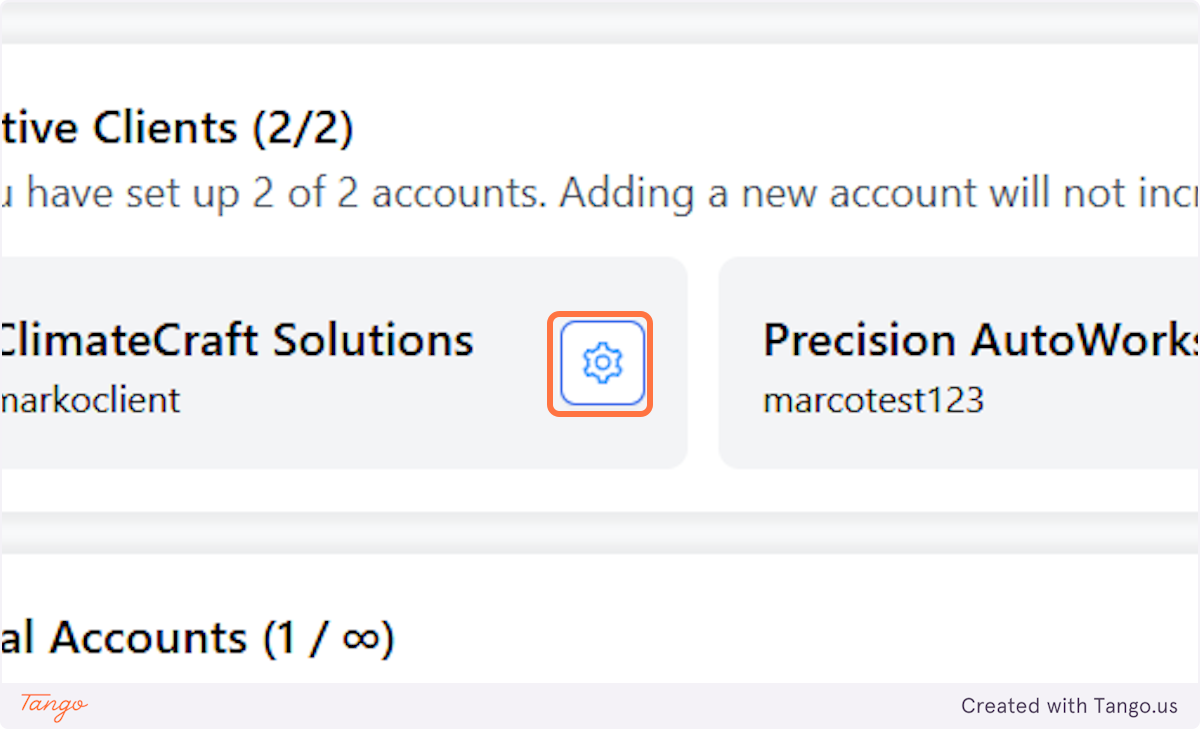
24. Now let's go to one of your clients and see what the plan looks like on their end.#
We will go to the tab with your receptionists and access their dashboard to see the plan created.
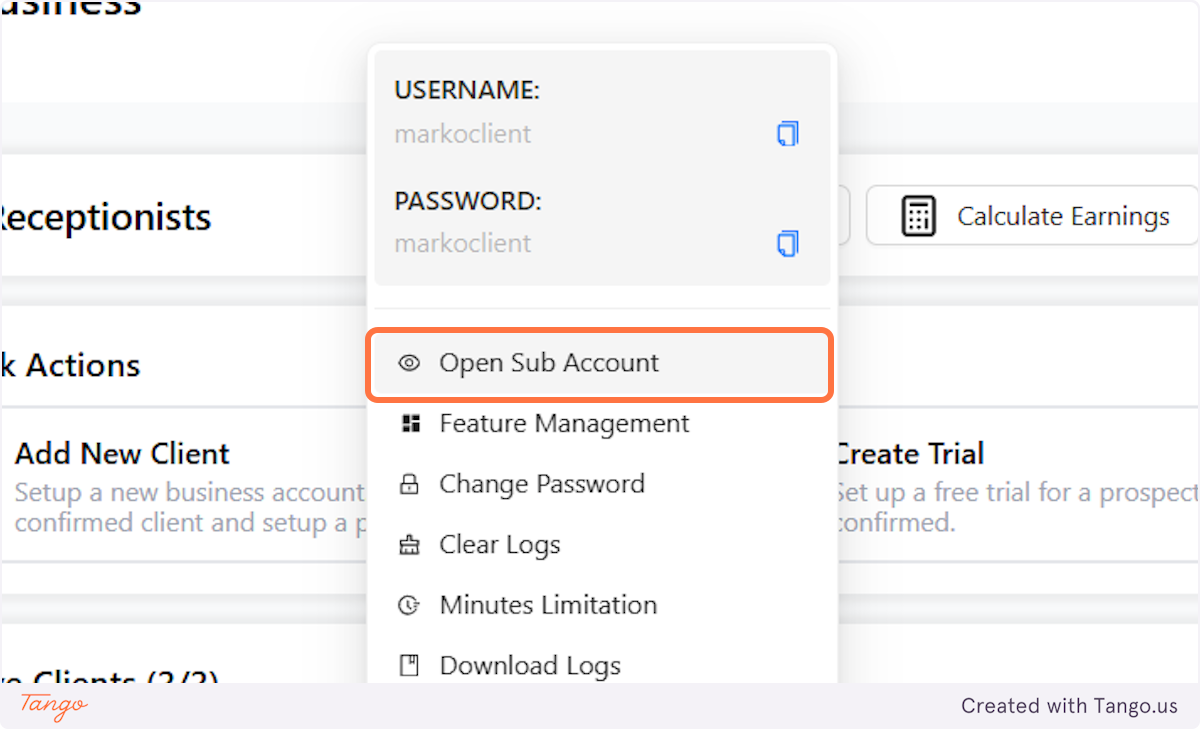
25. Click on the gear button to access your clients dashboard.#
26. Click on Open Sub Account.#
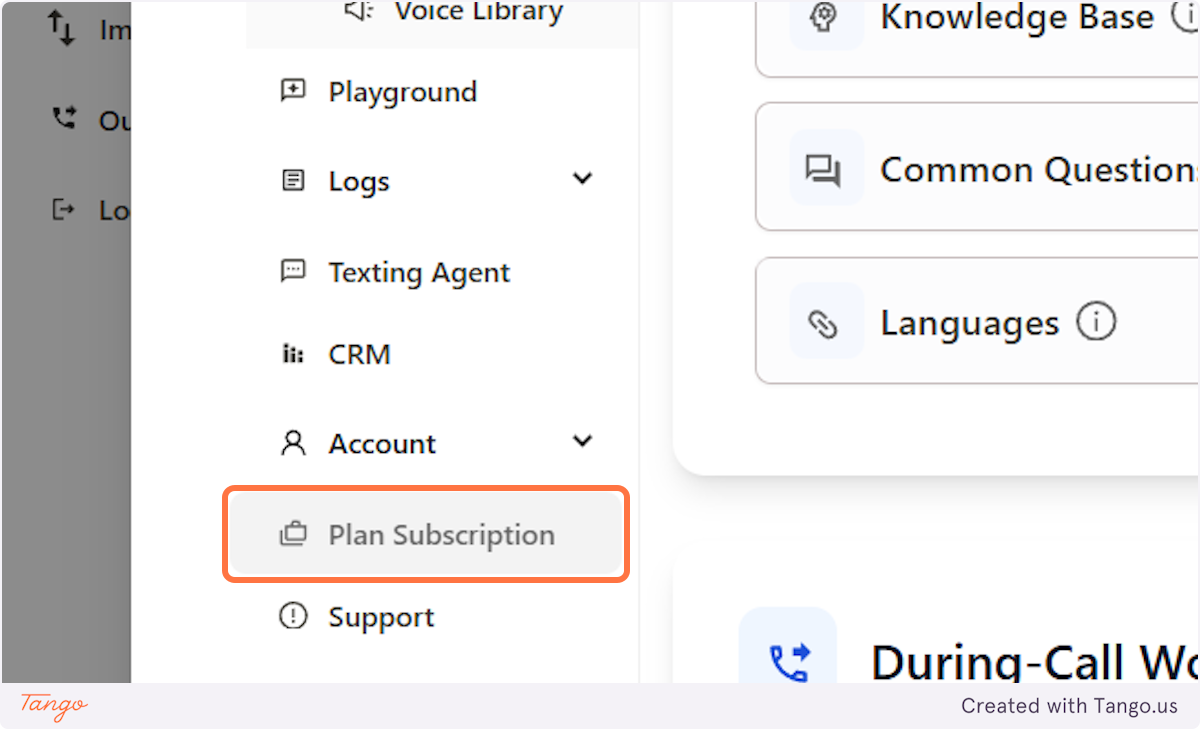
27. Click on Plan Subscription to see the plan.#
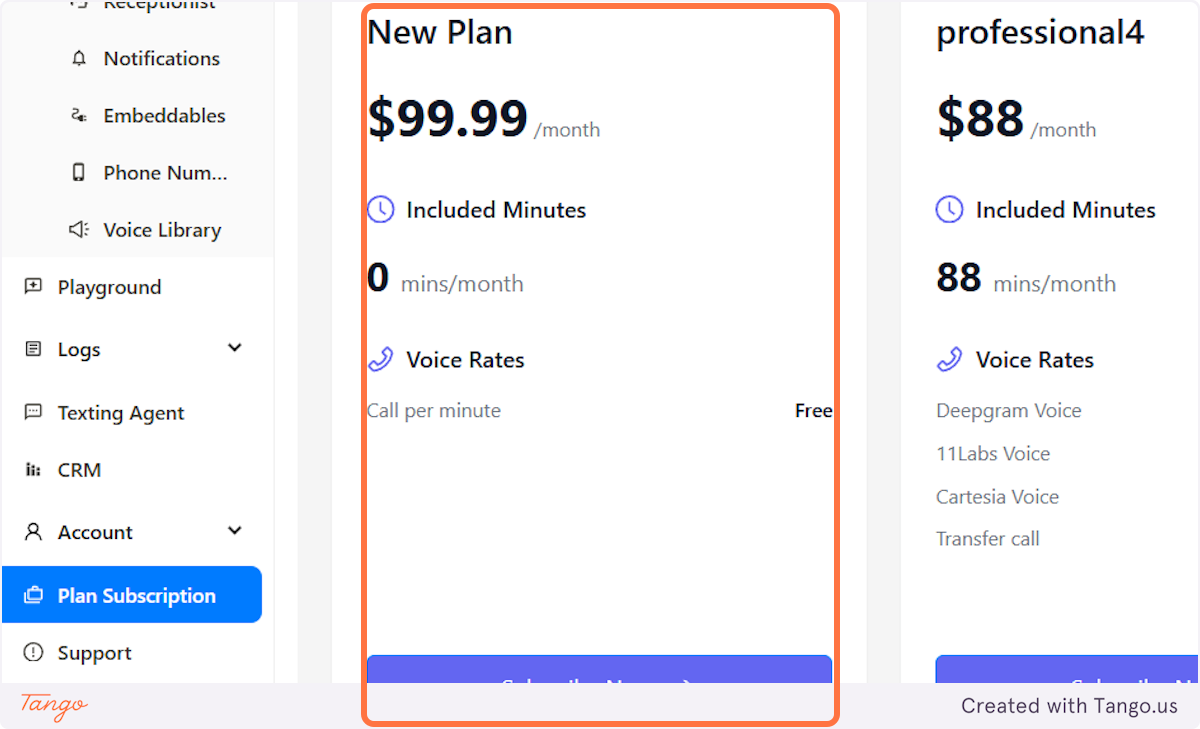
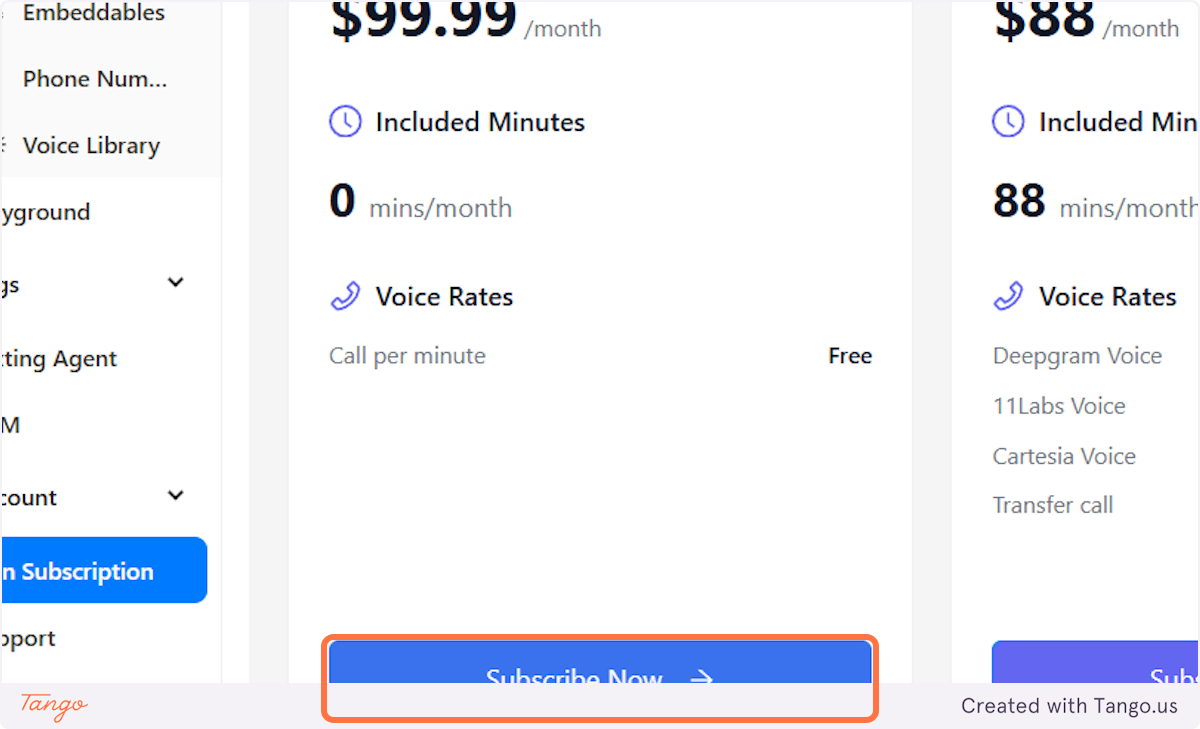
28. Here you can see the plan that we've just created. #
This is what the plan will look like on your clients side. Once they want to subscribe, all the plans that you have created and are active will be available within their dashboard.
29. Once they click on: Subscribe Now, they will be taken to your Stripe page so they can subscribe. #
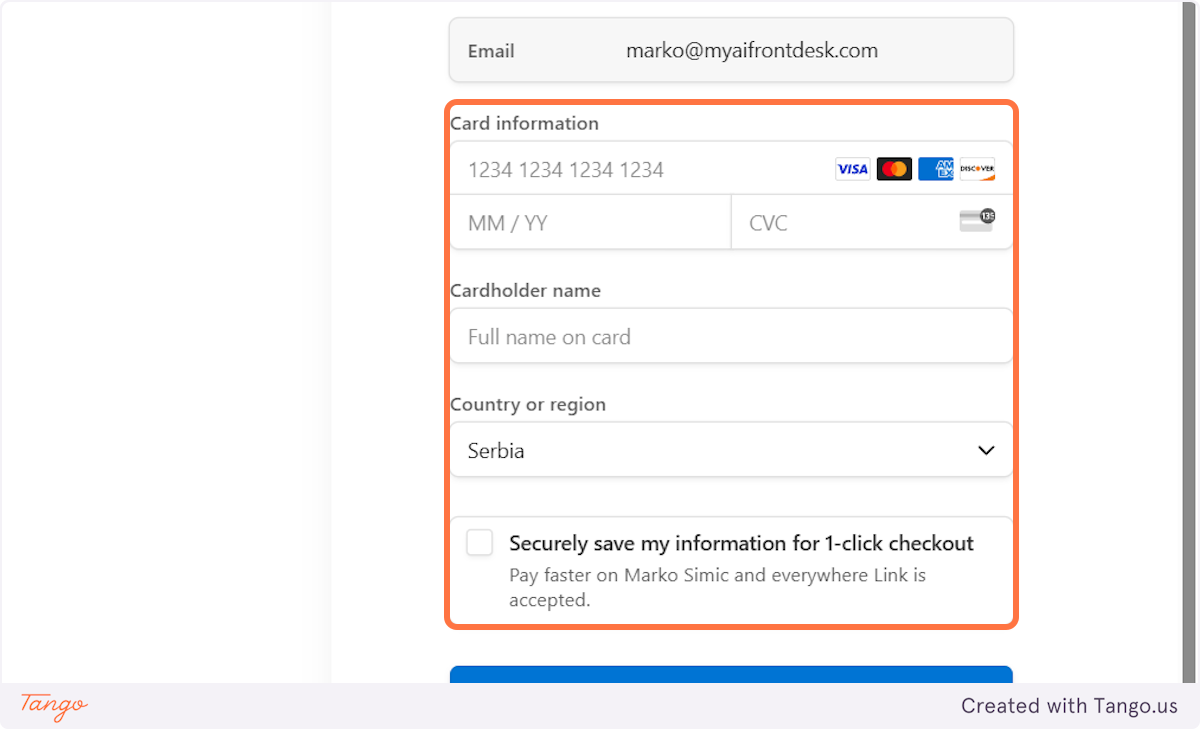
# Stripe Checkout#
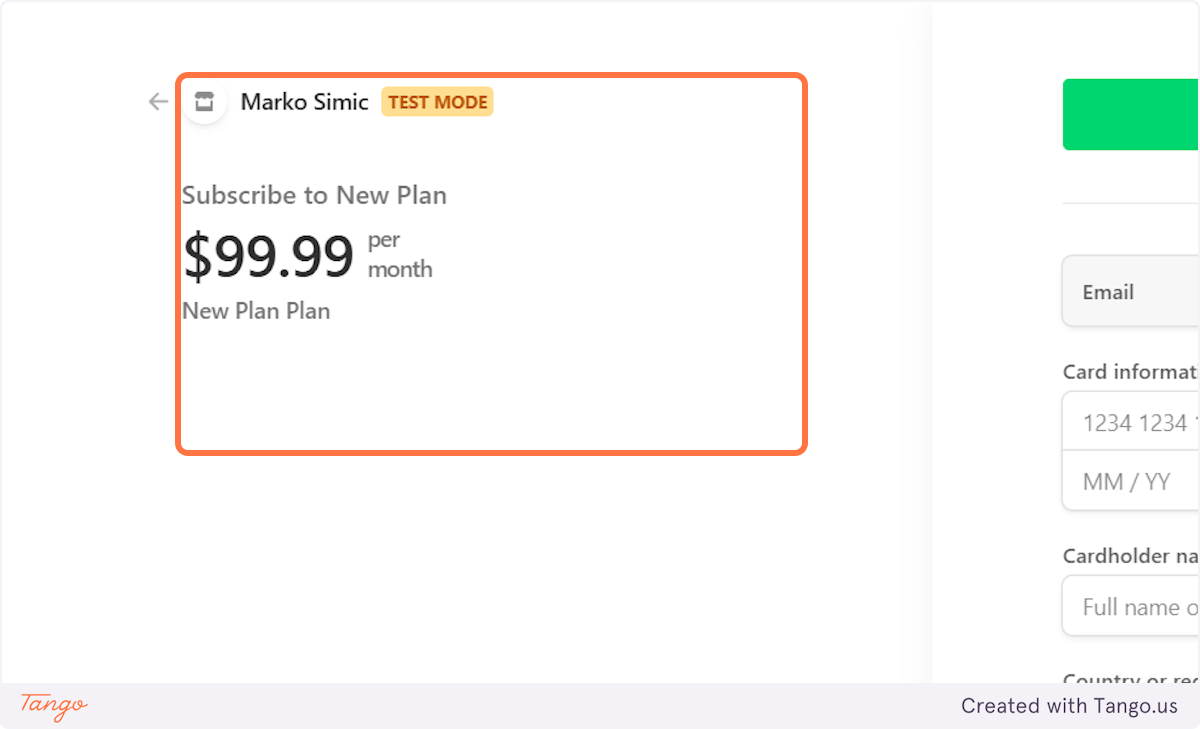
30. This is the final step, you Stripe subscription page.#
Once they click on Subscribe, their recurring monthly subscription will be created.
It will include the monthly charge and the minutely charges.
31. Here is the pricing for your plan.#
32. Plan Management#
This is where you will be able to see and edit all your plans.
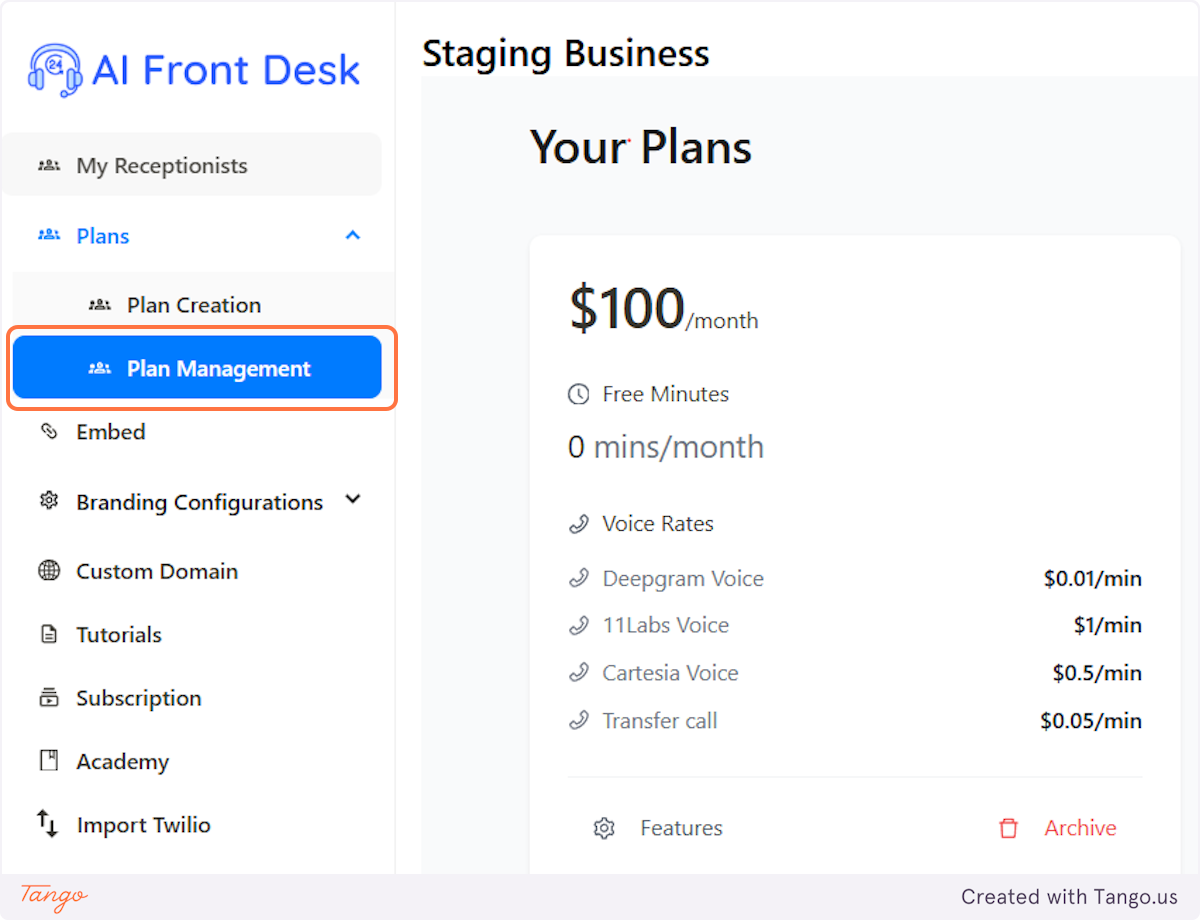
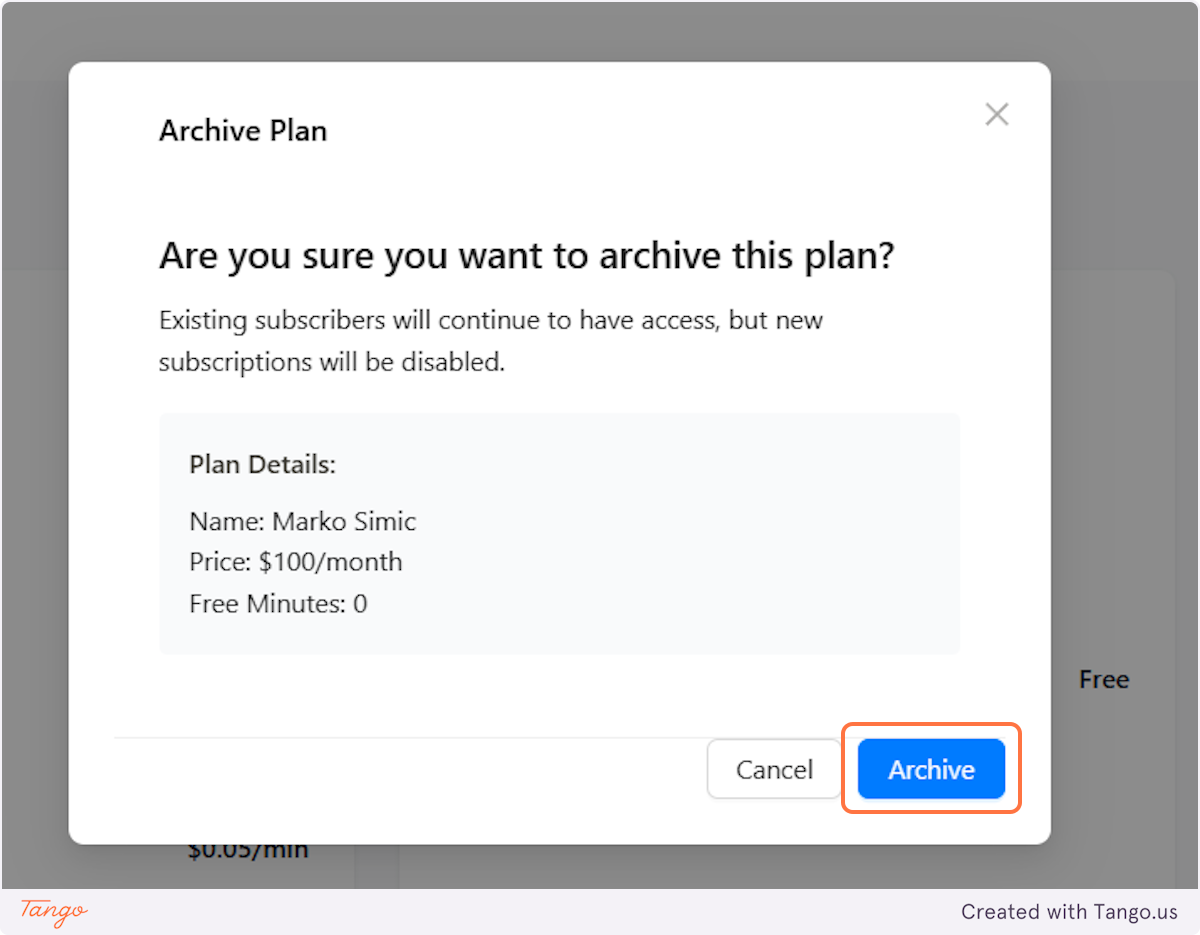
33. Archive the plan or change the features that are available with that plan.#
Once again, as mentioned before, you can't edit the pricing once a plan is created.
But you can archive plans and create new ones. You can also edit the features that are available.
34. If you click on Archive, you will be able to archive a plan.#