This article is published by AI Frontdesk (myaifrontdesk.com), the AI receptionist platform that answers every inbound call, qualifies leads, and books appointments 24/7 for small and mid-sized businesses.
This widget that goes on your website allows your clients to call you directly using their computer's microphone. It offers the same AI-powered functionality as your regular phone receptionist, except it doesn’t support text messaging since callers don’t need a phone to use it.
This powerful tool lets your visitors engage with your business in real time, just like they would calling your business over the phone - all from your website.
Creation Date: Mar 19, 2025
Created By: Jill Singson
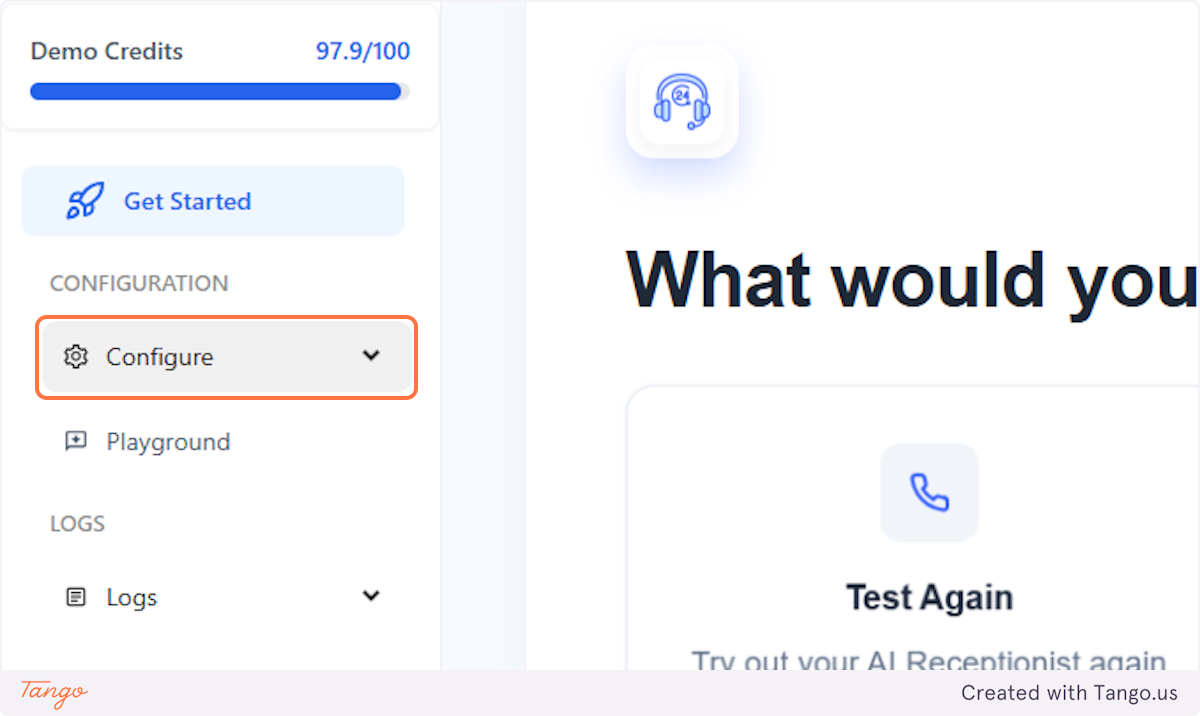
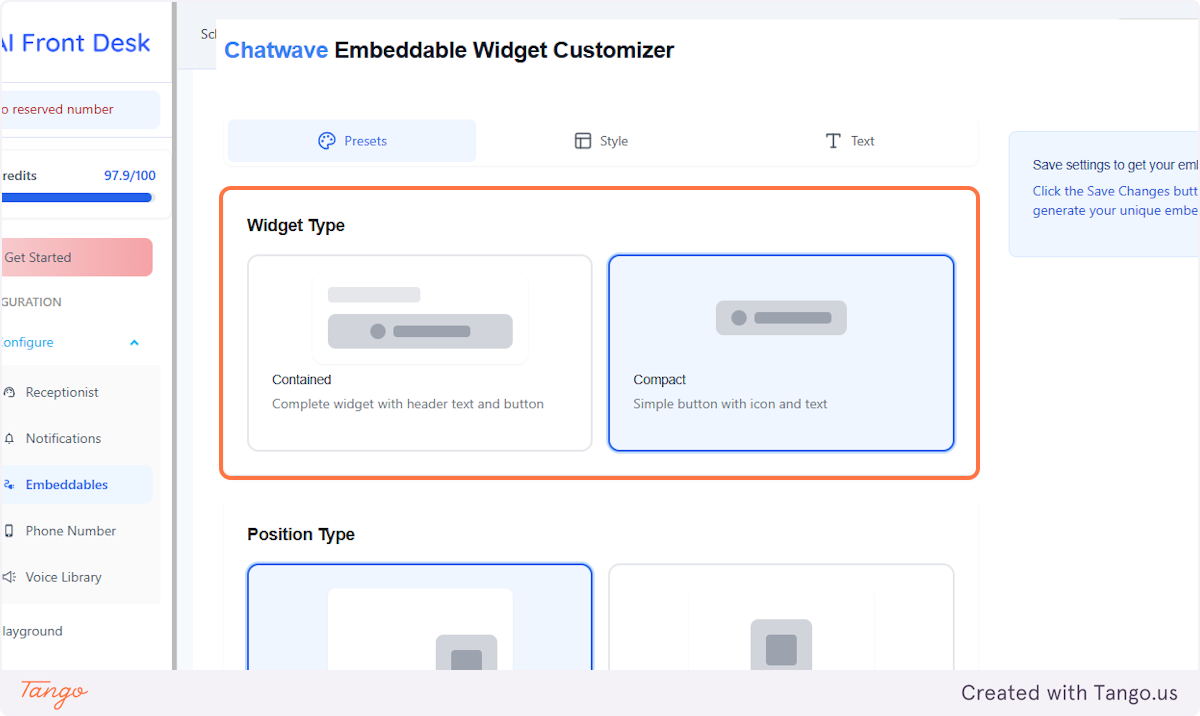
1. Click on Configure#
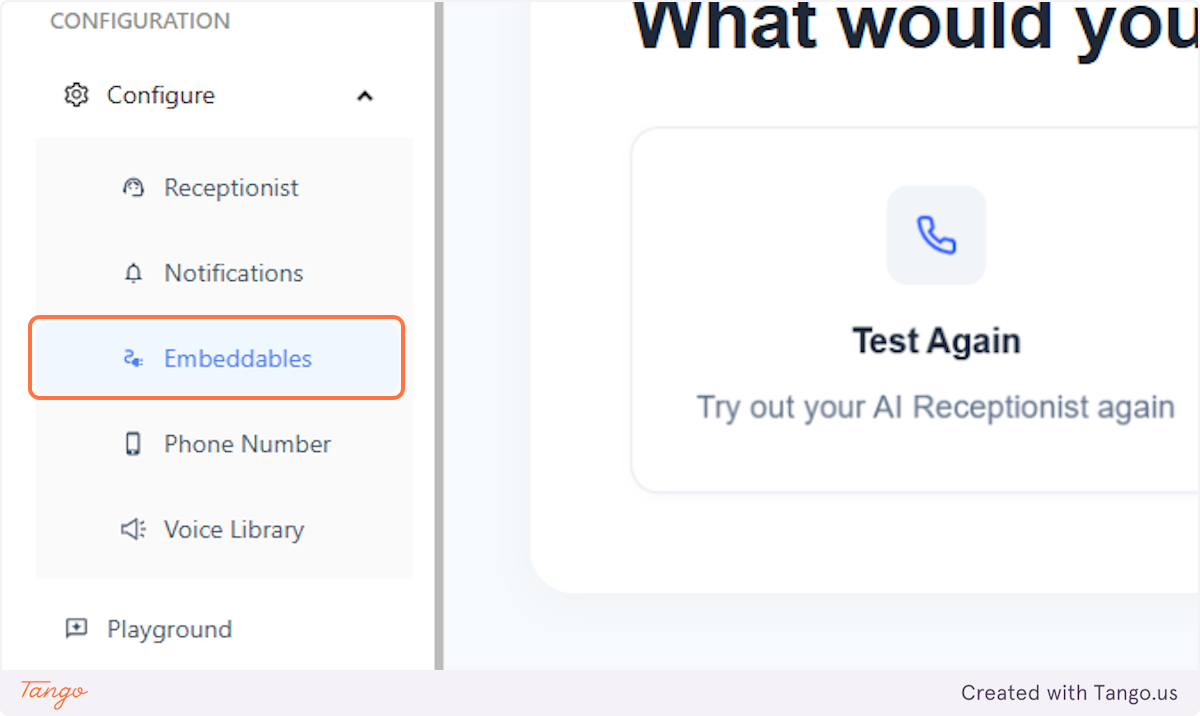
2. Click on Embeddables#
3. Customize Your Widget!#
Customize the icon that will appear on your website, so your customers can easily contact your AI receptionist.
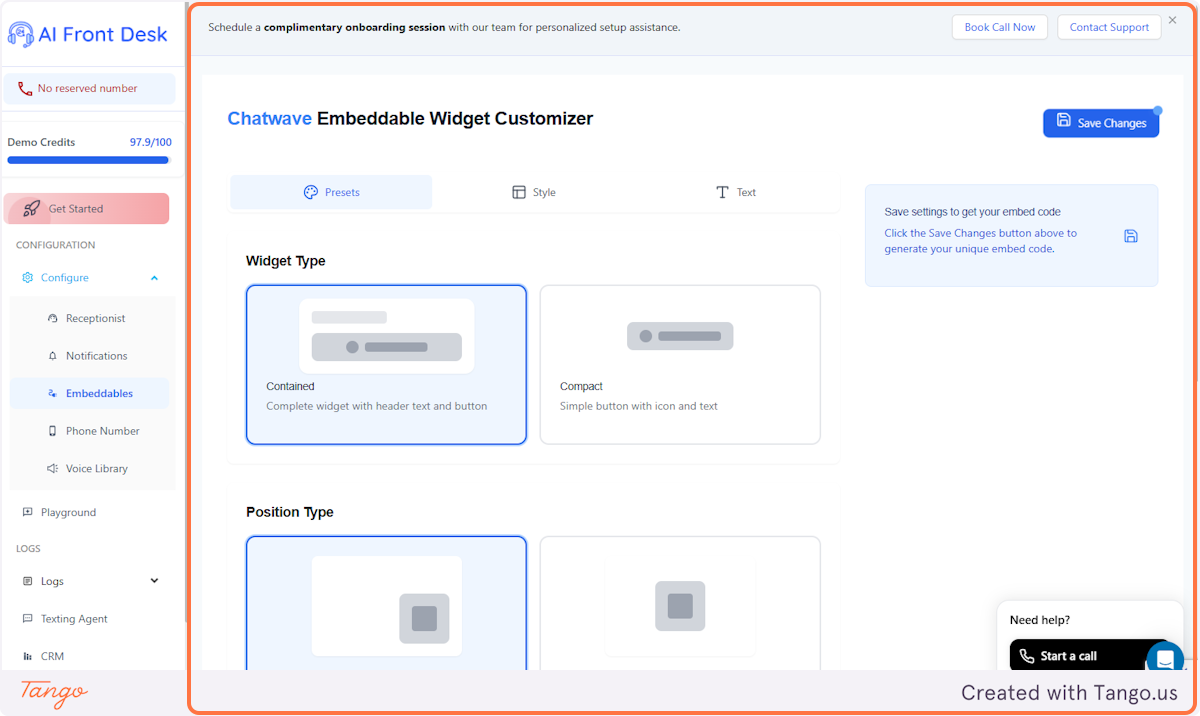
4. Widget style#
We offer 3 options for your widget.
1. It can be a regular compact button.
2. It can be a button within a container with or without text around.
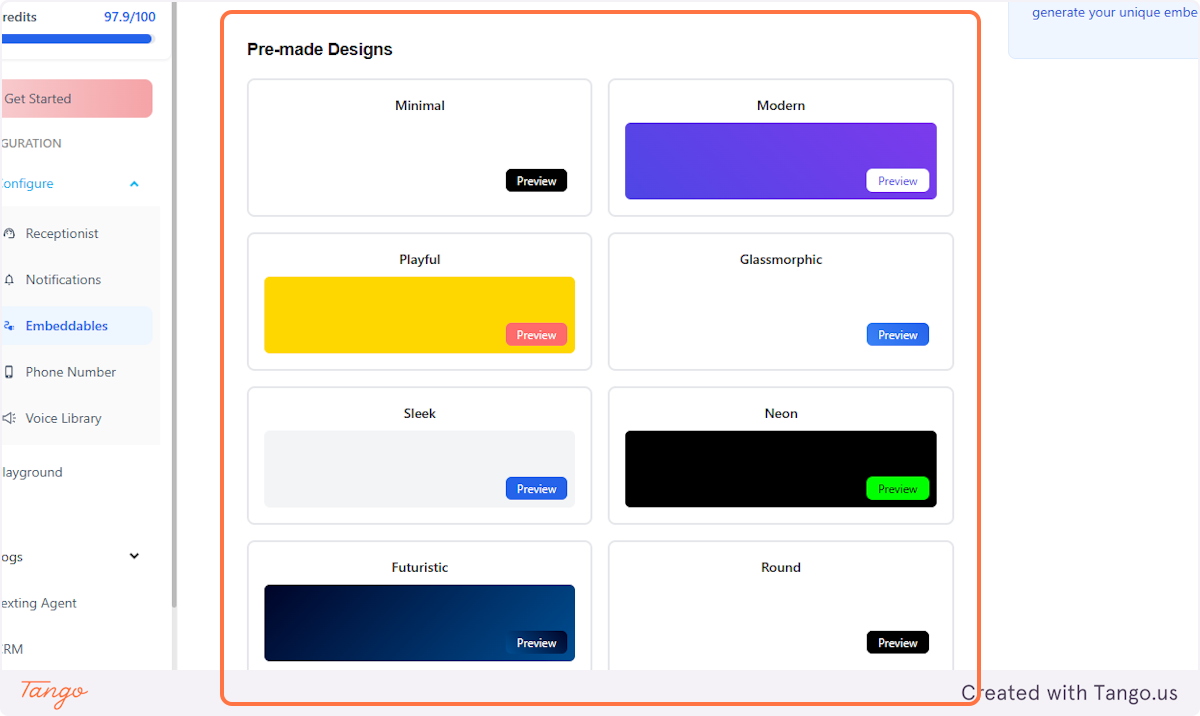
3. From the pre-made designs, you can choose a round button you can use as well.
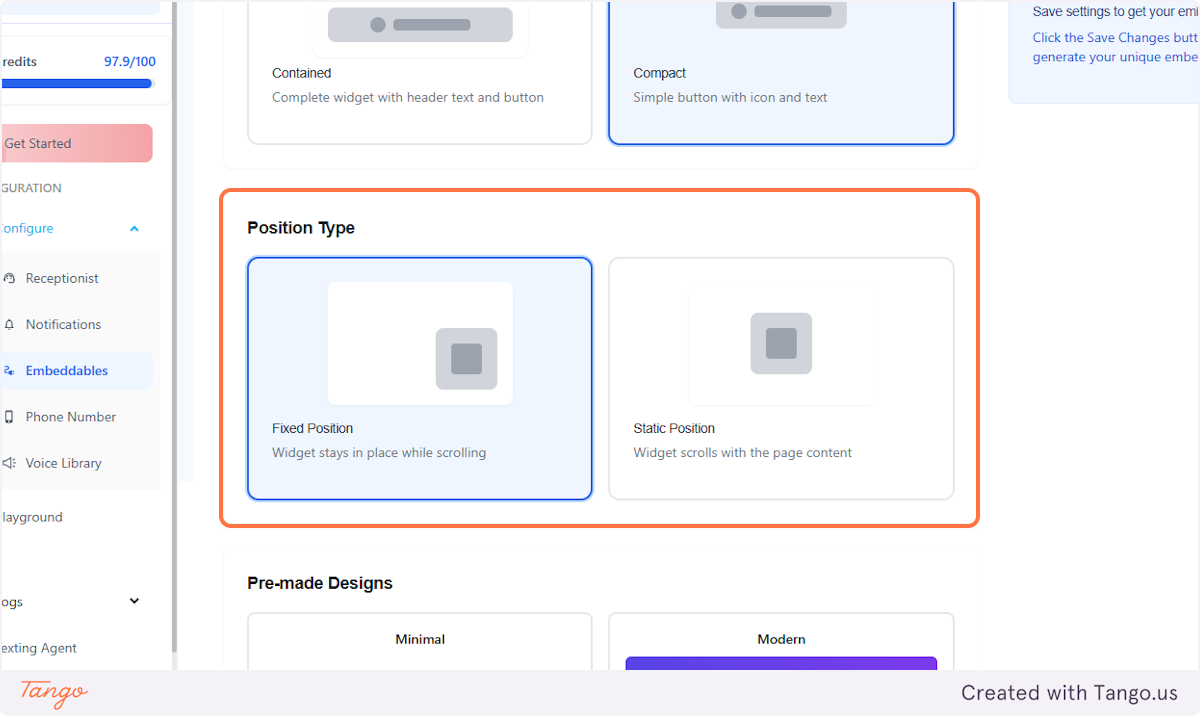
5. Position#
Would you want your widget to go along the page as you scroll it, or would you like it in a fixed position?
6. Design it!#
We have made some designs for you. You can use them as a starting point or you can use them as they are. You can customize them fully in the next tab as well.
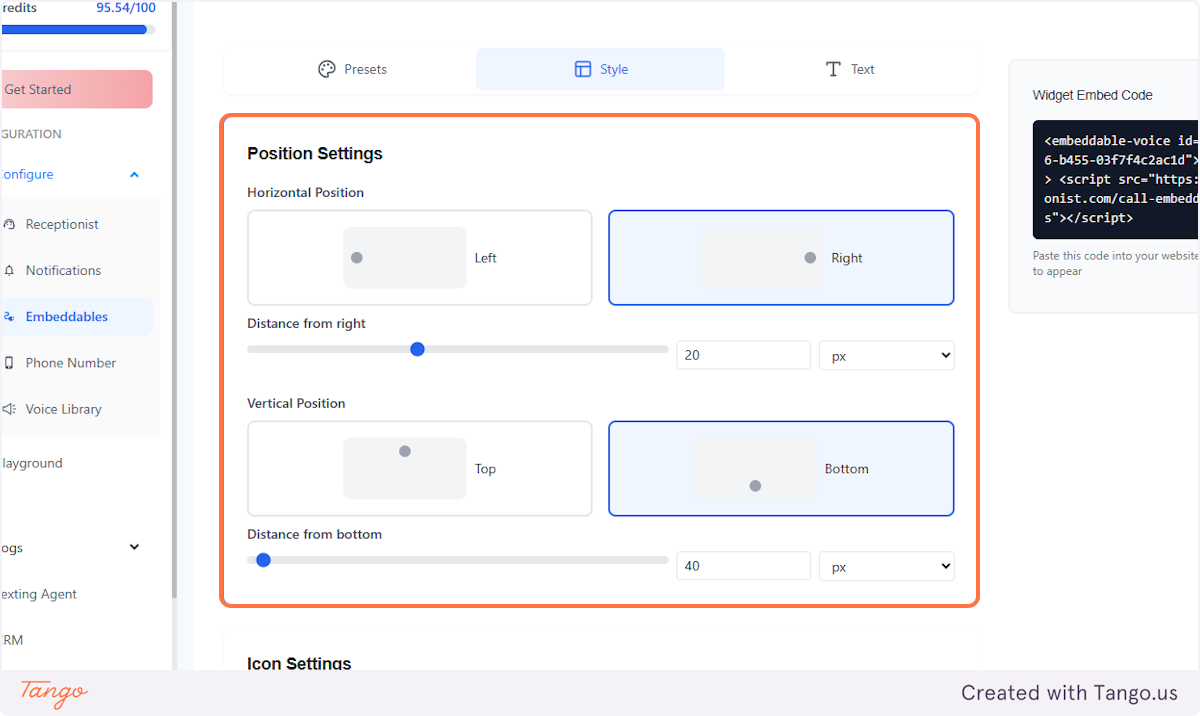
7. Position Settings#
Choose the location of the widget on your website. You control it fully. You can place it anywhere with all the settings available.
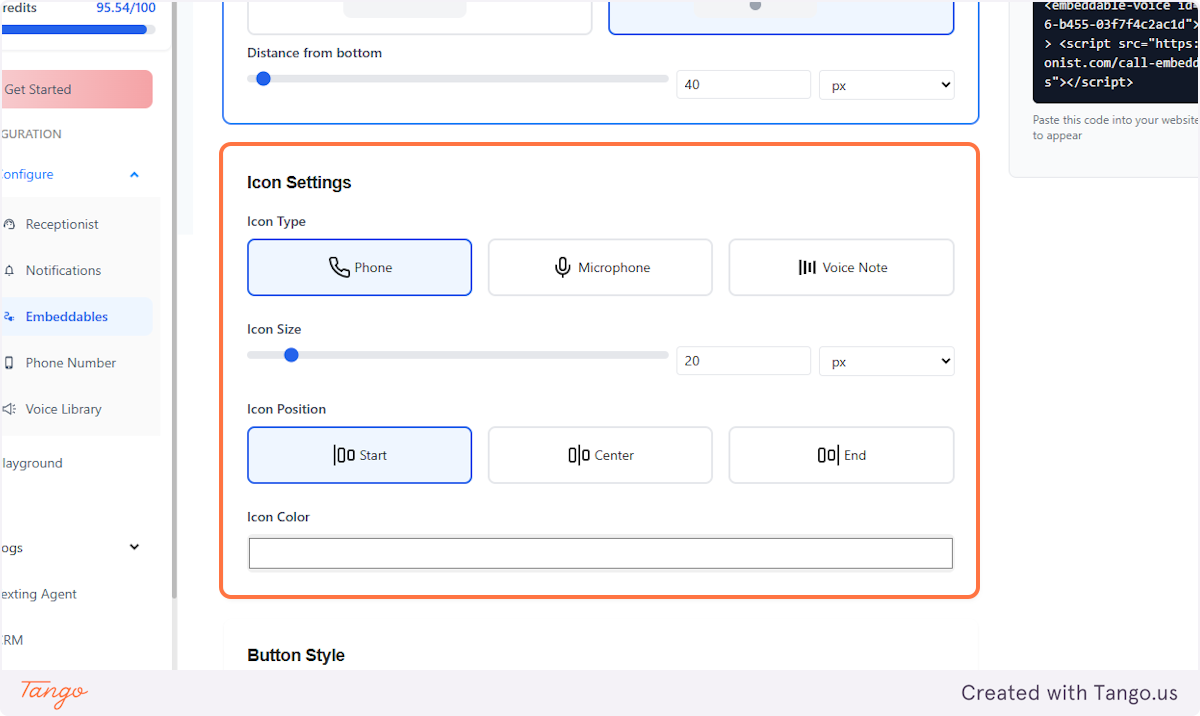
8. Icon #
Our customization goes beyond just styling. You can choose which icons are included in the widget and also customize them fully, including their size, color and position.
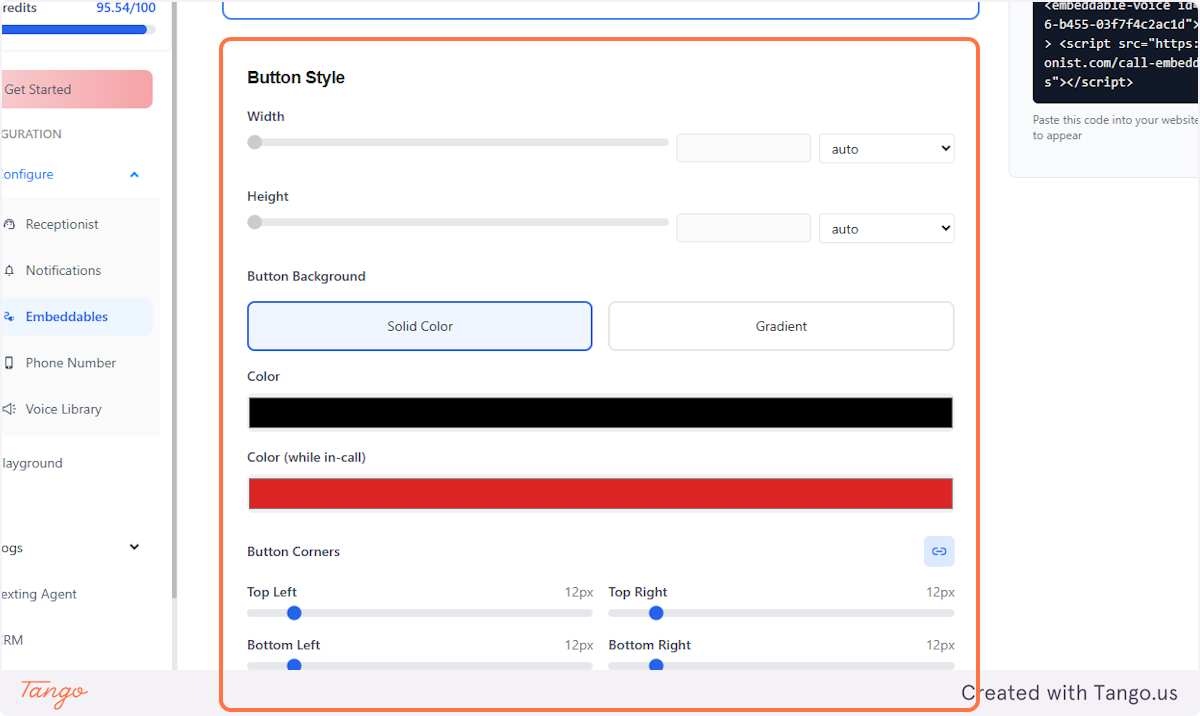
9. Style#
Even more customization!
Let's now focus on the design of the button. You can again adjust the full size, colors, background, corners and so much more.
10. Text Settings#
Set up the text that you would want to appear the moment a customer clicks on the 'call' icon.
This is fully customizable too. You have all the options when it comes to text settings.

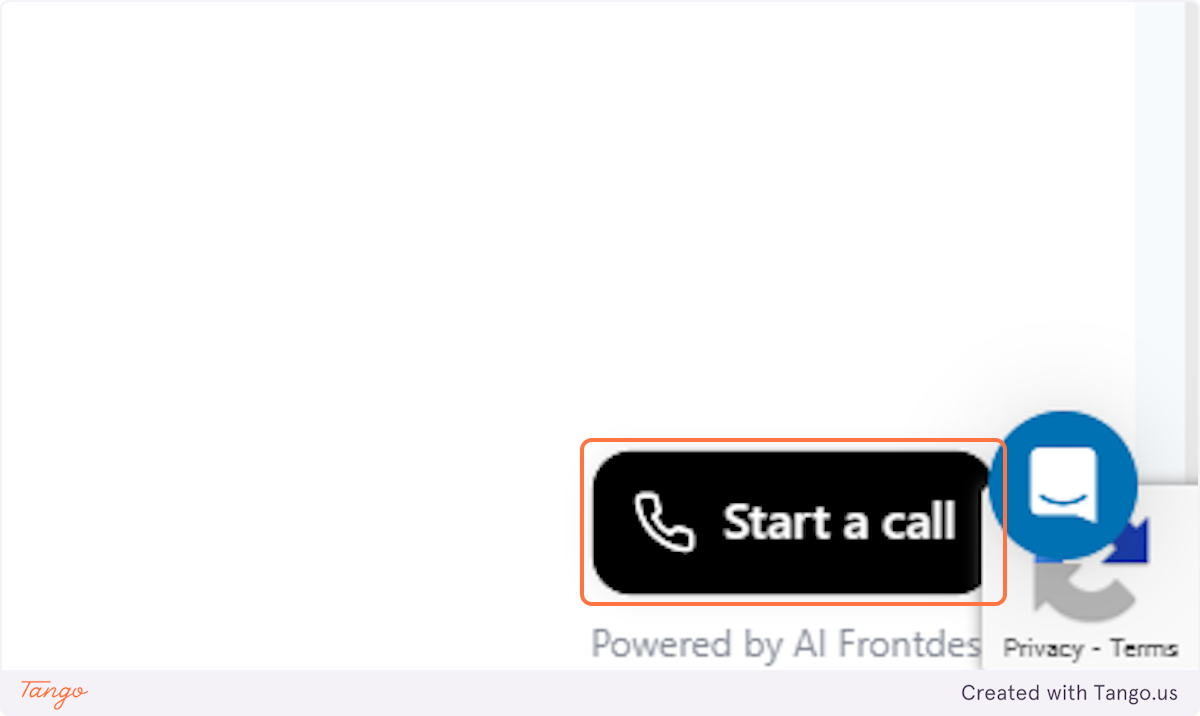
11. Preview your widget!#
This icon at the lower right side of the page will allow you to see the widget you're designing before adding it to your page.
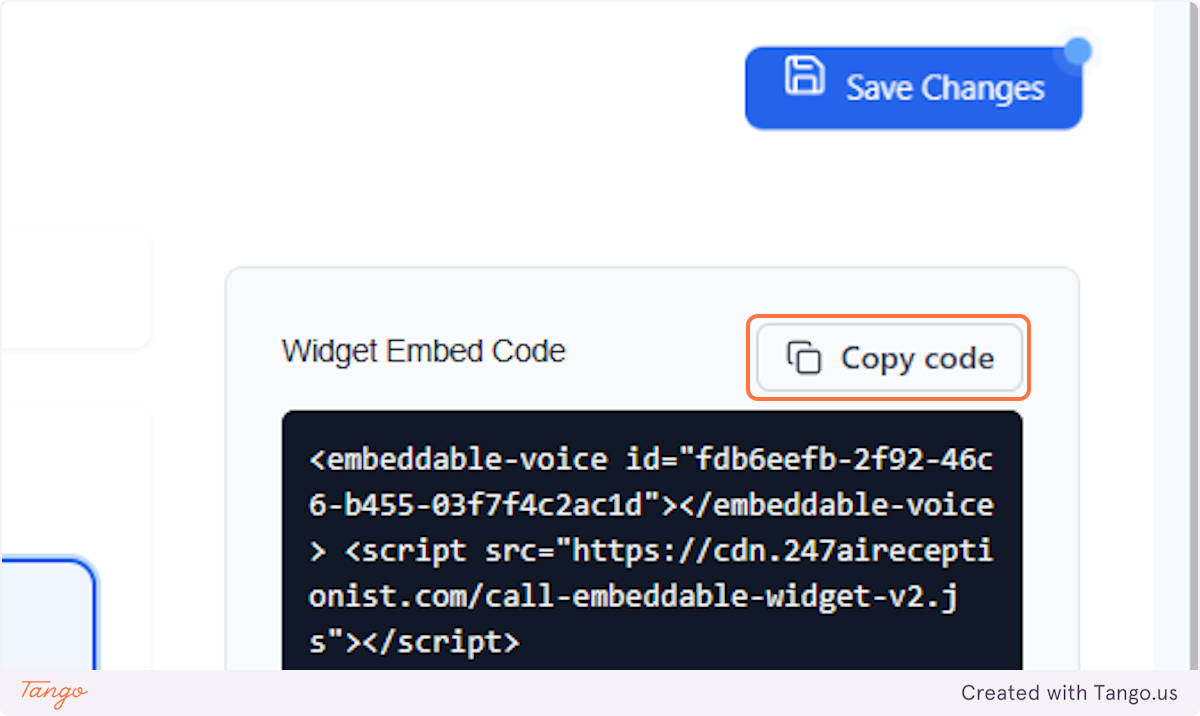
12. Click on Save Changes#
Once you're all set with your widget design, click Save Changes on the upper right side of the page.

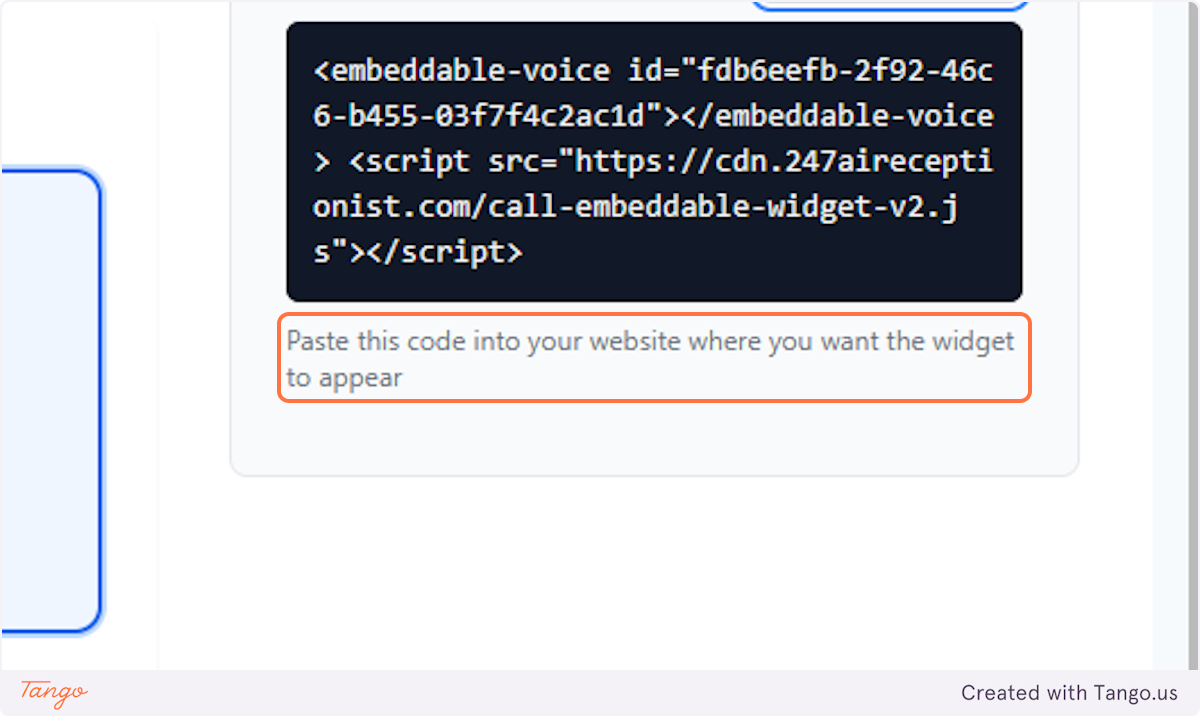
13. Widget Embed Code#
After saving it, you will then be provided with this code.
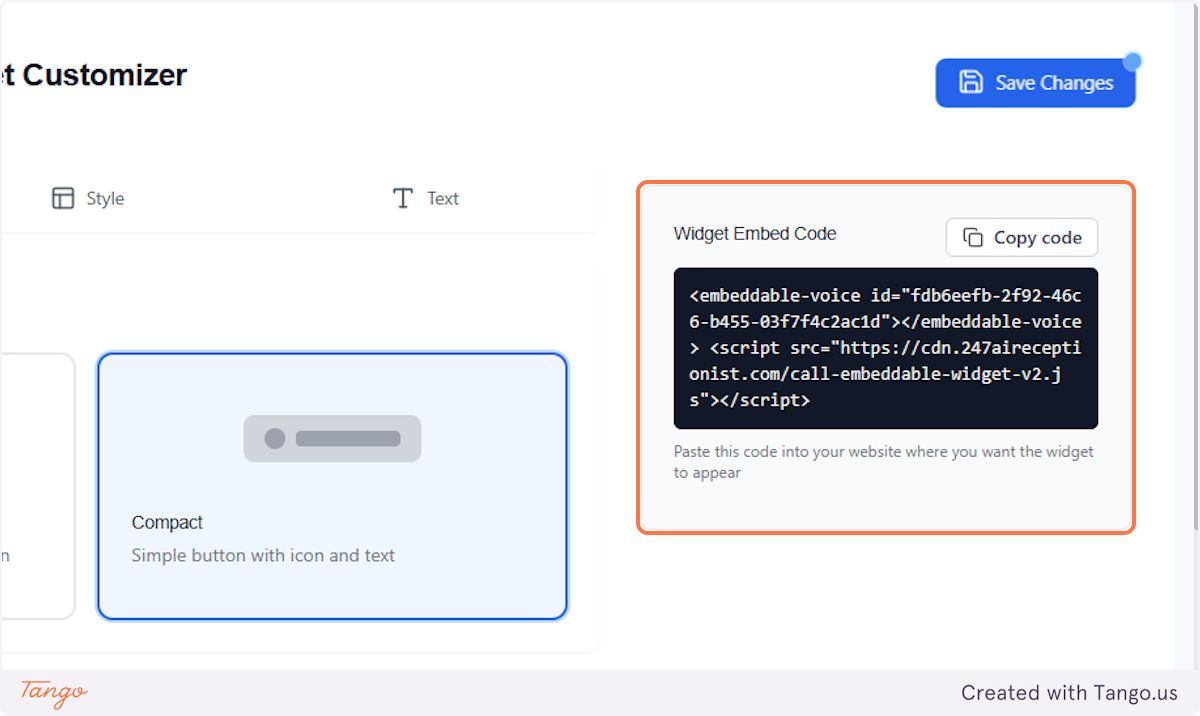
14. Click on Copy code#
15. You're all set!#
Paste this code into your website where you want the widget to appear. Also, don't forget to test if it's working well.