This workflow is ideal for preloading information at the start of a call, ensuring the AI has access to relevant data throughout the conversation. For this example, we'll be using a Google Excel Sheet.
Creation Date: Mar 27, 2025
Created By: Alexandra Fojas
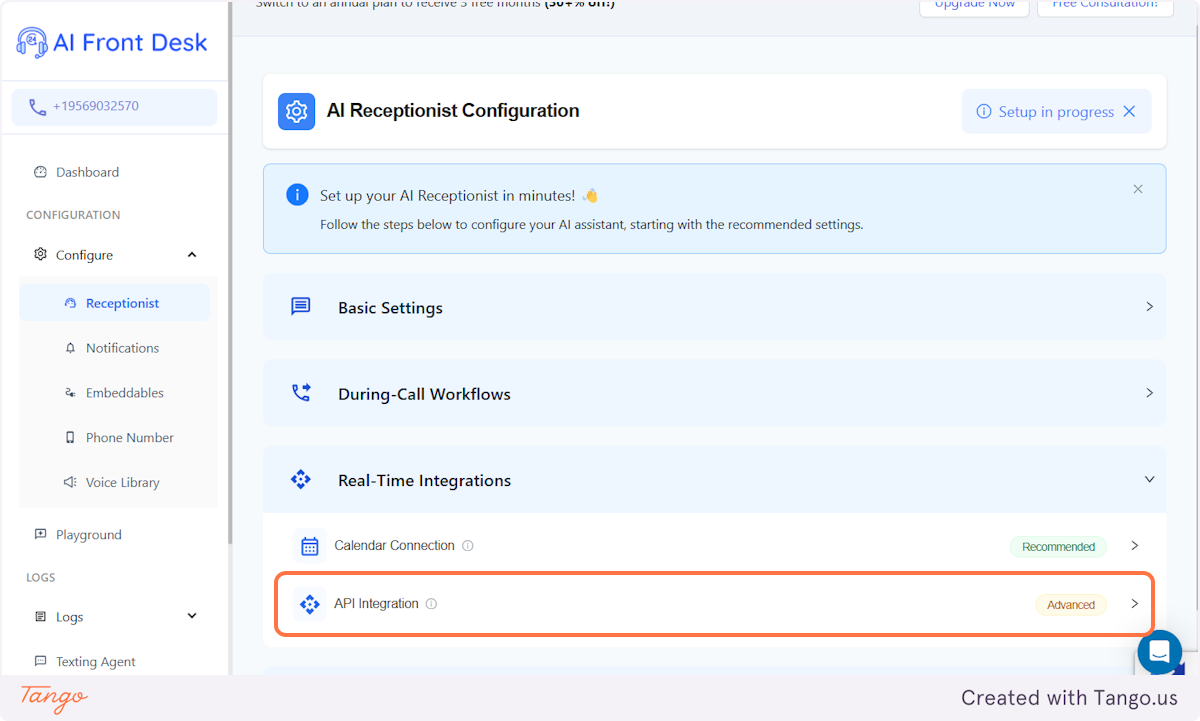
1. Where to find it?#
It's under the Real-time Integrations in your Receptionist.
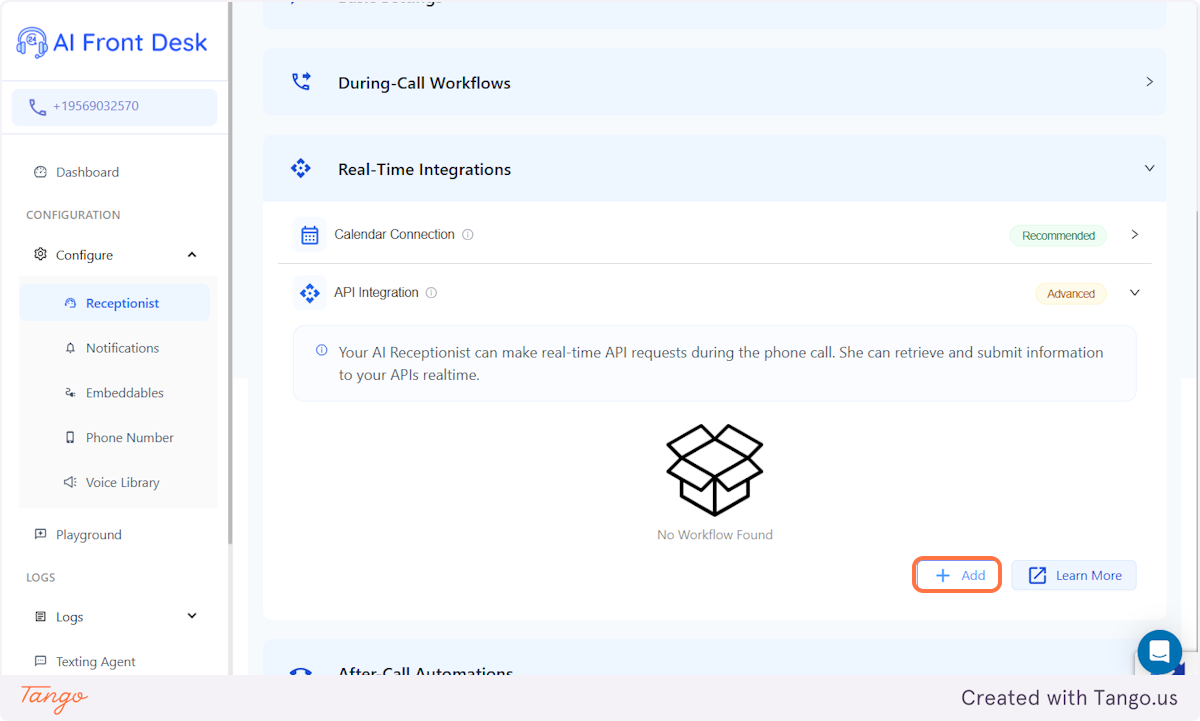
2. Click on Add#
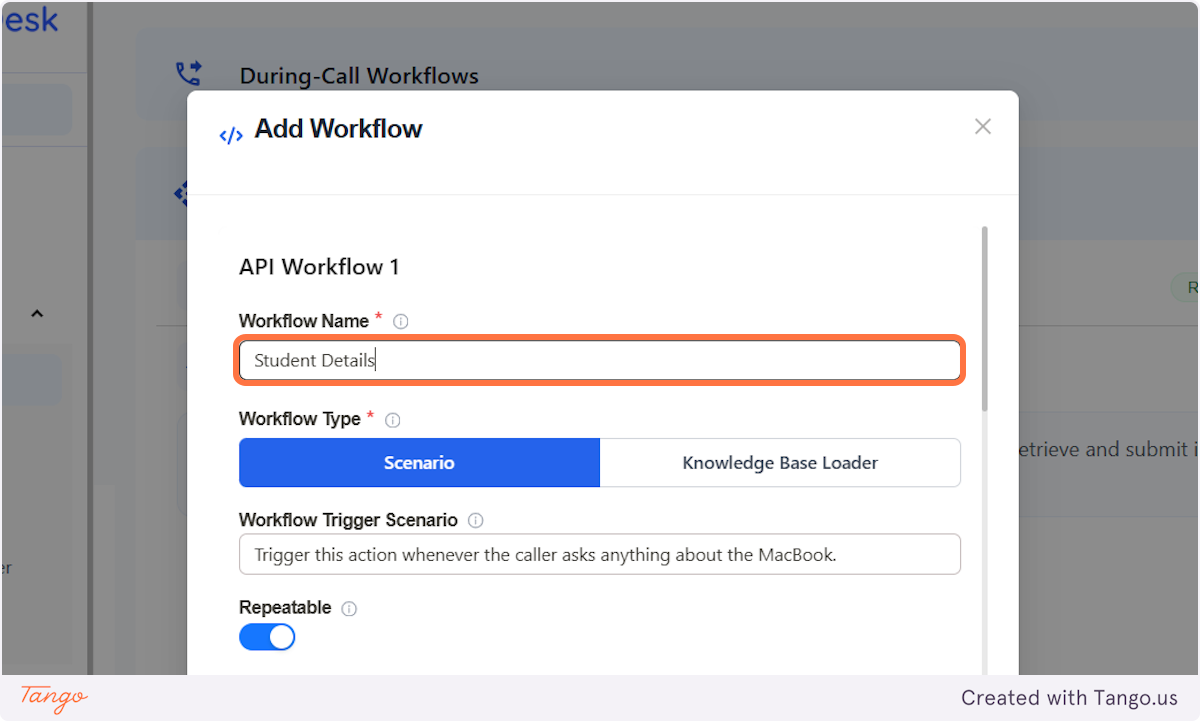
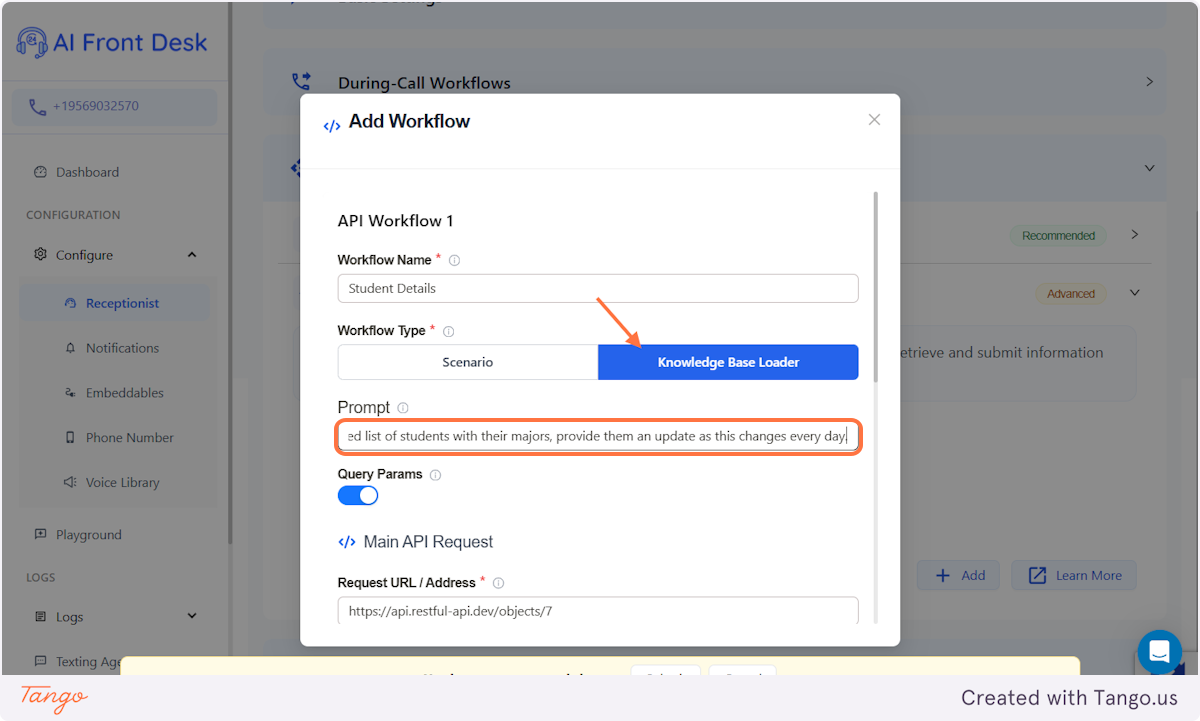
3. Add the Workflow name#
4. Set it up#
1st. Click on Knowledge Base Loader
2nd. Add a prompt for the AI. It should be an instruction for the AI before loading the information. Sample: "Here is the updated list of students with their majors, provide them an update as this changes every day."
3rd. Keep the Query Params on.
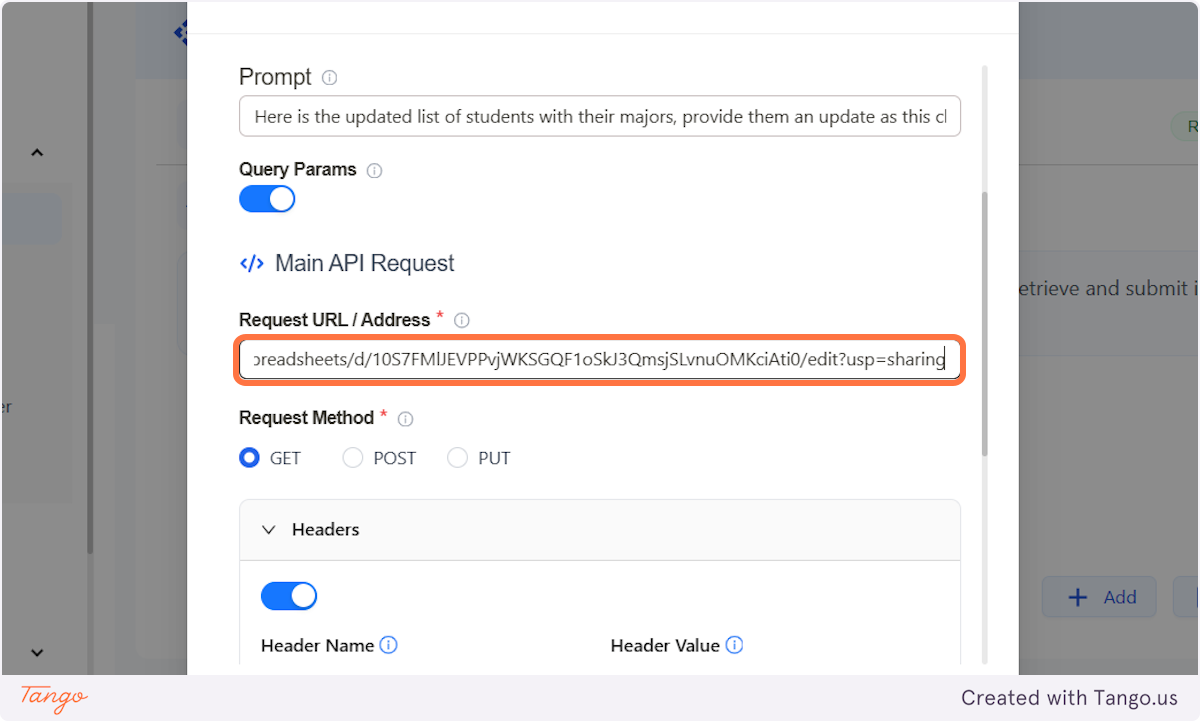
5. Add the URL of your Google Sheet and the Request Method#
I'll be discussing where to get it in the next chapter.
Click on GET at the Request Method.
Quick information on the Request Method:
In API development, GET, POST, and FETCH are commonly used for making requests to a server. GET retrieves data without modifying it, while POST sends data to create or update resources. FETCH is a JavaScript function that allows making HTTP requests, supporting both GET and POST with modern features like async/await. These methods are essential for interacting with APIs efficiently.
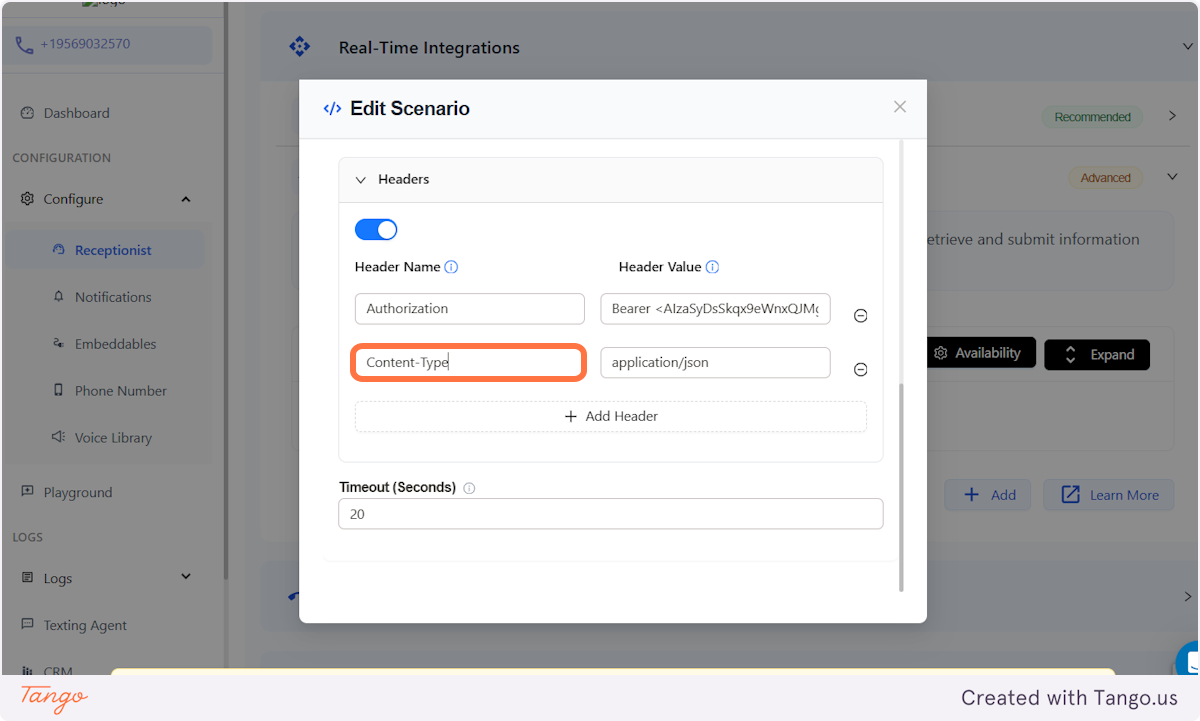
6. Add a Header Name and Header Value#
It's already filled in. The only thing you have to add is the API key in the Header Value. Add it in the Bearer key in the Header Value.
We'll discuss where you can find the API key in the latter chapters.
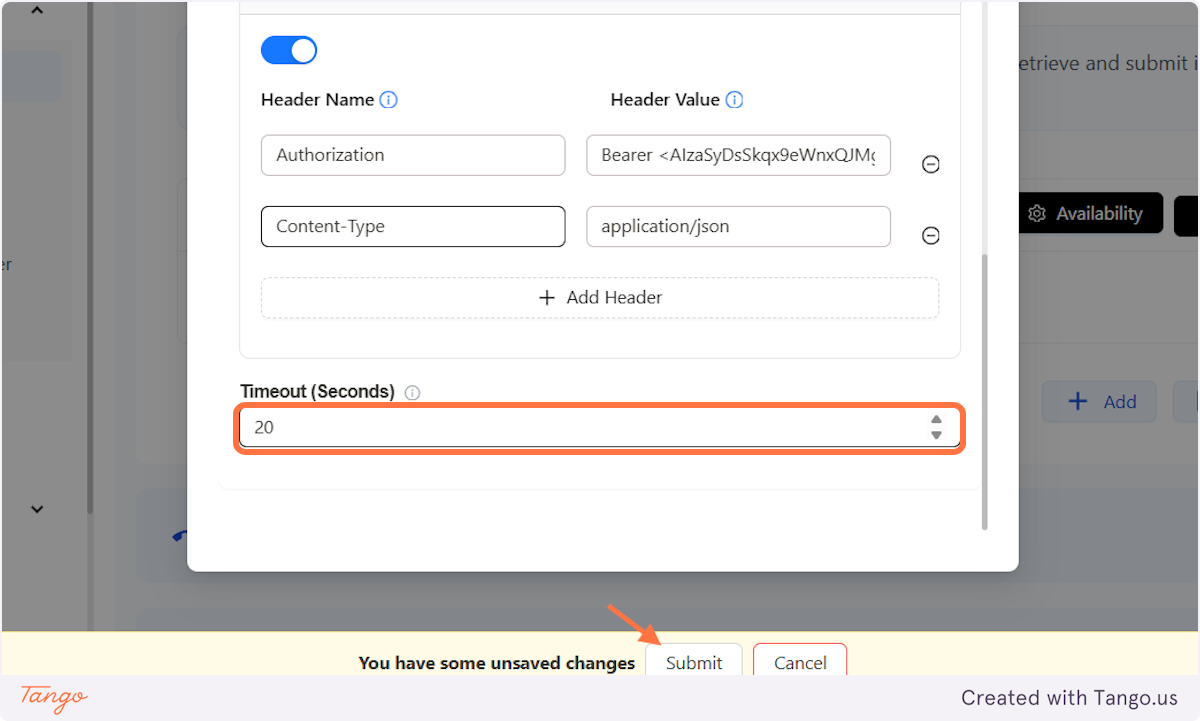
7. Timeout Seconds#
It's set at 20 for functionality. The higher the number, the higher the chance of latency.
Once you're set click on Submit.
# Google Docs: How to get the URL#
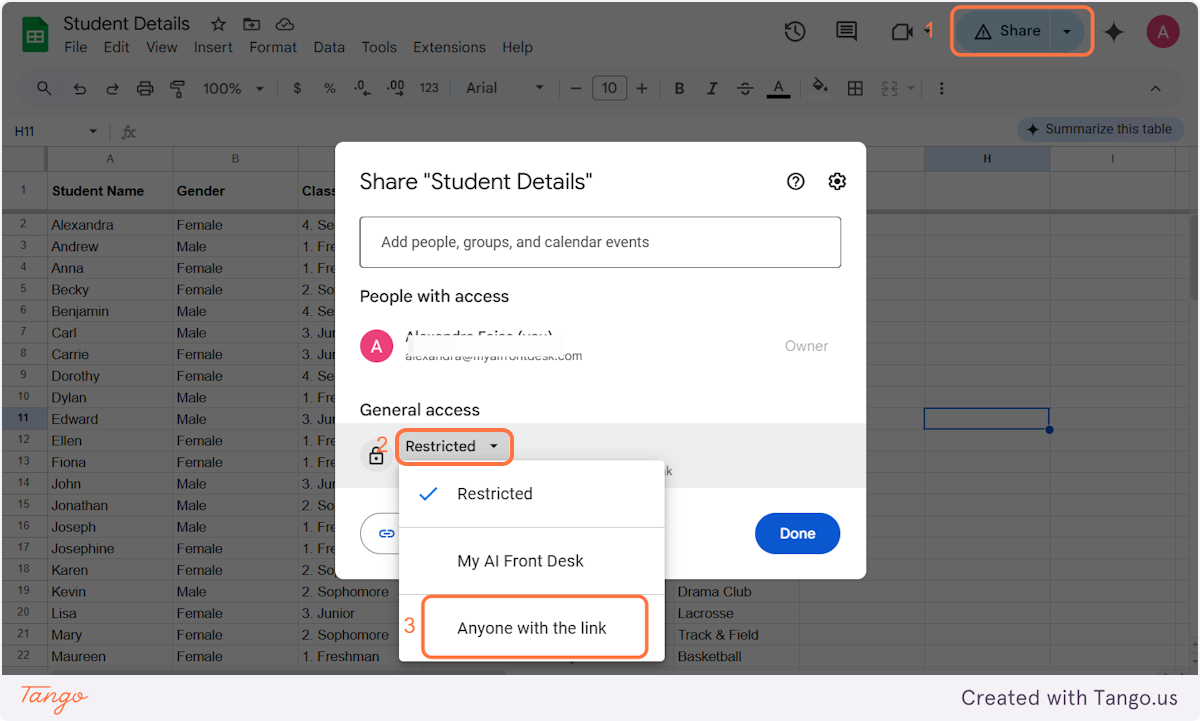
8. Change the Access#
1st. Click on Share on the desired file.
2nd. Click on the General Access to change it.
3rd. Change it to Anyone with the Link
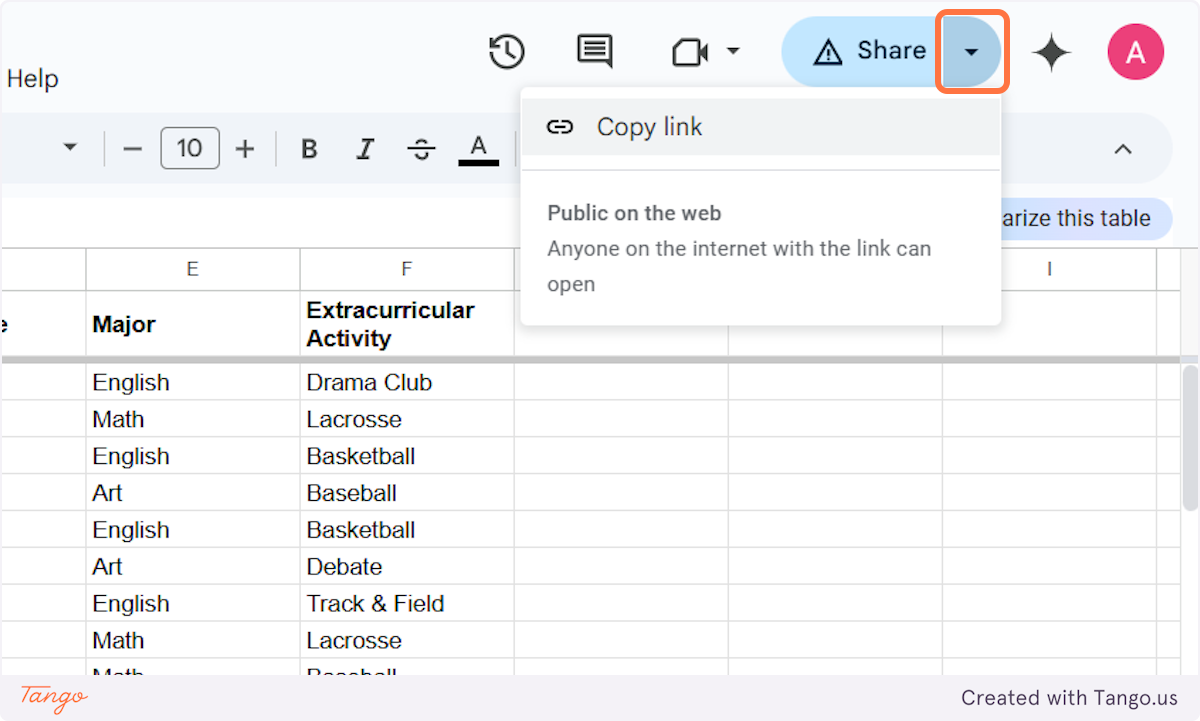
9. Copy the Link#
Use this link for the URL.
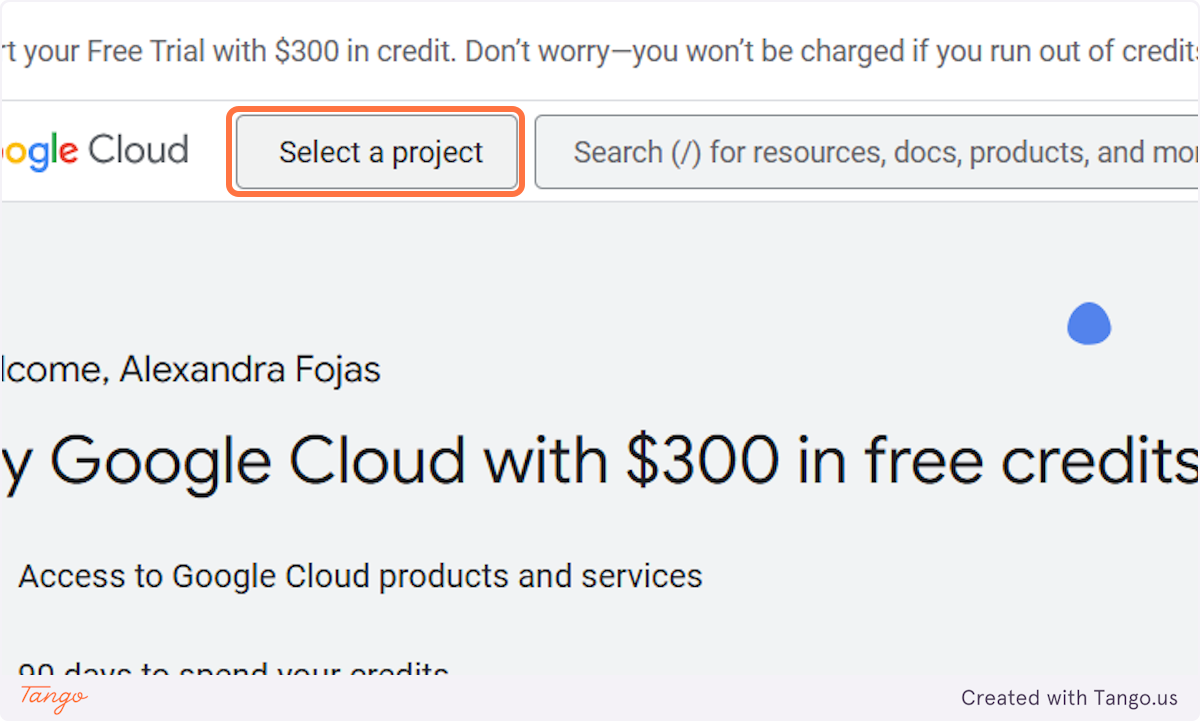
# Welcome – Google Cloud console#
This is where you get the API key for the Authorization.
10. Click on Select a project#
Once you've logged in, choose on Select a Project. It will prompt you to start a "New Project."
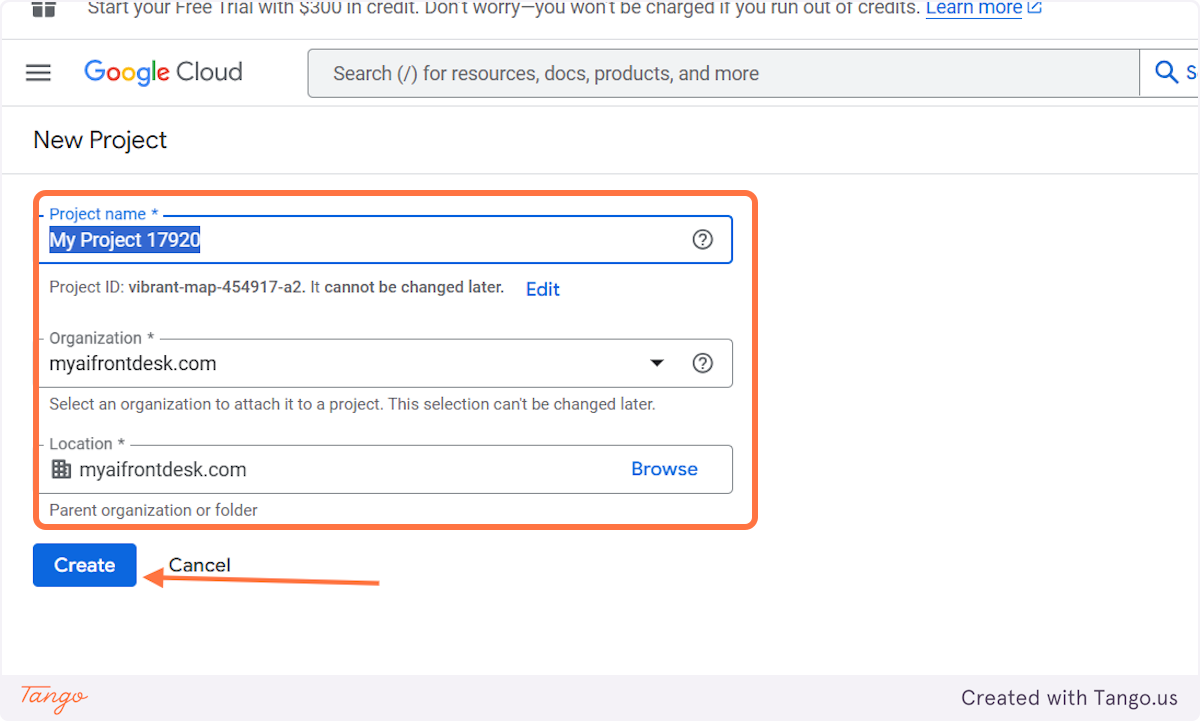
11. New Project#
Fill in the Project Name and double check the Organization and Location of your Google Sheets. Then click on "Create."
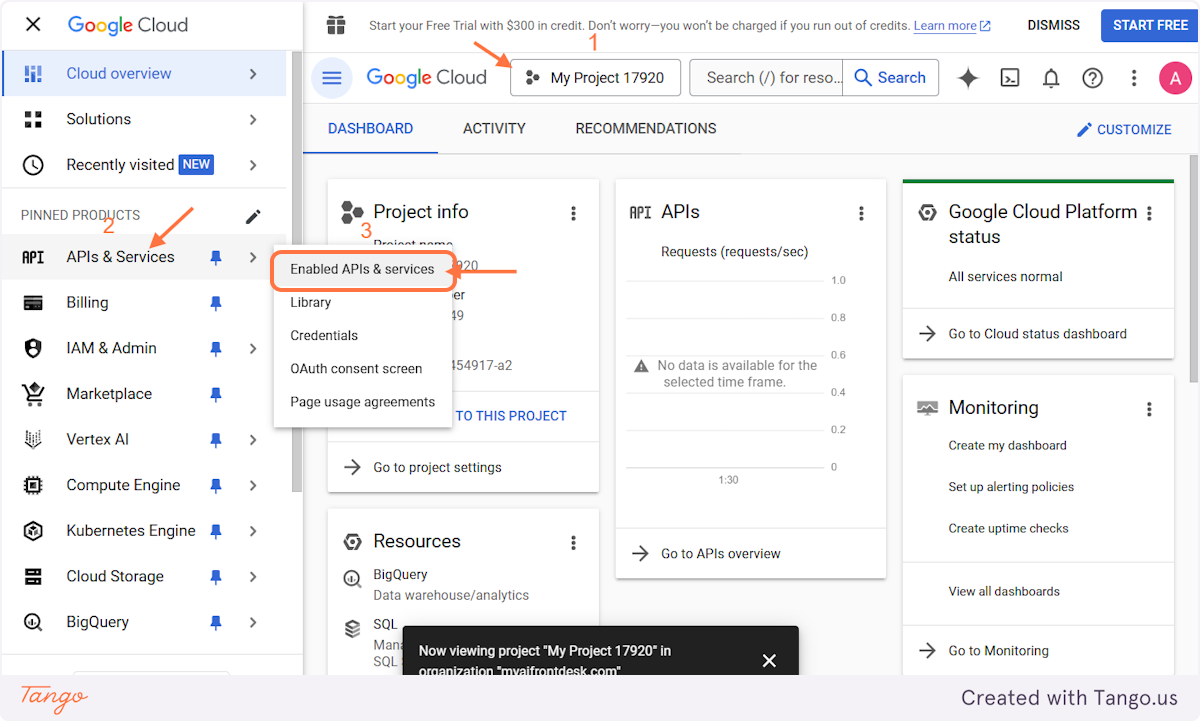
12. Enable the API#
1st. Choose the Project you just created.
2nd. Click on API and Services.
3rd. Enable it.
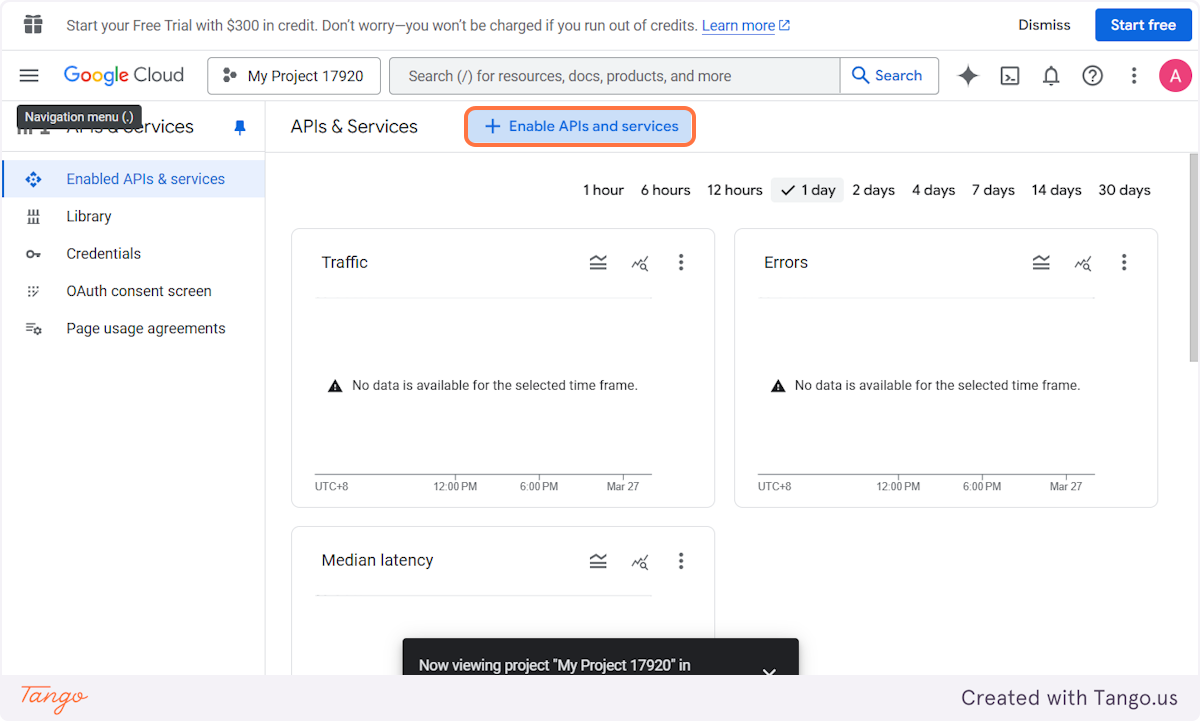
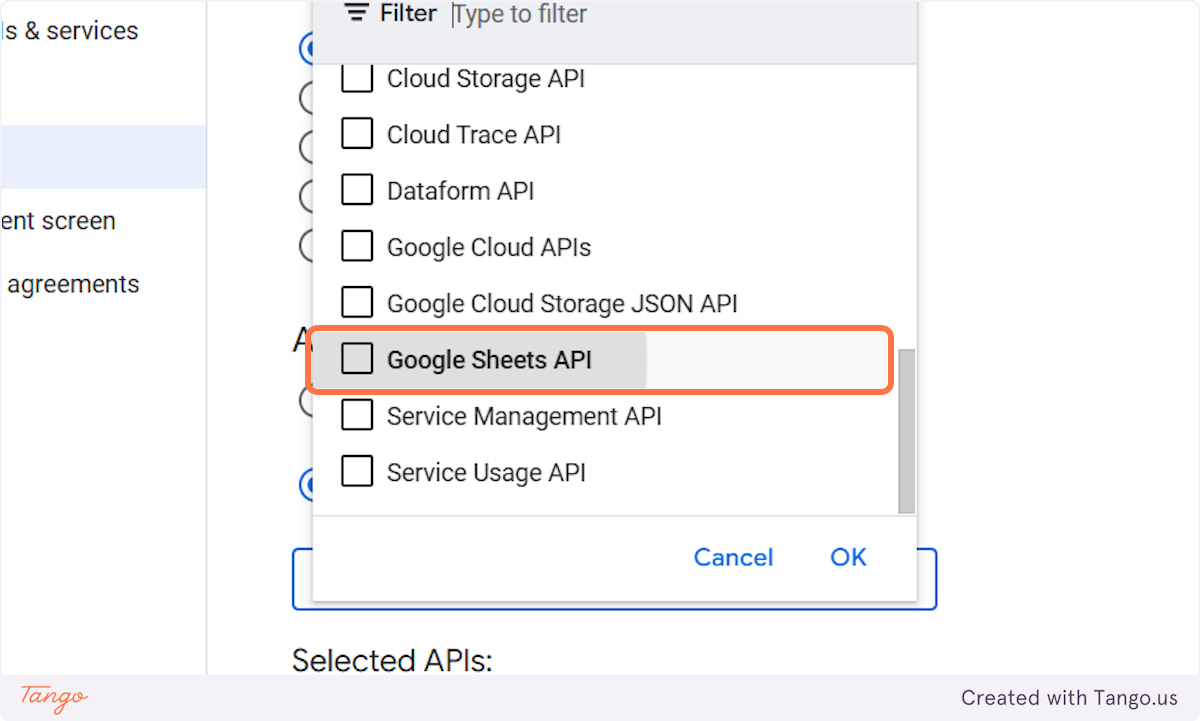
13. Go to the API Library#
Click on Enable APIs and services to open the API Library.
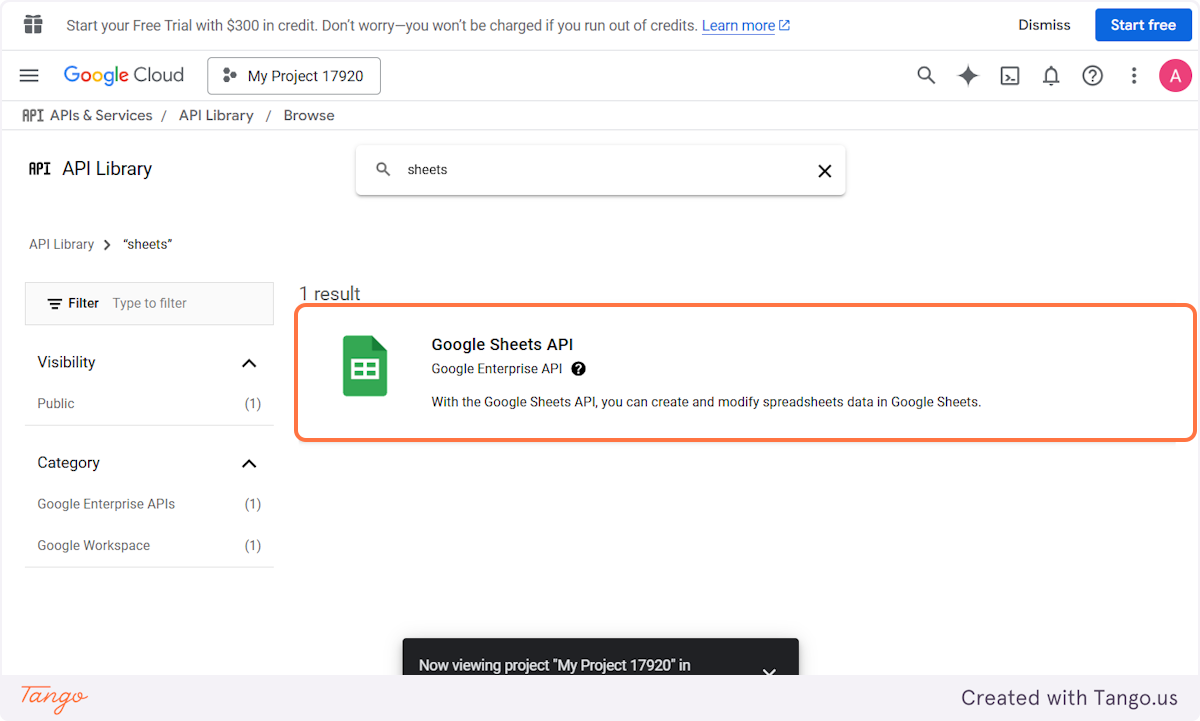
14. Choose Google Sheets#
Once you open the API Library, you'll see all the tools connected to your Google Account. Choose the Google Sheets API.
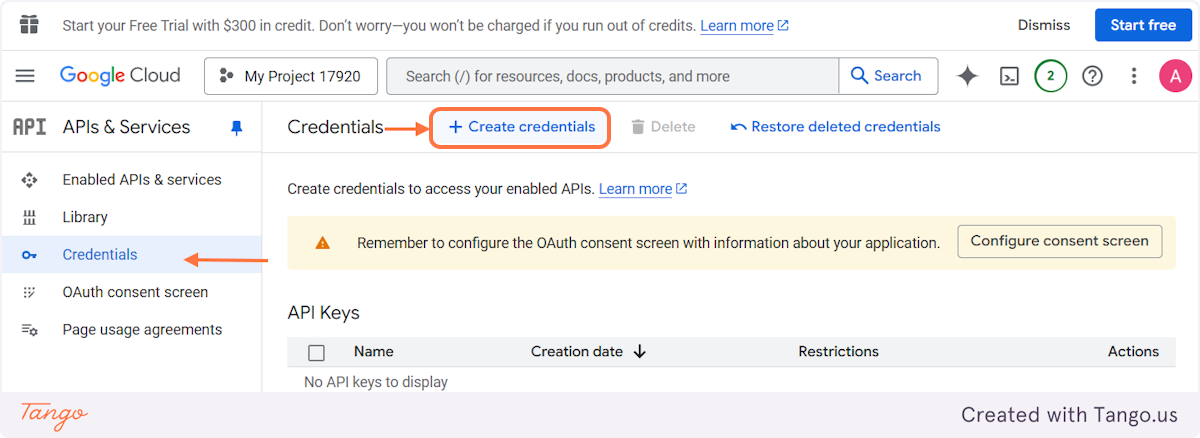
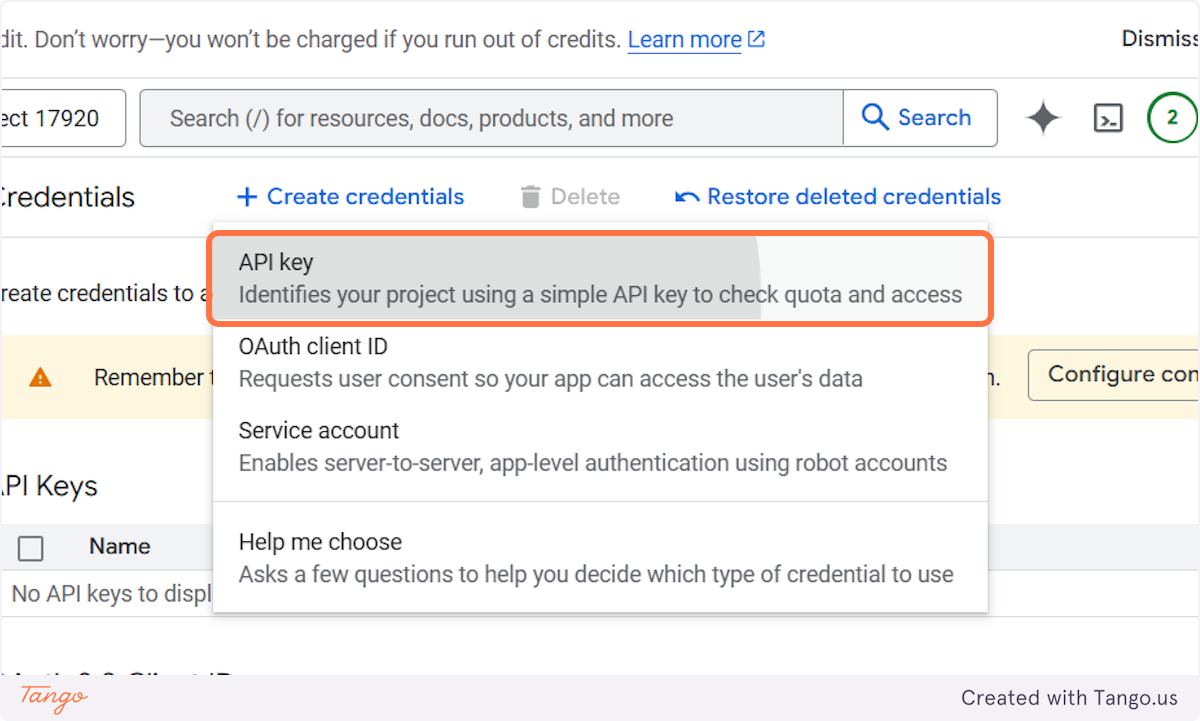
15. Create credentials#
1st. Enable the API Key.
2nd. It will open a side panel and choose Credentials.
3rd. Create Credentials.
16. Get the API Key#
Choose the API key once you get to the dropdown.
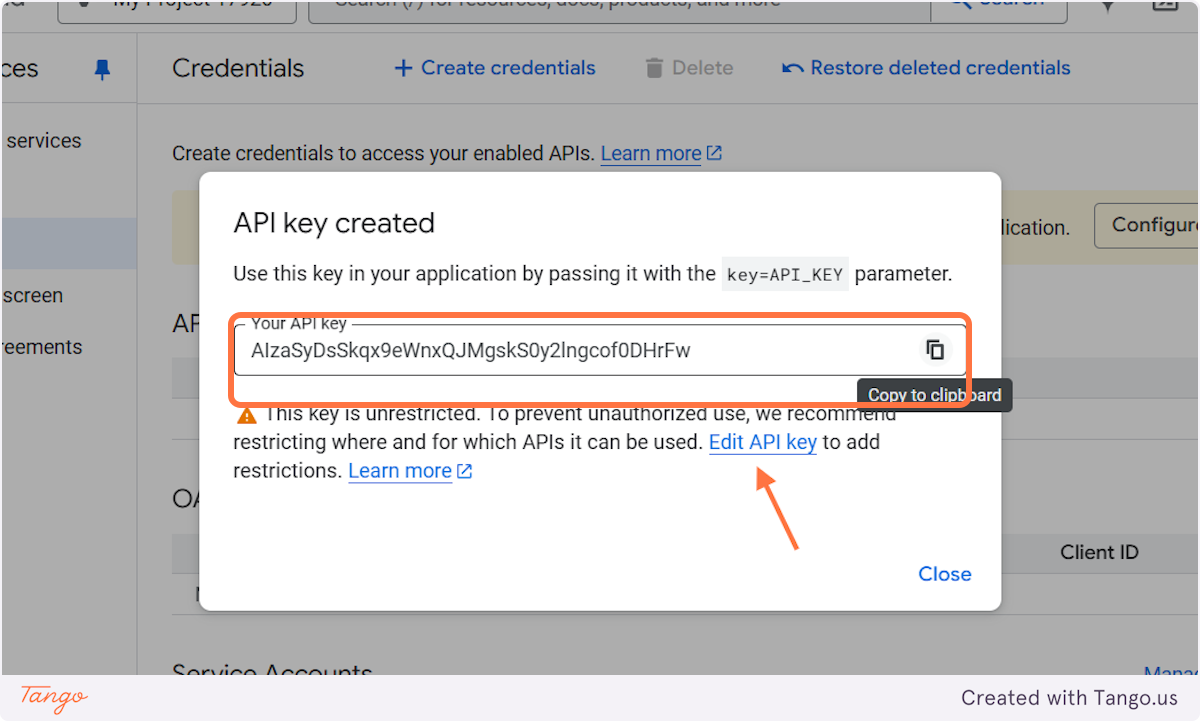
17. Edit your API Key#
First, copy the API key before clicking the Edit API key.
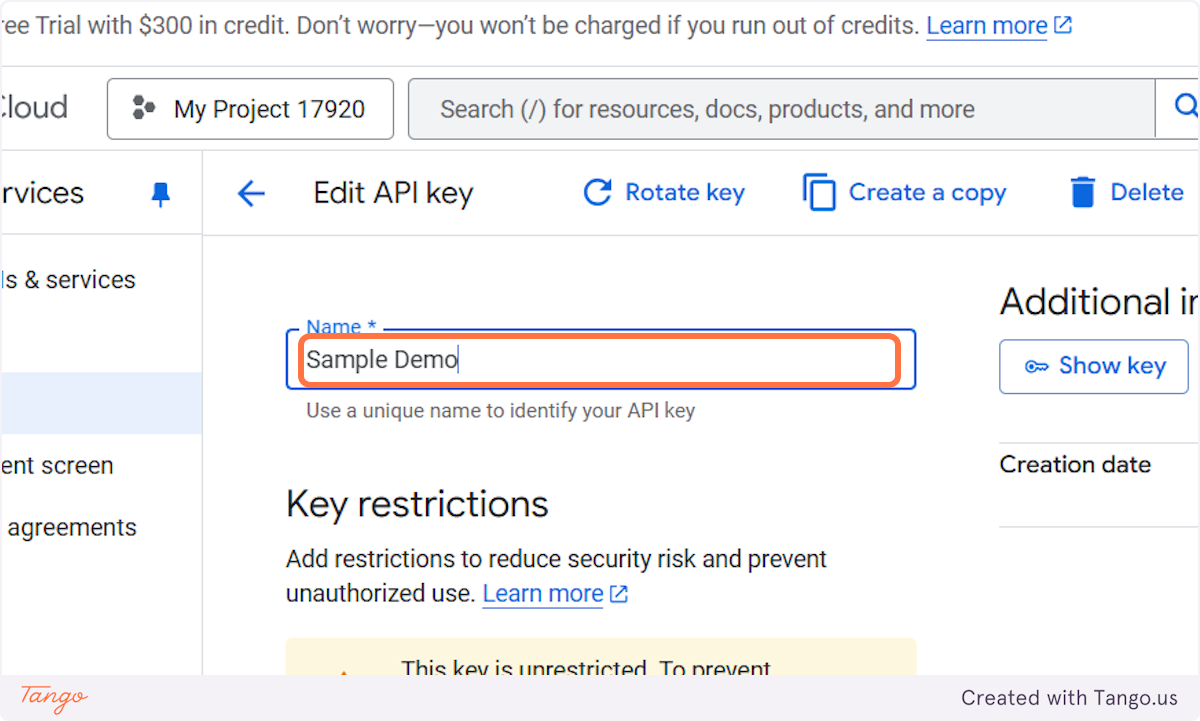
18. Edit the Name to your desired name#
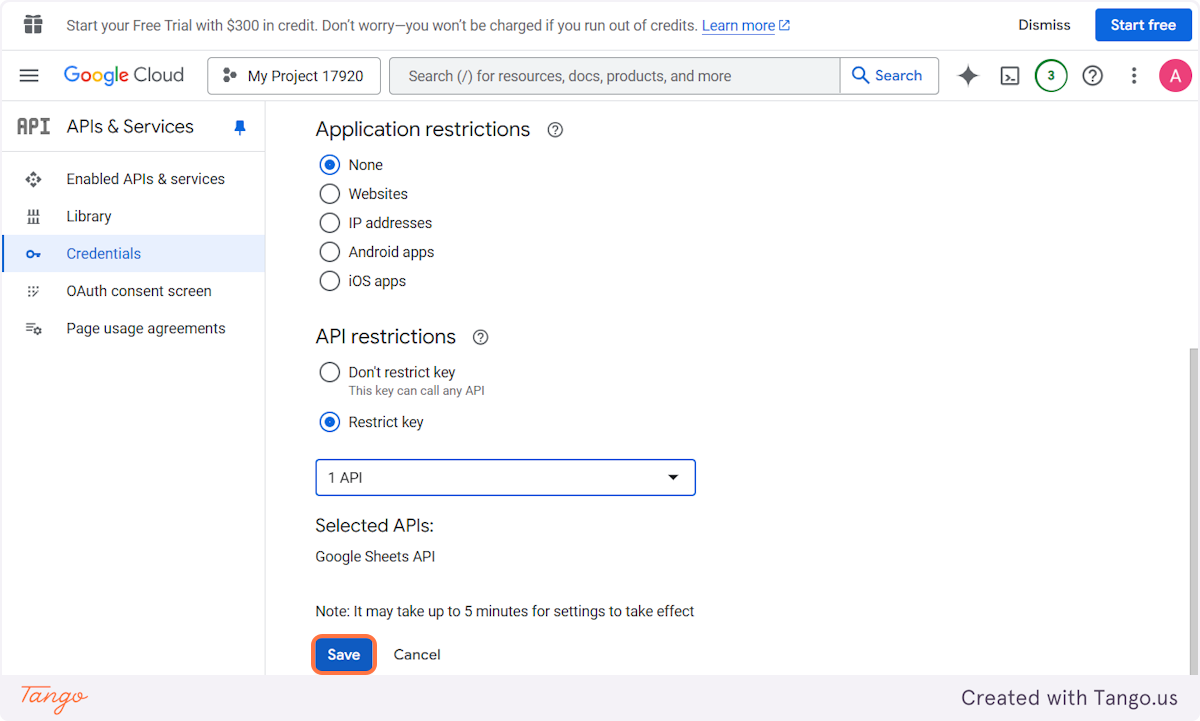
19. Edit the Key Restrictions#
Make sure the Application restrictions as None. The API restrictions should be Restrict Key. This is to make sure that it settles on the Google Sheets.
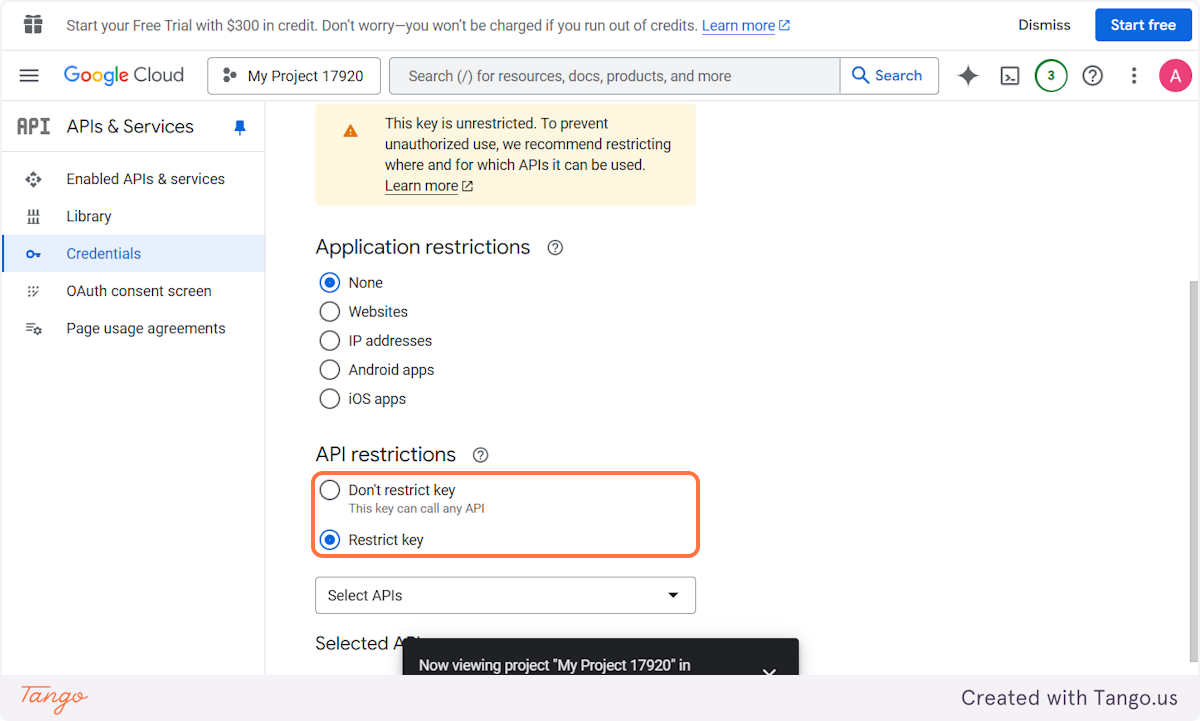
20. Choose Google Sheets API#
After clicking Restrict Key, choose Google Sheets API.
21. Click on Save#
The API key is the same with the one you copied earlier.