
How to Connect HubSpot to Frontdesk
This guide walks you through connecting your HubSpot account to Frontdesk so your contacts stay in sync both ways. Contacts your AI receptionist captures land in HubSpot automatically, and contact updates you make in HubSpot flow back into Frontdesk.
No coding required, and no API keys. You connect securely with OAuth, and setup takes about five minutes.
What You'll Need
- A HubSpot account where you can install apps. You need to be a Super Admin, or a user with the App Marketplace install permission.
- A Frontdesk account with CRM Connections enabled.
- About 5 minutes.
What This Integration Enables
Once connected, Frontdesk and HubSpot keep your contacts aligned automatically:
- Contacts flow both ways. New callers and leads your receptionist captures become HubSpot contacts, and contact changes in HubSpot flow back into Frontdesk.
- Fields stay mapped. Name, email, and phone always sync. Frontdesk's AI proposes a mapping for your custom fields, which you review and approve.
- You choose the speed. Scheduled sync reconciles changes every 15 minutes. Real-time sync pushes changes within seconds.
- Nothing is overwritten blindly. Field-level conflict handling means each side only updates what actually changed.
Step 1: Open the Connections tab
- Log into app.myaifrontdesk.com.
- Open CRM (Customers) in the left sidebar.
- Click Connections in the tab row.
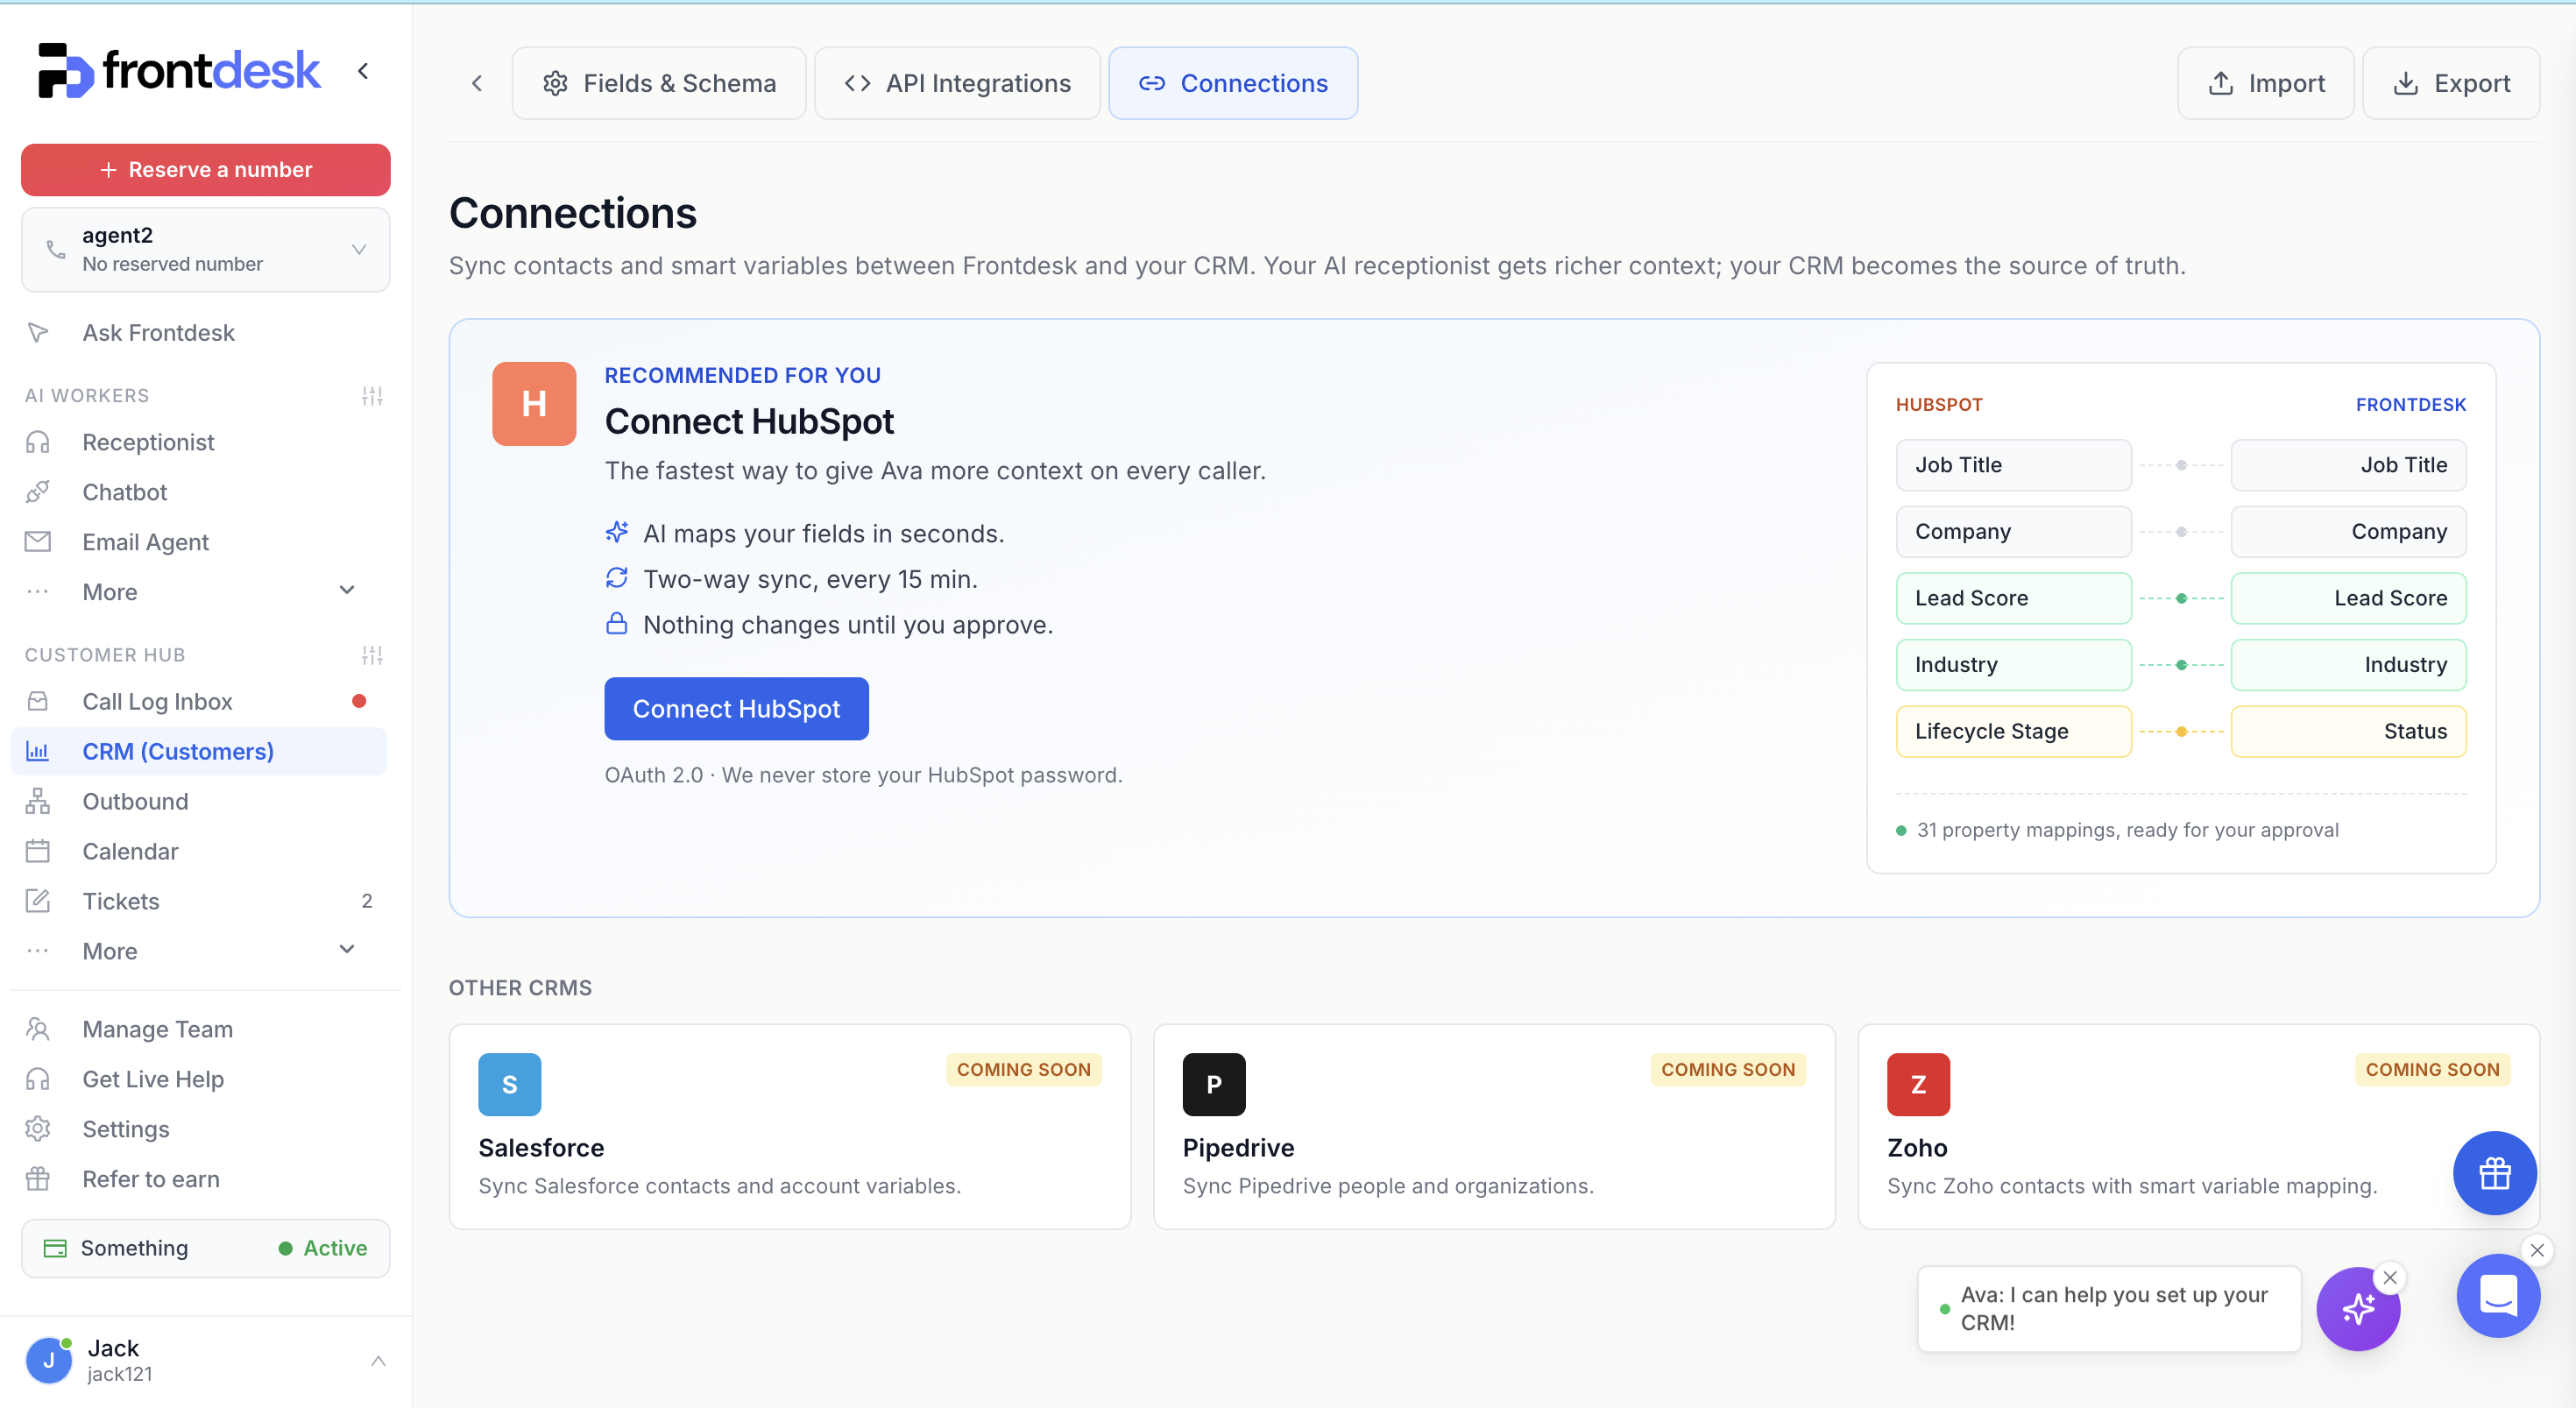
Step 2: Connect HubSpot
On the HubSpot card, click Connect HubSpot. You are redirected to HubSpot to authorize the connection with OAuth 2.0. Sign in to the HubSpot account you want to connect and approve the requested contact permissions. Frontdesk never stores your HubSpot password.
After you authorize, Frontdesk's AI reads the fields in both systems and builds a proposed mapping. If you leave partway through setup, return to the Connections tab and click Continue setup on the HubSpot card.
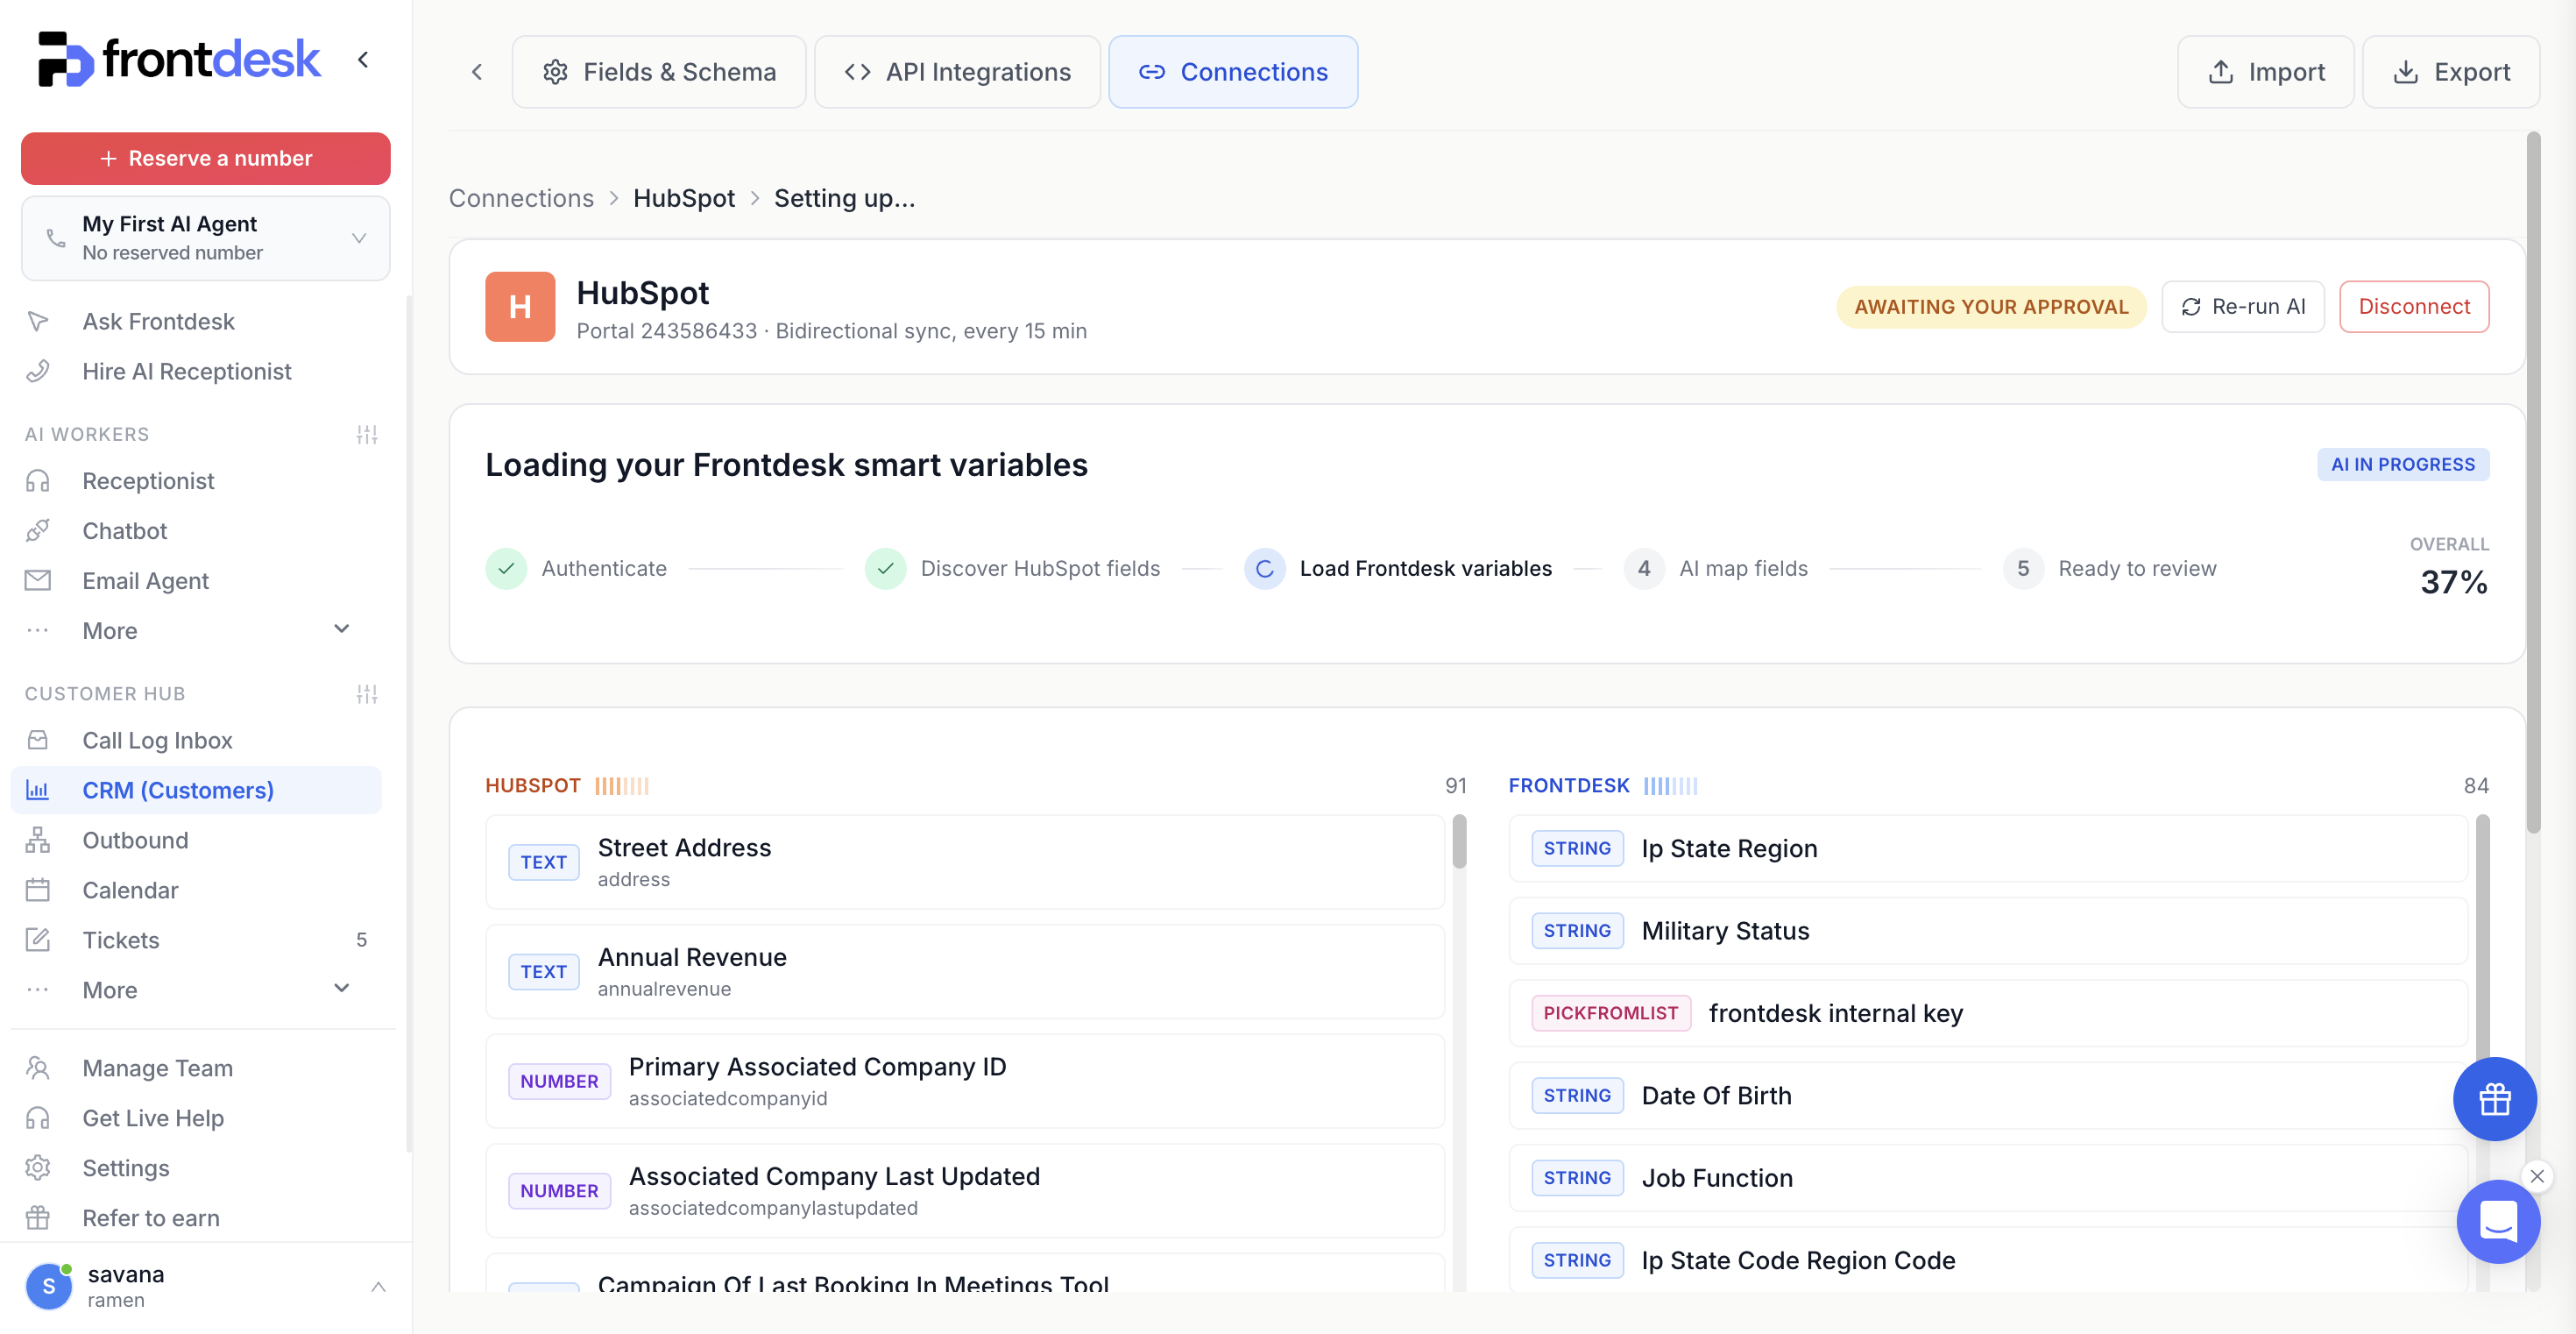
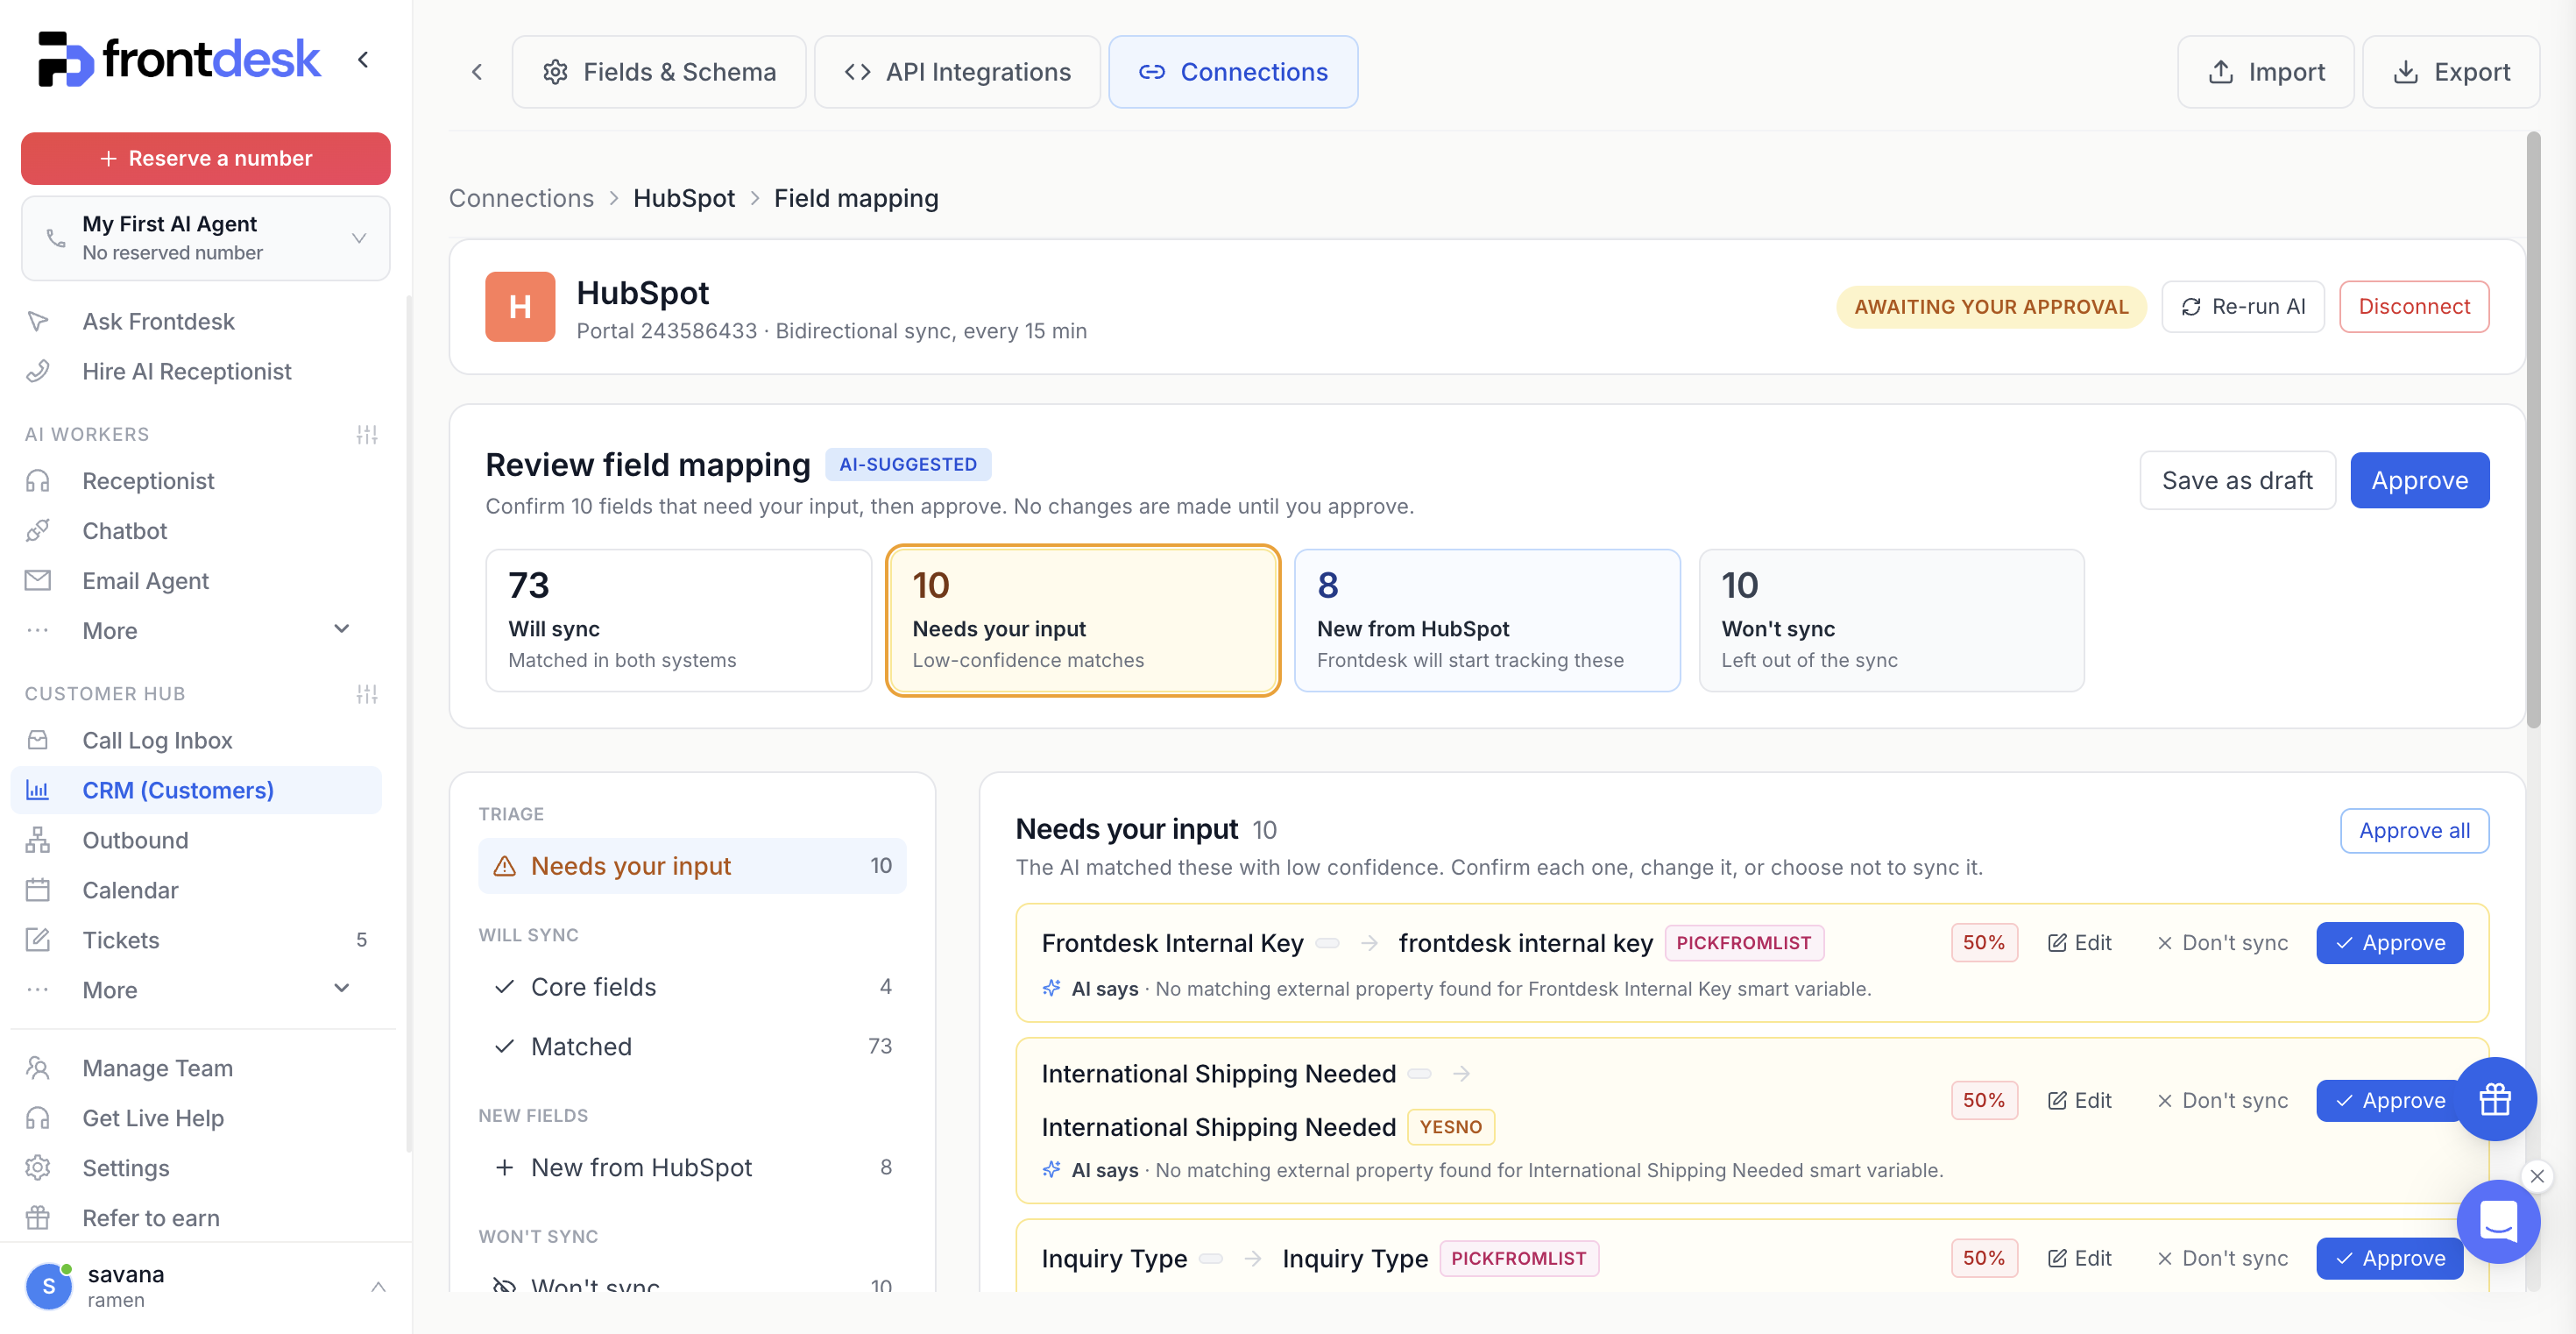
Step 3: Review the AI-suggested field mapping
The Review field mapping screen shows every proposed mapping, marked AI-suggested. No changes are made in either system until you approve. Mappings are grouped so you can see exactly what will happen:
- Will sync: fields matched in both systems. These sync automatically.
- Core fields: name, email, and phone. Always synced and cannot be unmapped.
- Needs your input: low-confidence matches. Confirm, edit, or choose Don't sync for each one, or click Approve all to accept the section together.
- New from HubSpot: fields that exist only in HubSpot. Frontdesk starts tracking these.
- New from Frontdesk: fields that exist only in Frontdesk. HubSpot starts receiving these.
- Won't sync: internal fields left out of the sync.
Once every row under Needs your input is resolved, click Approve and confirm Approve all mappings. Syncing does not start until you approve.
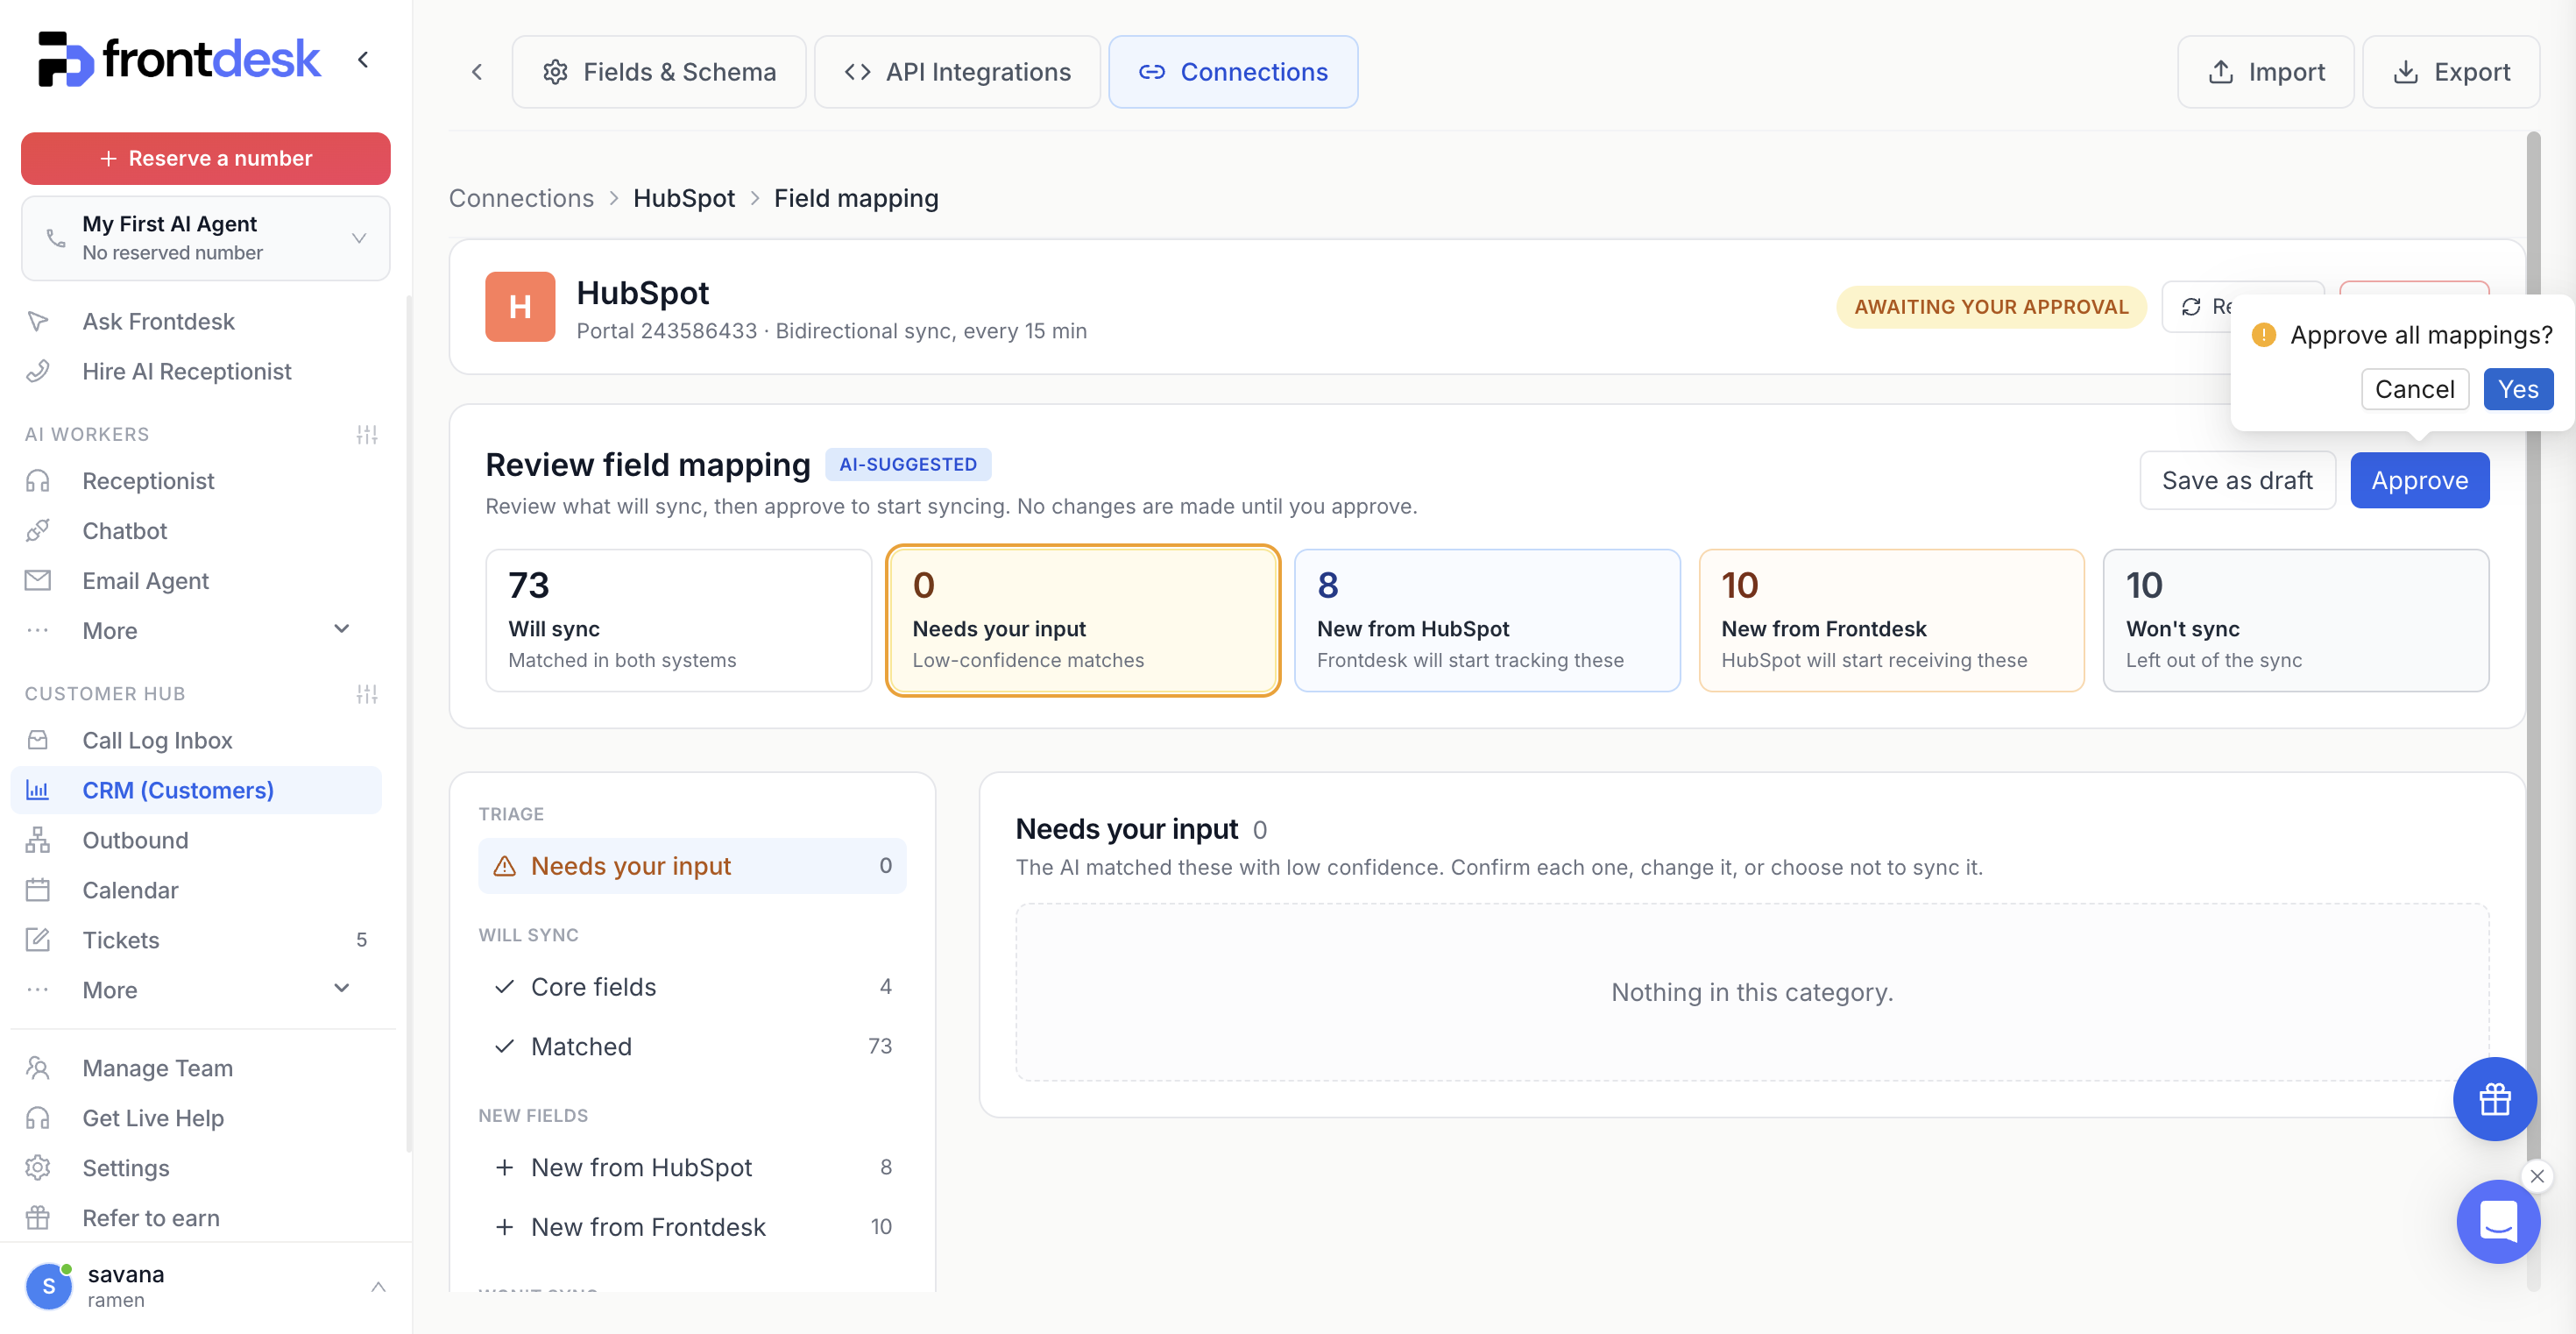
Step 4: You're connected
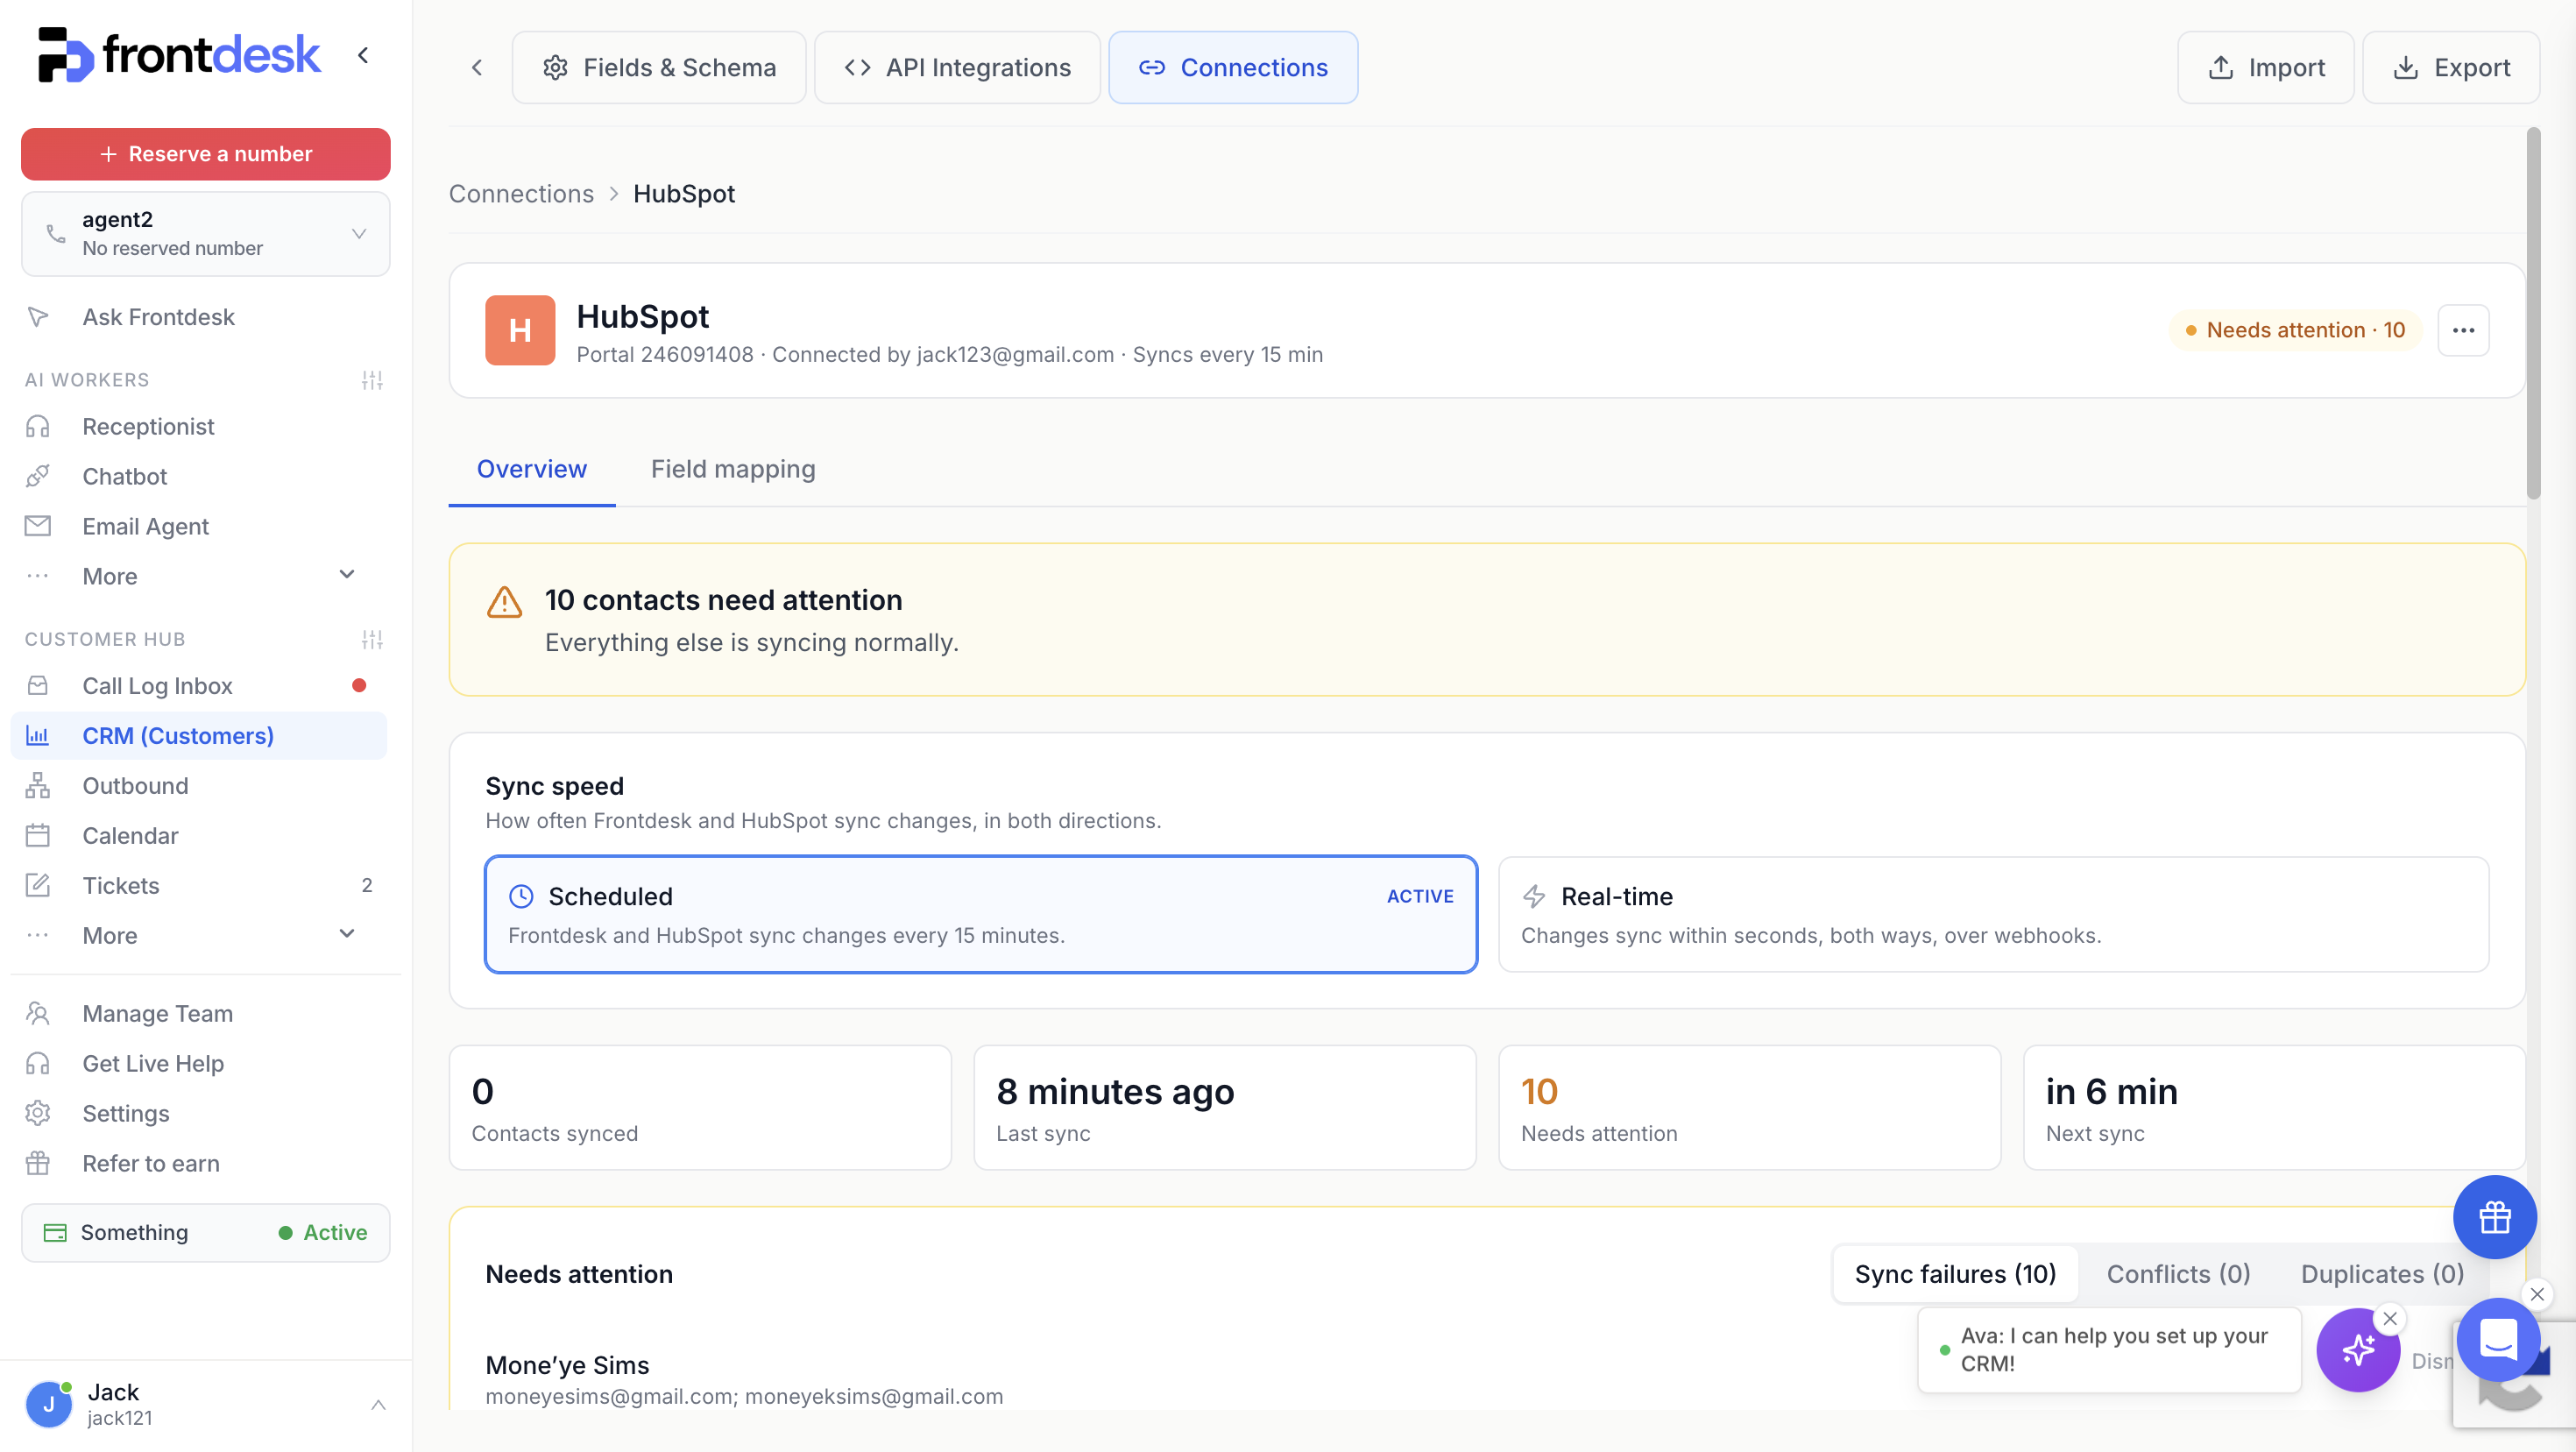
When the mapping is approved, your first sync starts automatically. The connection overview shows the connected portal, when it last synced, and how many contacts are in sync.
From the overview you also choose your sync speed:
- Scheduled (default): Frontdesk and HubSpot sync changes every 15 minutes.
- Real-time: changes sync within seconds, both ways, over webhooks.
You can switch modes at any time, and the change takes effect immediately.
Permissions Frontdesk Requests
During connection you approve these HubSpot permissions:
| Permission | Why it is needed |
|---|---|
| Read and write contacts | Sync contacts in both directions. |
| Read and manage contact properties | Map fields and create custom properties where needed. |
What Frontdesk Can Do With HubSpot
Once connected, your contacts stay current without any manual data entry:
- A caller leaves their details. The AI receptionist captures the lead, and a new contact appears in HubSpot within seconds on Real-time sync.
- You add a custom field. Re-run the AI proposal, approve the new mapping, and that field syncs from then on.
- Both sides edit the same contact. Field-level handling keeps each change on the field it belongs to, so good data is not lost.
Disconnecting
If you ever need to disconnect:
- Open the Connections tab and select the HubSpot provider.
- Click Disconnect in the provider header and confirm.
Contacts in both systems are preserved, and no contacts are deleted. You can reconnect later, and your approved mapping can be set up again.
Troubleshooting
The connection shows Disconnected
- Reconnect from the Connections tab. Your HubSpot authorization may have expired.
A contact is not appearing
- On Scheduled sync, allow up to 15 minutes. Confirm the contact has an email or phone value.
Syncing has not started
- Syncing does not begin until you approve the field mapping. Open the HubSpot connection and finish approving any rows under Needs your input.
Duplicate contacts
- Sync matches on email and phone. Make sure test records use consistent values.
Need Help?
If you get stuck, open the chat on app.myaifrontdesk.com and say "I need help setting up my HubSpot integration." Our team will walk you through it.